Lenovo H520 User Guide - Page 43
Replacing an optical drive
 |
View all Lenovo H520 manuals
Add to My Manuals
Save this manual to your list of manuals |
Page 43 highlights
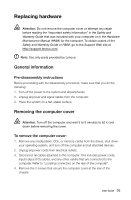
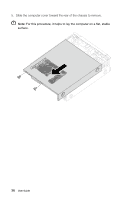
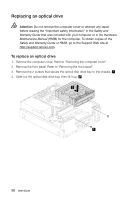
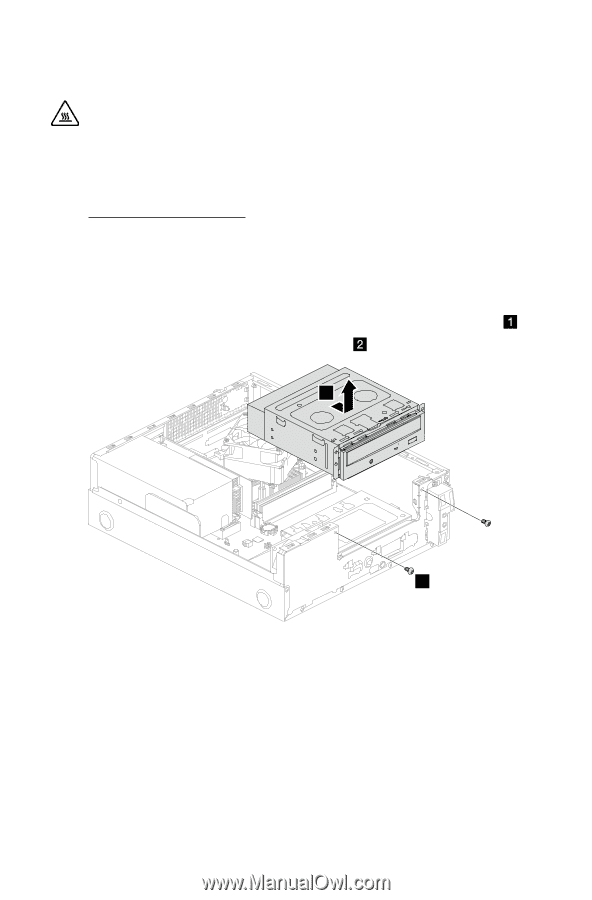
Replacing an optical drive Attention: Do not remove the computer cover or attempt any repair before reading the "Important safety information" in the Safety and Warranty Guide that was included with your computer or in the Hardware Maintenance Manual (HMM) for the computer. To obtain copies of the Safety and Warranty Guide or HMM, go to the Support Web site at http://support.lenovo.com. To replace an optical drive 1. Remove the computer cover. Refer to "Removing the computer cover". 2. Remove the front bezel. Refer to "Removing the front bezel". 3. Remove the 2 screws that secure the optical disk drive bay to the chassis. 4. Slide out the optical disk drive bay, then lift it up. 2 1 38 User Guide
-
 1
1 -
2
-
3
-
4
-
5
-
6
-
7
-
8
-
9
-
10
-
11
-
12
-
13
-
14
-
15
-
16
-
17
-
18
-
19
-
20
-
21
-
22
-
23
-
24
-
25
-
26
-
27
-
28
-
29
-
30
-
31
-
32
-
33
-
34
-
35
-
36
-
37
-
 38
38 -
 39
39 -
 40
40 -
 41
41 -
 42
42 -
 43
43 -
 44
44 -
 45
45 -
 46
46 -
 47
47 -
 48
48 -
49
-
50
-
51
-
52
-
53
 |
 |
38
User Guide
Replacing an optical drive
Attention:
Do not remove the computer cover or attempt any repair
before reading the “Important safety information” in the
Safety and
Warranty Guide
that was included with your computer or in the
Hardware
Maintenance Manual
(HMM) for the computer. To obtain copies of the
Safety and Warranty Guide
or
HMM
, go to the Support Web site at
.
To replace an optical drive
1.
Remove the computer cover. Refer to “Removing the computer cover”.
2.
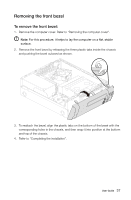
Remove the front bezel. Refer to “Removing the front bezel”.
3.
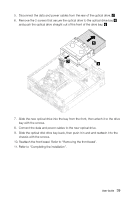
Remove the 2 screws that secure the optical disk drive bay to the chassis.
4.
Slide out the optical disk drive bay, then lift it up.
1
2