Lenovo ThinkServer RD120 User Guide
Lenovo ThinkServer RD120 Manual
 |
View all Lenovo ThinkServer RD120 manuals
Add to My Manuals
Save this manual to your list of manuals |
Lenovo ThinkServer RD120 manual content summary:
- Lenovo ThinkServer RD120 | User Guide - Page 1
ThinkServer RD120 Types 6444, 6445, 6446, and 6447 User Guide - Lenovo ThinkServer RD120 | User Guide - Page 2
- Lenovo ThinkServer RD120 | User Guide - Page 3
ThinkServer RD120 Types 6444, 6445, 6446, and 6447 User Guide - Lenovo ThinkServer RD120 | User Guide - Page 4
the Warranty and Support Information document on the ThinkServer Documentation DVD. Fourth Edition (April 2009) © Copyright Lenovo 2008, 2009. Portions © Copyright International Business Machines Corporation 2008. All rights reserved. LENOVO products, data, computer software, and services have been - Lenovo ThinkServer RD120 | User Guide - Page 5
Contents Safety v Chapter 1. The ThinkServer RD120 server 1 Related documentation 2 Notices and statements in this document 2 Features and specifications 3 What your server offers 4 Reliability, availability, and serviceability features 7 ThinkServer EasyStartup 8 Server controls, LEDs, - Lenovo ThinkServer RD120 | User Guide - Page 6
Installing the fan-bracket assembly 72 Replacing the CD-RW/DVD drive 73 Completing the installation 74 Installing the cover 75 Connecting the (VCCI) statement . . . 98 Lenovo product service information for Taiwan 98 Index 99 iv ThinkServer RD120 Types 6444, 6445, 6446, and 6447: User Guide - Lenovo ThinkServer RD120 | User Guide - Page 7
instalar este produto, leia as Informações sobre Segurança. Antes de instalar este producto, lea la información de seguridad. Läs säkerhetsinformationen innan du installerar den här produkten. © Lenovo 2008, 2009. Portions © IBM Corp. 2008. v - Lenovo ThinkServer RD120 | User Guide - Page 8
or danger statement in the Safety Information document, which is provided on the ThinkServer Documentation DVD. For example, if a caution statement is labeled "Statement 1," any optional device before you install the device. vi ThinkServer RD120 Types 6444, 6445, 6446, and 6447: User Guide - Lenovo ThinkServer RD120 | User Guide - Page 9
damage. v Disconnect the attached power cords, telecommunications systems, networks, and modems before you open the device covers, unless instructed otherwise in the installation and configuration procedures. v Connect and disconnect cables as described in the following table when installing, moving - Lenovo ThinkServer RD120 | User Guide - Page 10
or immerse into water v Heat to more than 100°C (212°F) v Repair or disassemble Dispose of the battery as required by local ordinances or regulations. viii ThinkServer RD120 Types 6444, 6445, 6446, and 6447: User Guide - Lenovo ThinkServer RD120 | User Guide - Page 11
laser products (such as CD drives, DVD drives, fiber optic devices, or transmitters) are installed, note the following: v Do not remove the covers. Removing the covers of the laser product could result in exposure to hazardous laser radiation. There are no serviceable parts inside the device. v Use - Lenovo ThinkServer RD120 | User Guide - Page 12
have more than one power cord. To remove all electrical current from the device, ensure that all power cords are disconnected from the power source. 2 1 x ThinkServer RD120 Types 6444, 6445, 6446, and 6447: User Guide - Lenovo ThinkServer RD120 | User Guide - Page 13
that has this label attached. There are no serviceable parts inside these components. If you suspect a problem with one of these parts, contact a service technician. Statement 12: CAUTION: The following to the information that is provided with your device for electrical specifications. Safety xi - Lenovo ThinkServer RD120 | User Guide - Page 14
Statement 15: CAUTION: Make sure that the rack is secured properly to avoid tipping when the server unit is extended. xii ThinkServer RD120 Types 6444, 6445, 6446, and 6447: User Guide - Lenovo ThinkServer RD120 | User Guide - Page 15
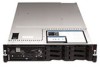
ThinkServer RD120 server The Lenovo® ThinkServer™ RD120 (Machine Types 6444, 6445, 6446, and 6447) server is a 5-U-high, high-performance server. It is ideally suited for networking environments that require superior microprocessor performance, improved systems management, and flexible memory and - Lenovo ThinkServer RD120 | User Guide - Page 16
in English as a PDF on the ThinkServer Documentation DVD. The most current version of the Hardware Maintenance Manual is available on the Lenovo Support Web site. It contains information to help you solve problems yourself, and it contains information for service technicians. Depending on the server - Lenovo ThinkServer RD120 | User Guide - Page 17
problem situations. v Attention: These notices indicate potential damage to programs, devices, or data. An attention notice is placed just before the instruction Features and specifications The following information is a summary of the features and specifications of the ThinkServer RD120 server 3 - Lenovo ThinkServer RD120 | User Guide - Page 18
uses the following features and technologies: v Baseboard management controller The baseboard management controller (BMC) provides basic service-processor environmental monitoring functions. If an environmental condition exceeds a 4 ThinkServer RD120 Types 6444, 6445, 6446, and 6447: User Guide - Lenovo ThinkServer RD120 | User Guide - Page 19
hot-swap hard disk drives in the hot-swap bays. The 2.5-inch model server supports up to eight 2.5-inch hot-swap hard disk drives in the hot-swap bays. With the hot-swap feature, you can add, remove, or replace hard disk drives without turning off the server. Chapter 1. The ThinkServer RD120 server - Lenovo ThinkServer RD120 | User Guide - Page 20
capability. v RAID support The server supports an internal ServeRAID-8k or 8k-l SAS Controller, which is required for you to use the hot-swap hard disk drives and to create redundant array of independent disks (RAID) configurations. 6 ThinkServer RD120 Types 6444, 6445, 6446, and 6447: User Guide - Lenovo ThinkServer RD120 | User Guide - Page 21
system problem-determination support v Standby voltage for systems-management features and monitoring v Startup (boot) from LAN through Preboot Execution Environment (PXE) boot agent utility or dynamic host configuration protocol/boot protocol (DHCP/BOOTP) Chapter 1. The ThinkServer RD120 server - Lenovo ThinkServer RD120 | User Guide - Page 22
9 CD/DVD drive activity LED 5 Hard disk drive activity LED (green) 10 Rack release latch The following illustration shows the controls, light-emitting diodes (LEDs), and connectors on the front of the 2.5-inch model server. 8 ThinkServer RD120 Types 6444, 6445, 6446, and 6447: User Guide - Lenovo ThinkServer RD120 | User Guide - Page 23
. See the documentation that comes with each dc power supply. v Hard disk drive activity LED: When this LED is flashing, it indicates that a hard disk drive is in use. v System-locator LED: Use this LED to visually locate the server among other servers. Chapter 1. The ThinkServer RD120 server 9 - Lenovo ThinkServer RD120 | User Guide - Page 24
Hard disk drive activity LED: Each hot-swap hard disk drive has an activity LED. When this LED is flashing, it indicates that the drive is in use. Hard disk drive status LED: Each hot-swap hard disk drive 4 connector 10 ThinkServer RD120 Types 6444, 6445, 6446, and 6447: User Guide 11 Ethernet 2 - Lenovo ThinkServer RD120 | User Guide - Page 25
a dc power environment, only trained service personnel other than Lenovo service technicians are authorized to connect or For any other combination of LEDs, see the Hardware Maintenance Manual on the ThinkServer Documentation DVD. DC power LED: Each hot-swap power supply ThinkServer RD120 server 11 - Lenovo ThinkServer RD120 | User Guide - Page 26
the server and leave it connected to power, the server can respond to requests from the service processor, such as a remote request to turn on the server. While the server remains connected are disconnected from the power source. 2 1 12 ThinkServer RD120 Types 6444, 6445, 6446, and 6447: User Guide - Lenovo ThinkServer RD120 | User Guide - Page 27
service personnel other than Lenovo service if your operating system supports this feature. v If service processor can turn off the server as an automatic response to a critical system failure. v You can turn off the server through a request from the service processor. Chapter 1. The ThinkServer RD120 - Lenovo ThinkServer RD120 | User Guide - Page 28
14 ThinkServer RD120 Types 6444, 6445, 6446, and 6447: User Guide - Lenovo ThinkServer RD120 | User Guide - Page 29
This chapter provides detailed instructions for installing optional hardware devices in the server. Server components The following illustrations show the major components in the server. The illustrations in this document might differ slightly from your hardware. © Lenovo 2008, 2009. Portions © IBM - Lenovo ThinkServer RD120 | User Guide - Page 30
Operator information panel 13 Optional tape drive 14 Tape drive space filler 15 Tape drive filler 16 CD/DVD media backplane 17 Microprocessor air baffle 18 3.5-inch hard disk drive backplane 19 Fan bracket assembly 20 Fans (5 or 10) 16 ThinkServer RD120 Types 6444, 6445, 6446, and 6447: User Guide - Lenovo ThinkServer RD120 | User Guide - Page 31
1 Riser-card assembly 2 Full-height adapter 3 DIMM air baffle 4 DIMM 5 RAID SAS controller 6 System board 7 Heat-sink retention module 8 VRM 9 Microprocessor 10 Heat sink 11 Heat-sink filler 12 Remote Supervisor Adapter II SlimLine 13 Low-profile adapter Chapter 2. Installing optional devices 17 - Lenovo ThinkServer RD120 | User Guide - Page 32
connectors (1 and 2) 9 Battery connector Note: The connectors for fans 7 and 10 are on the power backplane. See "Power-backplane-board connectors" on page 19. 18 ThinkServer RD120 Types 6444, 6445, 6446, and 6447: User Guide - Lenovo ThinkServer RD120 | User Guide - Page 33
riser-card assembly is inverted. Power-backplane-board connectors The following illustration shows the internal connectors on the power-backplane board. 1 Fan 10 connector 2 Hard disk drive power connector 3 Fan 7 connector 4 System board connector Chapter 2. Installing optional devices 19 - Lenovo ThinkServer RD120 | User Guide - Page 34
connectors on the system board. 1 Hard disk drive backplane signal (J92) 2 Power backplane (J72) 3 Tape drive power (J100) 4 Front USB (J50) 10 SATA tape drive signal (J102) 11 Intelligent Platform Management Bus (IPMB) connector 20 ThinkServer RD120 Types 6444, 6445, 6446, and 6447: User Guide - Lenovo ThinkServer RD120 | User Guide - Page 35
System-board external connectors The following illustration shows the external input/output connectors on the system board. 1 Ethernet connectors 1 and 2 and USB 4 Serial connector connectors 3 and 4 2 USB connectors 1 and 2 5 Systems-management Ethernet connector 3 Video connector 6 SAS - Lenovo ThinkServer RD120 | User Guide - Page 36
Maintenance Manual on the ThinkServer Documentation DVD for information about using the boot block recovery jumper. 1 Boot block recovery jumper (J42) 2 Switch block (SW2) Table 2 on page 23 describes the function of each switch on the switch block. 22 ThinkServer RD120 Types 6444, 6445, 6446 - Lenovo ThinkServer RD120 | User Guide - Page 37
-sensitive devices" on page 31, and "Turning off the server" on page 12.) Attention: In a dc power environment, only trained service personnel other than Lenovo service technicians are authorized to connect or disconnect power to the dc power supply. See the documentation that comes with each dc - Lenovo ThinkServer RD120 | User Guide - Page 38
Channels A, B, C, D error LEDs 6 VRM error LED 7 Microprocessors 1 and 2 error LEDs 8 PCI slots 3 and 4 error LEDs 9 System-management Ethernet error LED 10 3-V battery error LED 24 ThinkServer RD120 Types 6444, 6445, 6446, and 6447: User Guide - Lenovo ThinkServer RD120 | User Guide - Page 39
Riser-card assembly LEDs The following illustration shows the light-emitting diodes (LEDs) on the riser-card assembly. 1 PCI slot 1 error LED 2 PCI slot 2 error LED Chapter 2. Installing optional devices 25 - Lenovo ThinkServer RD120 | User Guide - Page 40
problem is solved. v See the parts listing in the Hardware Maintenance Manual about the error. OVER SPEC The power supplies are using environment, only trained service personnel other than Lenovo service technicians are authorized to ThinkServer RD120 Types 6444, 6445, 6446, and 6447: User Guide - Lenovo ThinkServer RD120 | User Guide - Page 41
problem is solved. v See the parts listing in the Hardware Maintenance Manual service personnel other than Lenovo service MEM A memory error has service DASD A hard disk drive error has occurred. 1. Check the LEDs on the hard disk drives and replace the indicated drive. 2. Call for service - Lenovo ThinkServer RD120 | User Guide - Page 42
at a time from the failing PCI bus, and restart the server after each adapter is removed. 4. Call for service. For more information about diagnostics, see the Hardware Maintenance Manual on the ThinkServer Documentation DVD. 28 ThinkServer RD120 Types 6444, 6445, 6446, and 6447: User Guide - Lenovo ThinkServer RD120 | User Guide - Page 43
lenovo.com/support. 2. Enter your product number (machine type and model number) or select Servers and Storage from the Select your product list. 3. From Family list, select ThinkServer RD120, and click Continue. 4. Click Downloads and drivers problems" in the Installation Guide on the ThinkServer - Lenovo ThinkServer RD120 | User Guide - Page 44
support hot-swap capability, you can remove or install the component while the server is running. (Orange can also indicate touch points on hot-swap components.) See the instructions for removing or installing a specific the server. 30 ThinkServer RD120 Types 6444, 6445, 6446, and 6447: User Guide - Lenovo ThinkServer RD120 | User Guide - Page 45
If the server is not working correctly, see the Hardware Maintenance Manual for diagnostic information. To remove the cover, complete the following steps page 29. 2. If you are planning to install or remove a microprocessor, memory module, PCI adapter, battery, or other non-hot-swap optional device, - Lenovo ThinkServer RD120 | User Guide - Page 46
, only trained service personnel other than Lenovo service technicians are authorized support single-width IXA adapters. See http://www.lenovo.com/ thinkserver/ for a list of riser-card assemblies that you can use with the server. 32 ThinkServer RD120 Types 6444, 6445, 6446, and 6447: User Guide - Lenovo ThinkServer RD120 | User Guide - Page 47
and peripheral devices, and disconnect the power cord and all external cables. Attention: In a dc power environment, only trained service personnel other than Lenovo service technicians are authorized to connect or disconnect power to the dc power supply. See the documentation that comes with each - Lenovo ThinkServer RD120 | User Guide - Page 48
cables are disconnected. Attention: In a dc power environment, only trained service personnel other than Lenovo service technicians are authorized to connect or disconnect power to the dc power to remove the microprocessor air baffle. 34 ThinkServer RD120 Types 6444, 6445, 6446, and 6447: User Guide - Lenovo ThinkServer RD120 | User Guide - Page 49
power cords and external cables (see "Turning off the server" on page 12). Attention: In a dc power environment, only trained service personnel other than Lenovo service technicians are authorized to connect or disconnect power to the dc power supply. See the documentation that comes with each dc - Lenovo ThinkServer RD120 | User Guide - Page 50
cables are disconnected. Attention: In a dc power environment, only trained service personnel other than Lenovo service technicians are authorized to connect or disconnect power to the dc power removed might damage server components. 36 ThinkServer RD120 Types 6444, 6445, 6446, and 6447: User Guide - Lenovo ThinkServer RD120 | User Guide - Page 51
power cords and external cables (see "Turning off the server" on page 12). Attention: In a dc power environment, only trained service personnel other than Lenovo service technicians are authorized to connect or disconnect power to the dc power supply. See the documentation that comes with each dc - Lenovo ThinkServer RD120 | User Guide - Page 52
other than Lenovo service technicians are authorized to connect or disconnect power to the dc power supply. See the documentation that comes with each dc power supply. 3. Remove the cover (see "Removing the cover" on page 31). 38 ThinkServer RD120 Types 6444, 6445, 6446, and 6447: User Guide - Lenovo ThinkServer RD120 | User Guide - Page 53
4. Align the tabs on the sides of the air baffle with the slots on the power-supply cage. 5. Place your fingers into the handle 4 and finger hole on the top of the DIMM air baffle. 6. Press the handle 4 toward the finger hole and lower the air baffle so that the lip on the right side of the baffle - Lenovo ThinkServer RD120 | User Guide - Page 54
Adapter II SlimLine can be installed only in a dedicated slot on the system board. v The server supports only 3.3 V and universal PCI adapters. v The PCI bus configuration is as follows: - Non- an adapter, complete the following steps: 40 ThinkServer RD120 Types 6444, 6445, 6446, and 6447: User Guide - Lenovo ThinkServer RD120 | User Guide - Page 55
power cords and external cables (see "Turning off the server" on page 12). Attention: In a dc power environment, only trained service personnel other than Lenovo service technicians are authorized to connect or disconnect power to the dc power supply. See the documentation that comes with each dc - Lenovo ThinkServer RD120 | User Guide - Page 56
assembly to install the adapter, align the riser-card assembly with the release-tab posts, rear guides, and connector; then, press the PCI riser-card assembly firmly into the connector (see " that are required for the adapter. 42 ThinkServer RD120 Types 6444, 6445, 6446, and 6447: User Guide - Lenovo ThinkServer RD120 | User Guide - Page 57
power cords and external cables (see "Turning off the server" on page 12). Attention: In a dc power environment, only trained service personnel other than Lenovo service technicians are authorized to connect or disconnect power to the dc power supply. See the documentation that comes with each dc - Lenovo ThinkServer RD120 | User Guide - Page 58
PCI slot. 8. If you have other optional devices to install or remove, do so now. Otherwise, go to "Completing the installation" on page 74. 44 ThinkServer RD120 Types 6444, 6445, 6446, and 6447: User Guide - Lenovo ThinkServer RD120 | User Guide - Page 59
power cords and external cables (see "Turning off the server" on page 12). Attention: In a dc power environment, only trained service personnel other than Lenovo service technicians are authorized to connect or disconnect power to the dc power supply. See the documentation that comes with each dc - Lenovo ThinkServer RD120 | User Guide - Page 60
you restart the server for the first time after you install a ServeRAID-8k SAS controller, the monitor screen remains blank while the controller initializes 46 ThinkServer RD120 Types 6444, 6445, 6446, and 6447: User Guide - Lenovo ThinkServer RD120 | User Guide - Page 61
For a list of supported 3.5-inch hard disk drives, see http://www.lenovo.com/thinkserver. v The server 2.5-inch models support eight 2.5-inch hot-swap hard disk drives installed on Ultra-Slim hard disk drive trays for 2.5-inch drives. For a list of supported 2.5-inch hard disk drives, see http://www - Lenovo ThinkServer RD120 | User Guide - Page 62
hard disk drives. See the RAID documentation on the IBM ServeRAID Support CD for information about these RAID controllers. If you have other optional devices to install or remove, do so now. Otherwise, go to "Completing the installation" on page 74. 48 ThinkServer RD120 Types 6444, 6445, 6446 - Lenovo ThinkServer RD120 | User Guide - Page 63
Removing a hard disk drive 3.5-inch drives 1 Tray handle 2 Hard disk drive Chapter 2. Installing optional devices 49 - Lenovo ThinkServer RD120 | User Guide - Page 64
model server Install the optional SATA tape drive in the two bottom-left hard disk drive bays. If hard disk drives are installed in those bays, move the drives to other bays. The cables for the tape drive come with the tape drive. 50 ThinkServer RD120 Types 6444, 6445, 6446, and 6447: User Guide - Lenovo ThinkServer RD120 | User Guide - Page 65
Attention: In a dc power environment, only trained service personnel other than Lenovo service technicians are authorized to connect or disconnect power to the the filler panels from the two bottom-left hard disk drive bays. 6. If you have not attached the space filler from the tape enablement kit - Lenovo ThinkServer RD120 | User Guide - Page 66
page 72). If you have other optional devices to install or remove, do so now. Otherwise, go to "Completing the installation" on page 74. 52 ThinkServer RD120 Types 6444, 6445, 6446, and 6447: User Guide - Lenovo ThinkServer RD120 | User Guide - Page 67
personnel other than Lenovo service technicians are authorized to connect or disconnect power to the dc power supply. See the documentation that comes with each dc power supply. 3. If you installed the space filler from the tape enablement kit onto the tape-drive assembly, remove it now. 4. Remove - Lenovo ThinkServer RD120 | User Guide - Page 68
supports certain Intel Xeon dual-core or quad-core flip-chip land grid array 771 (FC-LGA 771) microprocessors, which are designed for the LGA771 socket. See http://www.lenovo.com/thinkserver for a list of supported microprocessors. 54 ThinkServer RD120 Types 6444, 6445, 6446, and 6447: User Guide - Lenovo ThinkServer RD120 | User Guide - Page 69
1. Go to: http://www.lenovo.com/support. 2. Enter your product number (machine type and model number) or select Servers and Storage from the Select your product list. 3. From Family list, select ThinkServer RD120, and click Continue. 4. Click Downloads and drivers to download firmware updates. v To - Lenovo ThinkServer RD120 | User Guide - Page 70
other than Lenovo service technicians are authorized to connect or disconnect power to the dc power supply. See the documentation that comes with each dc power supply. 3. Remove the server cover (see "Removing the cover" on page 31). 56 ThinkServer RD120 Types 6444, 6445, 6446, and 6447: User Guide - Lenovo ThinkServer RD120 | User Guide - Page 71
4. Remove the microprocessor air baffle (see "Removing the microprocessor air baffle" on page 34). 5. Install the VRM in the VRM connector. a. Touch the static-protective package containing the VRM to any unpainted metal surface on the outside of the server. Then, remove the VRM from the package. b. - Lenovo ThinkServer RD120 | User Guide - Page 72
way on the socket. e. Carefully close the microprocessor release lever to secure the microprocessor in the socket. 10. Install a heat sink on the microprocessor. 58 ThinkServer RD120 Types 6444, 6445, 6446, and 6447: User Guide - Lenovo ThinkServer RD120 | User Guide - Page 73
Attention: Do not touch the thermal grease 1 on the bottom of the heat sink 2 or set down the heat sink after you remove the plastic cover. Touching the thermal grease will contaminate it. a. Make sure that the heat-sink release lever is in the open position. b. Remove the plastic protective cover - Lenovo ThinkServer RD120 | User Guide - Page 74
performance by installing the DIMMs in connectors 1 and 7 instead of 1 and 4. However, because the connectors in the pair are not on the same memory branch (see the following illustration), Advanced ECC memory protection is disabled. 60 ThinkServer RD120 Types 6444, 6445, 6446, and 6447: User Guide - Lenovo ThinkServer RD120 | User Guide - Page 75
the active pair to the mirroring pair. See "Memory mirroring" on page 62 for more information about memory mirroring and the DIMM installation sequence that is required. v The server supports online-spare memory. This feature disables the failed memory from the system configuration and activates an - Lenovo ThinkServer RD120 | User Guide - Page 76
. Memory mirroring reduces the amount of available memory. Enable memory mirroring through the Configuration/Setup Utility program. See "Configuration/Setup Utility menu choices" on page 80 for details about enabling memory mirroring. 62 ThinkServer RD120 Types 6444, 6445, 6446, and 6447: User Guide - Lenovo ThinkServer RD120 | User Guide - Page 77
mirroring DIMM functions Group Active DIMMs 1 1, 4 2 2, 5 3 3, 6 Mirroring DIMMs 7, 10 8, 11 9, 12 Online-spare memory The server supports online-spare memory. This feature disables the failed memory from the system configuration and activates an online-spare pair of DIMMs to replace the - Lenovo ThinkServer RD120 | User Guide - Page 78
4 (dual-rank DIMMs only) 10 1 and 4 (largest DIMMs) 2 and 5 Online-sparing on branch 0 Online-sparing on branch 1 7 and 10 8 and 11 9 and 12 12 N/A N/A 64 ThinkServer RD120 Types 6444, 6445, 6446, and 6447: User Guide - Lenovo ThinkServer RD120 | User Guide - Page 79
Removing a memory module To remove a DIMM, complete the following steps. 1. Read the safety information personnel other than Lenovo service technicians are authorized to connect or disconnect power to the dc power supply and to install and remove a dc power supply. The server supports a maximum of - Lenovo ThinkServer RD120 | User Guide - Page 80
. If you suspect a problem with one of these parts, contact a service technician. 1 Hot-swap power supply 2 2 Power-supply-filler release lever 3 Power supply filler To install an ac power supply, complete the following steps: 66 ThinkServer RD120 Types 6444, 6445, 6446, and 6447: User Guide - Lenovo ThinkServer RD120 | User Guide - Page 81
environment, only trained service personnel other than Lenovo service technicians are authorized to connect or disconnect power to the dc power supply and to install and remove a dc power supply. See the documentation that comes with each dc power supply for installation instructions. 1. Read the - Lenovo ThinkServer RD120 | User Guide - Page 82
a dc power environment, only trained service personnel other than Lenovo service technicians are authorized to connect or out of the bay. 6. Release the release latch; then, support the power supply and pull it the rest of the way 68 ThinkServer RD120 Types 6444, 6445, 6446, and 6447: User Guide - Lenovo ThinkServer RD120 | User Guide - Page 83
1 LED 2 Hot-swap fan To install any of the 10 replaceable fans, complete the following steps: 1. Read the safety information that begins on page v and "Installation guidelines" on page 29. 2. If you have not done so already, slide the server out of the rack and remove the cover (see "Removing - Lenovo ThinkServer RD120 | User Guide - Page 84
install a fan, it is not necessary to remove the fan-bracket assembly. See "Removing a fan" on page 69 and "Installing a fan" on page 68. 70 ThinkServer RD120 Types 6444, 6445, 6446, and 6447: User Guide - Lenovo ThinkServer RD120 | User Guide - Page 85
and peripheral devices, and disconnect the power cords and all external cables. Attention: In a dc power environment, only trained service personnel other than Lenovo service technicians are authorized to connect or disconnect power to the dc power supply. See the documentation that comes with each - Lenovo ThinkServer RD120 | User Guide - Page 86
are disconnected. Attention: In a dc power environment, only trained service personnel other than Lenovo service technicians are authorized to connect or disconnect power to the dc power to "Completing the installation" on page 74. 72 ThinkServer RD120 Types 6444, 6445, 6446, and 6447: User Guide - Lenovo ThinkServer RD120 | User Guide - Page 87
other than Lenovo service technicians are authorized to connect or disconnect power to the dc power supply. See the documentation that comes with each dc power supply. 3. Remove the cover (see "Removing the cover" on page 31). 4. Press the release tab 1 down to release the drive 2 ; then, while - Lenovo ThinkServer RD120 | User Guide - Page 88
the top cover into the matching slots in the server chassis. Press down on the cover-release latch to lock the cover in place. 74 ThinkServer RD120 Types 6444, 6445, 6446, and 6447: User Guide - Lenovo ThinkServer RD120 | User Guide - Page 89
server for complete rack installation and removal instructions. 5. To attach peripheral devices and connect the power cords, see "Connecting the cables." Attention: In a dc power environment, only trained service personnel other than Lenovo service technicians are authorized to connect or disconnect - Lenovo ThinkServer RD120 | User Guide - Page 90
to operate as a symmetric multiprocessing (SMP) server. You might have to upgrade the operating system to support SMP. For more information, see Chapter 3, "Configuring the server," on page 79 and the operating-system documentation. 76 ThinkServer RD120 Types 6444, 6445, 6446, and 6447: User Guide - Lenovo ThinkServer RD120 | User Guide - Page 91
or removed a hard disk drive, see "Using the RAID Configuration Utility program" on page 87 for information about reconfiguring the disk arrays. If you have installed a Remote Supervisor Adapter II SlimLine to manage the server remotely, see the Remote Supervisor Adapter User's Guide, which comes - Lenovo ThinkServer RD120 | User Guide - Page 92
78 ThinkServer RD120 Types 6444, 6445, 6446, and 6447: User Guide - Lenovo ThinkServer RD120 | User Guide - Page 93
, prepares the hard disk, prompts you to insert your operating system installation disc (CD or DVD), and launches an unattended installation of the operating system. For additional information, refer to the ThinkServer RD120 Installation Guide. v EasyManage software ThinkServer EasyManage Core - Lenovo ThinkServer RD120 | User Guide - Page 94
the server and the order of startup devices (startup-drive sequence) v Set and change settings for advanced a USB device summary, and the amount of installed memory. When you make configuration changes through other options in the ThinkServer RD120 Types 6444, 6445, 6446, and 6447: User Guide - Lenovo ThinkServer RD120 | User Guide - Page 95
disc in the CD-RW/DVD drive, then checks the hard disk drive, and then checks a network . Follow the instructions on the screen Memory Settings Select this choice to enable or disable pairs of memory connectors, configure the memory mode (flat, memory-mirroring, or online-spare), and view the memory - Lenovo ThinkServer RD120 | User Guide - Page 96
in the Hardware Maintenance Manual on the ThinkServer Documentation DVD). - that are connected to the slot. Follow the instructions on the screen to page forward or backward through to use to provide USB support for remote access to the ThinkServer RD120 Types 6444, 6445, 6446, and 6447: User Guide - Lenovo ThinkServer RD120 | User Guide - Page 97
event/error log contains all event and error messages that have been generated during POST by the system management interface handler and by the system service processor. Run the diagnostic programs to get Chapter 3. Configuring the server 83 - Lenovo ThinkServer RD120 | User Guide - Page 98
information about error codes that occur. See the Hardware Maintenance Manual on the ThinkServer Documentation DVD for instructions for running the diagnostic programs. v Save Settings Select this server in any of the following ways: 84 ThinkServer RD120 Types 6444, 6445, 6446, and 6447: User Guide - Lenovo ThinkServer RD120 | User Guide - Page 99
instructions for removing the battery, see the Hardware Maintenance Manual on the ThinkServer Documentation environment, only trained service personnel other than Lenovo service technicians are authorized to system board to On, to clear CMOS memory and bypass the power-on or administrator password - Lenovo ThinkServer RD120 | User Guide - Page 100
the cover" on page 31 for instructions. 5. Move the clear-CMOS switch (switch 1 on SW2) to the On position. 6. Install the cover and connect the server to a keyboard, monitor, and mouse; then, connect the server to a power source. 86 ThinkServer RD120 Types 6444, 6445, 6446, and 6447: User Guide - Lenovo ThinkServer RD120 | User Guide - Page 101
a dc power environment, only trained service personnel other than Lenovo service technicians are authorized to connect or of the smallest hard disk drive. v To help ensure signal quality, do not mix drives with different speeds instructions on the screen. Chapter 3. Configuring the server 87 - Lenovo ThinkServer RD120 | User Guide - Page 102
drive. v Disk Utilities Select this choice to format a disk or verify the disk media. Select a device from the list and read the instructions basic service-processor problem and also records the error in the BMC system event log. 88 ThinkServer RD120 Types 6444, 6445, 6446, and 6447: User Guide - Lenovo ThinkServer RD120 | User Guide - Page 103
complete the following steps: 1. Insert the configuration utility diskette into the diskette drive and restart the server. 2. From a command-line prompt, type bmc_cfg and press Enter. 3. Follow the instructions on the screen. Using the baseboard management controller firmware update utility program - Lenovo ThinkServer RD120 | User Guide - Page 104
90 ThinkServer RD120 Types 6444, 6445, 6446, and 6447: User Guide - Lenovo ThinkServer RD120 | User Guide - Page 105
operation of any other product, program, or service. Lenovo may have patents or pending patent applications covering support applications where malfunction may result in injury or death to persons. The information contained in this document does not affect or change Lenovo product specifications - Lenovo ThinkServer RD120 | User Guide - Page 106
741 824 bytes. When referring to hard disk drive capacity or communications volume, MB stands for 1 000 000 bytes, and GB stands for 1 000 000 000 bytes. Total user-accessible capacity can vary depending on operating environments. 92 ThinkServer RD120 Types 6444, 6445, 6446, and 6447: User Guide - Lenovo ThinkServer RD120 | User Guide - Page 107
the replacement of any standard hard disk drives and population of all hard disk drive bays with the largest currently supported drives that are available from Lenovo. Maximum memory might require replacement of the standard memory with an optional memory module. Lenovo makes no representations or - Lenovo ThinkServer RD120 | User Guide - Page 108
effects of EEE on the environment and human health due to the potential presence of hazardous substances. For additional WEEE information, go to: http://www.lenovo.com/lenovo/environment. Recycling statements for Japan 94 ThinkServer RD120 Types 6444, 6445, 6446, and 6447: User Guide - Lenovo ThinkServer RD120 | User Guide - Page 109
or service manual for specific battery information. The battery must be recycled or disposed of properly. Recycling facilities may not be available in your area. For information on disposal or batteries outside the United States, go to http://www.lenovo.com/lenovo/environment or contact your local - Lenovo ThinkServer RD120 | User Guide - Page 110
not installed and used in accordance with the instruction manual, may cause harmful interference to radio communications. be used in order to meet FCC emission limits. Lenovo is not responsible for any radio or television interference 96 ThinkServer RD120 Types 6444, 6445, 6446, and 6447: User Guide - Lenovo ThinkServer RD120 | User Guide - Page 111
responsibility for any failure to satisfy the protection requirements resulting from a nonrecommended modification of the product, including the fitting of non-Lenovo option cards. This product has been tested and found to comply with the limits for Class A Information Technology Equipment according - Lenovo ThinkServer RD120 | User Guide - Page 112
Chinese Class A warning statement Japanese Voluntary Control Council for Interference (VCCI) statement Lenovo product service information for Taiwan 98 ThinkServer RD120 Types 6444, 6445, 6446, and 6447: User Guide - Lenovo ThinkServer RD120 | User Guide - Page 113
cable 20 external port 21 front 75 internal cable 20 memory 18 microprocessor 18 port 21 rear 76 system board 18 VRM caution statements 2 CD drive specifications 3 CD-RW/DVD drive installing 73 removing 73 CD/DVD drive activity LED 10 CD/DVD 11 © Lenovo 2008, 2009. Portions © IBM Corp. 2008. 99 - Lenovo ThinkServer RD120 | User Guide - Page 114
drive specifications 3 I important notices 2 information LED 10 installing adapter 39 air baffle (DIMM) 38 air baffle (microprocessor) 36 CD-RW/DVD drive 73 cover 75 DIMMs 60 hard disk drive 47 hot-swap drive 47, 48 memory slots 3 100 ThinkServer RD120 Types 6444, 6445, 6446, and 6447: User Guide - Lenovo ThinkServer RD120 | User Guide - Page 115
Supervisor Adapter II SlimLine 7 removing adapter 43 CD-RW/DVD drive 73 power supply 68 RAID controller 45 replacing RAID controller 45 resetting features 3 specifications 3 ServeRAID 6 service processor, defined 12 setting clear CMOS (password override) jumper 85 size 4 specifications 3 statements - Lenovo ThinkServer RD120 | User Guide - Page 116
video connector (continued) rear 11 voltage regulator module, installing 57 VRM See voltage regulator module W Web site Lenovo support 2, 29, 55 Lenovo ThinkServer RD120 products 1 weight 3, 4 102 ThinkServer RD120 Types 6444, 6445, 6446, and 6447: User Guide - Lenovo ThinkServer RD120 | User Guide - Page 117
- Lenovo ThinkServer RD120 | User Guide - Page 118
Part Number: 46U0861 Printed in USA (1P) P/N: 46U0861
-
 1
1 -
 2
2 -
 3
3 -
 4
4 -
 5
5 -
 6
6 -
 7
7 -
8
-
9
-
10
-
11
-
12
-
13
-
14
-
15
-
16
-
17
-
18
-
19
-
20
-
21
-
22
-
23
-
24
-
25
-
26
-
27
-
28
-
29
-
30
-
31
-
32
-
33
-
34
-
35
-
36
-
37
-
38
-
39
-
40
-
41
-
42
-
43
-
44
-
45
-
46
-
47
-
48
-
49
-
50
-
51
-
52
-
53
-
54
-
55
-
56
-
57
-
58
-
59
-
60
-
61
-
62
-
63
-
64
-
65
-
66
-
67
-
68
-
69
-
70
-
71
-
72
-
73
-
74
-
75
-
76
-
77
-
78
-
79
-
80
-
81
-
82
-
83
-
84
-
85
-
86
-
87
-
88
-
89
-
90
-
91
-
92
-
93
-
94
-
95
-
96
-
97
-
98
-
99
-
100
-
101
-
102
-
103
-
104
-
105
-
106
-
107
-
108
-
109
-
110
-
111
-
112
-
113
-
114
-
115
-
116
-
117
-
118
 |
 |

ThinkServer
RD120
Types
6444,
6445,
6446,
and
6447
User
Guide