Lexmark 12N1515 User's Reference - Page 170
Replacing a toner cartridge
 |
UPC - 734646123327
View all Lexmark 12N1515 manuals
Add to My Manuals
Save this manual to your list of manuals |
Page 170 highlights
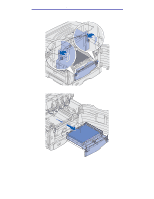
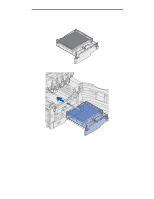
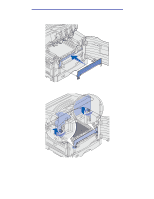
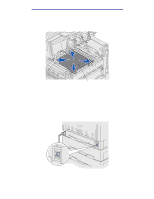
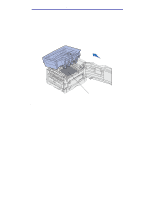
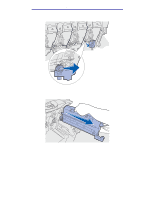
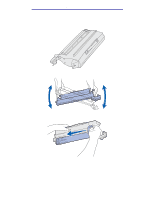
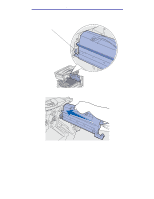
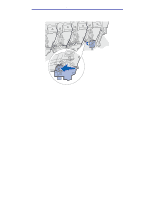
Maintenance 12 Press Go to reset the transfer belt counter. Once the counter is reset, the Printing Alignment Page message appears and a test page prints. After the test page has printed, you are prompted to enter alignment values for each setting. 13 Press Menu to choose the alignment value. 14 Press Select to enter the value and continue to the next value. After you have entered values for each alignment setting, the transfer belt should be aligned and the printer ready to print. Note: If you replaced the transfer belt after receiving the 80 Fuser/Belt Life Warning message or the 80 Fuser/Belt Exhausted message, see Removing the duplex unit for instructions on replacing the fuser. For instructions about replacing other supply items, click one of the following headings: Removing the duplex unit Replacing a toner cartridge Replacing a toner cartridge Your printer monitors the toner level of your toner cartridges. When the toner is getting low, the printer displays 88 Toner Low. This message indicates it is time for you to replace one or more specified toner cartridges. Press Go to clear the attendance message. The Supplies status message appears on the second line of the display to remind you there are supplies that need attention. You can open the Supplies Menu to see which toner cartridge is low. The printer continues to display the Supplies message until you replace the toner cartridge or until it is empty. When the life of the toner cartridge has expired, the printer displays 88 Toner Empty. You must replace the toner cartridge to continue printing. Use the following steps or the instruction sheet supplied with the toner cartridge to replace it. Replacing a toner cartridge 165
-
 1
1 -
2
-
3
-
4
-
5
-
6
-
7
-
8
-
9
-
10
-
11
-
12
-
13
-
14
-
15
-
16
-
17
-
18
-
19
-
20
-
21
-
22
-
23
-
24
-
25
-
26
-
27
-
28
-
29
-
30
-
31
-
32
-
33
-
34
-
35
-
36
-
37
-
38
-
39
-
40
-
41
-
42
-
43
-
44
-
45
-
46
-
47
-
48
-
49
-
50
-
51
-
52
-
53
-
54
-
55
-
56
-
57
-
58
-
59
-
60
-
61
-
62
-
63
-
64
-
65
-
66
-
67
-
68
-
69
-
70
-
71
-
72
-
73
-
74
-
75
-
76
-
77
-
78
-
79
-
80
-
81
-
82
-
83
-
84
-
85
-
86
-
87
-
88
-
89
-
90
-
91
-
92
-
93
-
94
-
95
-
96
-
97
-
98
-
99
-
100
-
101
-
102
-
103
-
104
-
105
-
106
-
107
-
108
-
109
-
110
-
111
-
112
-
113
-
114
-
115
-
116
-
117
-
118
-
119
-
120
-
121
-
122
-
123
-
124
-
125
-
126
-
127
-
128
-
129
-
130
-
131
-
132
-
133
-
134
-
135
-
136
-
137
-
138
-
139
-
140
-
141
-
142
-
143
-
144
-
145
-
146
-
147
-
148
-
149
-
150
-
151
-
152
-
153
-
154
-
155
-
156
-
157
-
158
-
159
-
160
-
161
-
162
-
163
-
164
-
 165
165 -
 166
166 -
 167
167 -
 168
168 -
 169
169 -
 170
170 -
 171
171 -
 172
172 -
 173
173 -
 174
174 -
 175
175 -
176
-
177
-
178
-
179
-
180
-
181
-
182
-
183
-
184
-
185
-
186
-
187
-
188
-
189
-
190
-
191
-
192
-
193
-
194
-
195
-
196
-
197
-
198
-
199
-
200
-
201
-
202
-
203
-
204
-
205
-
206
-
207
 |
 |
