Lexmark 4600 T64x - Setup Guide
Lexmark 4600 Manual
 |
View all Lexmark 4600 manuals
Add to My Manuals
Save this manual to your list of manuals |
Lexmark 4600 manual content summary:
- Lexmark 4600 | T64x - Setup Guide - Page 1
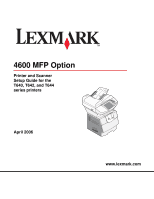
4600 MFP Option Printer and Scanner Setup Guide for the T640, T642, and T644 series printers April 2006 www.lexmark.com - Lexmark 4600 | T64x - Setup Guide - Page 2
also must have a printer stand or caster base. More information is available on our Lexmark Web site at www.lexmark.com/multifunctionprinters. VOORZICHTIG: support ou d'une base d'imprimante. Vous trouverez des informations supplémentaires sur le site Web de Lexmark à l'adresse suivante : www.lexmark - Lexmark 4600 | T64x - Setup Guide - Page 3
pod adresem: www.lexmark.com/multifunctionprinters 2000 web Lexmark www.lexmark.com/multifunctionprinters. UPOZORNÌNÍ: Sestavy usazené na podlahu potøebují kvùli stabilitì další díl. Pokud používáte zásobník na 2000 listù, je nutné použít buï stojan pod tiskárnu nebo podstavec tiskárny. Nìkter - Lexmark 4600 | T64x - Setup Guide - Page 4
2000 Lexmark Ո Web ঝ⚍˖ www.lexmark.com/multifunctionprinters Stability Information 3 - Lexmark 4600 | T64x - Setup Guide - Page 5
Stability Information 4 - Lexmark 4600 | T64x - Setup Guide - Page 6
English - Lexmark 4600 | T64x - Setup Guide - Page 7
only a 26 AWG or larger telecommunications (RJ-11) cord when connecting this product to the public switched telephone network. • Refer service or repairs, other than those described in the operating instructions, to a professional service person. • This product is designed, tested, and approved to - Lexmark 4600 | T64x - Setup Guide - Page 8
this book ...9 Turning off the printer ...9 Selecting a location for your printer and MFP 9 Customizing your MFP option ...10 Drivers and options ...11 Where to begin ...11 Chapter 2: MFP Adjustable stand setup 12 Assembling the MFP adjustable stand ...12 Installing a 250- or 500-sheet drawer - Lexmark 4600 | T64x - Setup Guide - Page 9
Scanner setup 42 Installing the printer operator panel cover ...42 Unlocking the scanner ...43 Attaching cables and power cords ...43 Installing drivers ...44 Fax setup ...45 Verify MFP setup ...48 Chapter 10: Distributing MFP user information 50 Finding user instructions ...50 Distributing user - Lexmark 4600 | T64x - Setup Guide - Page 10
identifies something that could damage your product hardware or software. Using this book This guide is intended to help you set up your printer and scanner (MFP option). If you do not have an option listed here, you can skip that portion of the guide and continue to the next task. If you need - Lexmark 4600 | T64x - Setup Guide - Page 11
. You must use either a printer stand or caster base if you are using a 2000-sheet drawer. Certain other configurations also must have a printer stand or caster base. More information is available on our Lexmark Web site at www.lexmark.com/multifunctionprinters. Customizing your MFP option 10 - Lexmark 4600 | T64x - Setup Guide - Page 12
with the printer, then install the MFP drivers located on the Software and Documentation CD that came with the MFP. After installing the drivers, verify the computer recognizes your installed options by: 1 Opening the Printers folder. 2 Right-clicking on the new MFP/printer and select Properties - Lexmark 4600 | T64x - Setup Guide - Page 13
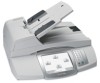
unit • Printer • Finisher or mailbox • 4600 MFP option (scanner) If you do not have an option listed here, you can skip that portion of the setup and continue to the next task. The setup for this portion of the book covers: 1 Assembling the MFP adjustable stand 2 Installing the optional drawer - Lexmark 4600 | T64x - Setup Guide - Page 14
MFP Adjustable stand setup Installing a 250- or 500-sheet drawer The 250- or 500-sheet drawer attaches under the printer and optional duplex unit. The printer automatically recognizes any drawer that is installed. A drawer consists of a tray and a support unit. The 250- and the 500-sheet drawers are - Lexmark 4600 | T64x - Setup Guide - Page 15
MFP Adjustable stand setup Installing a duplex unit The duplex unit attaches under the printer, below the standard tray and above any drawers. Note: Two optional duplex units are available. The 250-sheet duplex unit only works with printers that have a 250-sheet standard tray, and the 500-sheet - Lexmark 4600 | T64x - Setup Guide - Page 16
• Setup Sheet • Publications CD • Operator panel language overlays • Wire bail • Operator panel protector overlay 3 Place all items except the printer aside for later use. Note: If your scanner box contains an interface card, memory card, and firmware card, go to Installing printer memory or option - Lexmark 4600 | T64x - Setup Guide - Page 17
MFP Adjustable stand setup Installing the finisher or mailbox 1 Remove the top cover from the printer. You will not need the cover when the finisher or mailbox is attached. Store the cover; it will be needed if you remove the finisher - Lexmark 4600 | T64x - Setup Guide - Page 18
in the User's Guide located on the Software and Documentation CD. 5 Connect the two scanner cables. Note: To prevent errors and scanner malfunction, make sure the scanner cable thumbscrews are tightened securely. 6 Go to Removing the print cartridge packaging on page 32. Go to page 32 Installing the - Lexmark 4600 | T64x - Setup Guide - Page 19
stand (part number 20G0790) • Printer • 4600 MFP option (scanner) • Scanner shelf You may also have the following: • Optional drawers • Optional duplex unit • Printer memory or option cards If you do not have an option listed here, you can skip that portion of the setup and continue to the next task - Lexmark 4600 | T64x - Setup Guide - Page 20
-sheet drawer The 250- or 500-sheet drawer attaches under the printer and optional duplex unit. The printer automatically recognizes any drawer that is installed. A drawer consists of a tray and a support unit. The 250- and the 500-sheet drawers are installed the same way. 1 Remove the tray from the - Lexmark 4600 | T64x - Setup Guide - Page 21
Low profile stand setup Installing a duplex unit The duplex unit attaches under the printer, below the standard tray and above any drawers. Note: Two optional duplex units are available. The 250-sheet duplex unit only works with printers that have a 250-sheet standard tray, and the 500-sheet duplex - Lexmark 4600 | T64x - Setup Guide - Page 22
• Setup Sheet • Publications CD • Operator panel language overlays • Wire bail • Operator panel protector overlay 3 Place all items except the printer aside for later use. Note: If your scanner box contains an interface card, memory card, and firmware card, go to Installing printer memory or option - Lexmark 4600 | T64x - Setup Guide - Page 23
Low profile stand setup Installing the scanner shelf Note: If you do not have a scanner shelf but have a scanner stand, go to Scanner stand setup on page 28. Otherwise, go to Scanner option setup on page 30. 1 Remove the top cover from the printer. Note: A scanner shelf is not available for the T640 - Lexmark 4600 | T64x - Setup Guide - Page 24
in the User's Guide located on the Software and Documentation CD. 4 Connect the two scanner cables. Note: To prevent errors and scanner malfunction, make sure the scanner cable thumbscrews are tightened securely. 5 Go to Removing the print cartridge packaging on page 32. Go to page 32 Installing the - Lexmark 4600 | T64x - Setup Guide - Page 25
following components: • Caster base • Printer • 4600 MFP option (scanner) You may also have the following: • Optional drawers • Optional duplex unit • Scanner shelf • Printer memory or option cards If you do not have an option listed here, you can skip that portion of the setup and continue to the - Lexmark 4600 | T64x - Setup Guide - Page 26
Caster base setup Installing the caster base The caster base is used when placing your MFP on the scanner stand and the printer on the floor. It provides mobility and a stable platform for your printer. There are different assembly instructions for use with a 2000-sheet drawer, 500-sheet drawer, or - Lexmark 4600 | T64x - Setup Guide - Page 27
. The wire bail came with the printer and rests in the standard output bin when installed. 6 Attach the plastic bracket to the scanner shelf. Installing the scanner CAUTION: The scanner requires two people to lift it safely. 1 Place the scanner base on the scanner shelf. 2 Insert the two thumbscrews - Lexmark 4600 | T64x - Setup Guide - Page 28
in the User's Guide located on the Software and Documentation CD. 4 Connect the two scanner cables. Note: To prevent errors and scanner malfunction, make sure the scanner cable thumbscrews are tightened securely. 5 Go to Removing the print cartridge packaging on page 32. Go to page 32 Installing the - Lexmark 4600 | T64x - Setup Guide - Page 29
16C0700) • Printer • 4600 MFP option (scanner) You may also have the following: • Caster base • Low profile stand • Optional drawers • Optional duplex unit • Printer memory or option cards • Output options If you do not have an option listed here, you can skip that portion of the setup and continue - Lexmark 4600 | T64x - Setup Guide - Page 30
from the box, and follow the setup instructions included with the option. 3 Place the tips of the wire bail into the ends of the plastic bracket so that the bail curves downward. The wire bail came with the printer and rests in the standard output bin when installed. 4 Attach the plastic bracket to - Lexmark 4600 | T64x - Setup Guide - Page 31
on removing the scanner top, see "Removing the scanner top" in the User's Guide located on the Software and Documentation CD. 4 Connect the two scanner cables. Note: To prevent errors and scanner malfunction, make sure the scanner cable thumbscrews are tightened securely Scanner option setup 30 - Lexmark 4600 | T64x - Setup Guide - Page 32
Scanner option setup 5 Go to Removing the print cartridge packaging on page 32, and follow the printer setup instructions. For information on installing the interface card and memory and firmware cards, go to Installing printer memory or option cards on page 36. Positioning the scanner 31 - Lexmark 4600 | T64x - Setup Guide - Page 33
7 Setting up the printer Removing the print cartridge packaging Note: If you are installing a scanner after initial printer setup, the print cartridge packaging was removed during printer setup. 1 Open the lower front door. 2 Open the upper front door. 3 Pull the print cartridge up and out. 4 Remove - Lexmark 4600 | T64x - Setup Guide - Page 34
Return Program Print Cartridge for Label Applications X644X01A Extra High Yield Return Program Print Cartridge for Label Applications Other available print cartridges X644A21A Print Cartridge X644H21A High Yield Print Cartridge X644X21A Extra High Yield Print Cartridge For Europe, the - Lexmark 4600 | T64x - Setup Guide - Page 35
Setting up the printer Part number Description X644H01P High Yield Return Program Print Cartridge for Label Applications X644X01P Extra High Yield Return Program Print Cartridge for Label Applications Other available print cartridges X644A21P Print Cartridge X644H21P High Yield Print - Lexmark 4600 | T64x - Setup Guide - Page 36
Setting up the printer Loading paper Complete these instructions to load paper into any of the standard or optional trays. All trays are loaded in the same way. 1 Remove the tray. 2 Adjust the length and width guides to the correct position for the size of paper you are loading. 3 Flex the sheets of - Lexmark 4600 | T64x - Setup Guide - Page 37
. After installing memory or option cards, go to Scanner setup on page 42. The instructions in this section help you install the interface card, memory card, and firmware card. Information about other memory or option cards can be found in the printer User's Guide. Accessing the printer system board - Lexmark 4600 | T64x - Setup Guide - Page 38
Installing printer memory or option cards 5 Slide the shield to the right, and then remove it. 6 Set the shield aside. Use the illustration to locate the connector for the card you want to install. Option card connector Flash and firmware card connectors Memory card connector Accessing the - Lexmark 4600 | T64x - Setup Guide - Page 39
Installing printer memory or option cards Installing a memory card Note: Printer memory cards designed for other Lexmark printers may not work with the printer. 1 Remove the system board access cover. (See Accessing the printer system board.) Warning: Printer memory cards are easily damaged by - Lexmark 4600 | T64x - Setup Guide - Page 40
Installing printer memory or option cards Installing a firmware card Note: Firmware cards designed for other Lexmark printers may not work with the printer. 1 Remove the system board access cover. (See Accessing the printer system board.) Note: If a firmware card has been installed, you must remove - Lexmark 4600 | T64x - Setup Guide - Page 41
Installing printer memory or option cards Installing an interface card and cable Warning: Interface cards are easily damaged by static electricity. Touch something metal such as the printer frame before you touch an interface card. 1 Locate the card connectors on the system board. 2 Remove the screw - Lexmark 4600 | T64x - Setup Guide - Page 42
cards Replacing the shield After you have installed options on the printer system board, follow these steps to reattach the shield and close the doors. 1 Align the keyholes on the shield with the screws on the frame. 2 - Lexmark 4600 | T64x - Setup Guide - Page 43
9 Scanner setup Installing the printer operator panel cover If you purchased your printer and MFP option separately, you will need to install the printer operator panel cover. If you purchased a printer and MFP together, the printer operator panel cover is installed; go to Unlocking the scanner on - Lexmark 4600 | T64x - Setup Guide - Page 44
up until it locks into position. Attaching cables and power cords 1 Connect the scanner cable to the scanner and printer. 2 Connect the printer to a LAN drop or hub using standard cabling that is compatible with your network. 3 Connect the RJ-11 telephone fax line cable into the left modem port on - Lexmark 4600 | T64x - Setup Guide - Page 45
instructions to install the printer drivers. 3 Place the MFP Software and Documentation CD in the computer CD drive, and follow the onscreen instructions to install the MFP drivers. 4 Verify the computer recognizes your installed options. a Open the Printers folder. b Right-click the new MFP/printer - Lexmark 4600 | T64x - Setup Guide - Page 46
the printer. Scanner setup Fax setup When you first turn on the MFP or if the MFP has User's Guide on the MFP Software and Documentation CD. There are two methods to enter your fax setup information: • Manually enter the information through the MFP control panel; see "Performing manual fax setup - Lexmark 4600 | T64x - Setup Guide - Page 47
/Ports. 3 Touch the arrow next to TCP/IP. Standard Network appears if the printer has a network port on the printer system board. If a MarkNet N8000 series internal print server is installed, you see Network Option 1. 4 Touch Address. 5 Using the numeric pad, enter the IP address. When the address - Lexmark 4600 | T64x - Setup Guide - Page 48
prompt if using Windows 2000). If the printer is active on the network, a reply is sent. Performing browser fax setup Note: Configuration is a task usually done by a system support person. If you are prompted for a password during the following instructions, see your system support person for help - Lexmark 4600 | T64x - Setup Guide - Page 49
Scanner setup Verify MFP setup Printing a menu settings page 1 Touch the key icon on the MFP control panel. 2 Touch Reports. 3 Touch Menu Settings Page. 4 Verify the options you installed are correctly listed under "Installed Features" and "Printer Information." Printing the Help pages We recommend - Lexmark 4600 | T64x - Setup Guide - Page 50
document to the directory or application you specified. If you touch Profiles on the home screen, locate your shortcut on the list. 9 Return to your computer to view your file. Your output file is saved in the location you specified or launched in the application you specified. Verify MFP setup 49 - Lexmark 4600 | T64x - Setup Guide - Page 51
Documentation CD, and manually deliver them to users. • Copy the PDFs containing the user instructions, and store them in a convenient, common location on your network or intranet. The PDFs are stored in the Pubs directory on the MFP Software and Documentation CD. • Browse the Lexmark Web site (www - Lexmark 4600 | T64x - Setup Guide - Page 52
the fax setup. See Fax setup on page 45. 3 See the online information on the MFP Software and Documentation CD. Click View Documentation Use MFP Solving fax problems. Getting more help Launch the printer Software and Documentation CD, and then click Contact Lexmark for a complete list of phone
-
 1
1 -
 2
2 -
 3
3 -
 4
4 -
 5
5 -
 6
6 -
 7
7 -
8
-
9
-
10
-
11
-
12
-
13
-
14
-
15
-
16
-
17
-
18
-
19
-
20
-
21
-
22
-
23
-
24
-
25
-
26
-
27
-
28
-
29
-
30
-
31
-
32
-
33
-
34
-
35
-
36
-
37
-
38
-
39
-
40
-
41
-
42
-
43
-
44
-
45
-
46
-
47
-
48
-
49
-
50
-
51
-
52
 |
 |

www.lexmark.com
Printer and Scanner
Setup Guide for the
T640, T642, and T644
series printers
4600 MFP Option
April 2006