Lexmark C920 User's Guide - Page 34
Reinstalling the system board access cover, Aligning the optional high capacity feeder
 |
View all Lexmark C920 manuals
Add to My Manuals
Save this manual to your list of manuals |
Page 34 highlights
Installing and removing options Reinstalling the system board access cover After you finish installing cards on the printer system board, reinstall the system board access cover. 1 Align the holes on the access cover with the screws on the printer. Hole 2 Place the cover against the printer and slide it down. 3 Tighten the eight screws. Aligning the optional high capacity feeder Note: Failure to properly align the high capacity feeder may cause paper jams. Reinstalling the system board access cover 34
-
 1
1 -
2
-
3
-
4
-
5
-
6
-
7
-
8
-
9
-
10
-
11
-
12
-
13
-
14
-
15
-
16
-
17
-
18
-
19
-
20
-
21
-
22
-
23
-
24
-
25
-
26
-
27
-
28
-
 29
29 -
 30
30 -
 31
31 -
 32
32 -
 33
33 -
 34
34 -
 35
35 -
 36
36 -
 37
37 -
 38
38 -
 39
39 -
40
-
41
-
42
-
43
-
44
-
45
-
46
-
47
-
48
-
49
-
50
-
51
-
52
-
53
-
54
-
55
-
56
-
57
-
58
-
59
-
60
-
61
-
62
-
63
-
64
-
65
-
66
-
67
-
68
-
69
-
70
-
71
-
72
-
73
-
74
-
75
-
76
-
77
-
78
-
79
-
80
-
81
-
82
-
83
-
84
-
85
-
86
-
87
-
88
-
89
-
90
-
91
-
92
-
93
-
94
-
95
-
96
-
97
-
98
-
99
-
100
-
101
-
102
-
103
-
104
-
105
-
106
-
107
-
108
-
109
-
110
-
111
-
112
-
113
-
114
-
115
-
116
-
117
-
118
-
119
-
120
-
121
-
122
-
123
-
124
-
125
-
126
-
127
-
128
-
129
-
130
-
131
-
132
-
133
-
134
-
135
-
136
-
137
-
138
-
139
-
140
-
141
-
142
-
143
-
144
-
145
-
146
-
147
-
148
-
149
-
150
-
151
-
152
-
153
-
154
-
155
-
156
-
157
-
158
-
159
-
160
-
161
-
162
-
163
 |
 |

Reinstalling the system board access cover
34
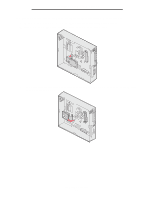
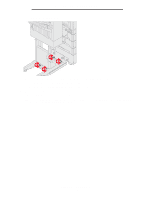
Installing and removing options
Reinstalling the system board access cover
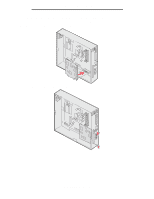
After you finish installing cards on the printer system board, reinstall the system board access cover.
1
Align the holes on the access cover with the screws on the printer.
2
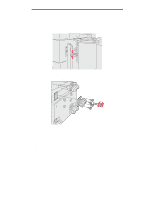
Place the cover against the printer and slide it down.
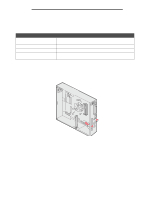
3
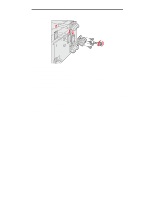
Tighten the eight screws.
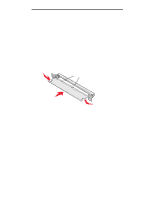
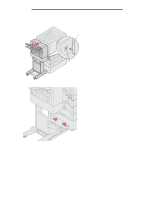
Aligning the optional high capacity feeder
Note:
Failure to properly align the high capacity feeder may cause paper jams.
Hole