Lexmark Forms Printer 2590n Lexmark Forms Printer 2500+ Series User's Guide - Page 12
FormFeed, Start/Stop, If Auto Cut Sheet Load is set to Off, then press
 |
View all Lexmark Forms Printer 2590n manuals
Add to My Manuals
Save this manual to your list of manuals |
Page 12 highlights
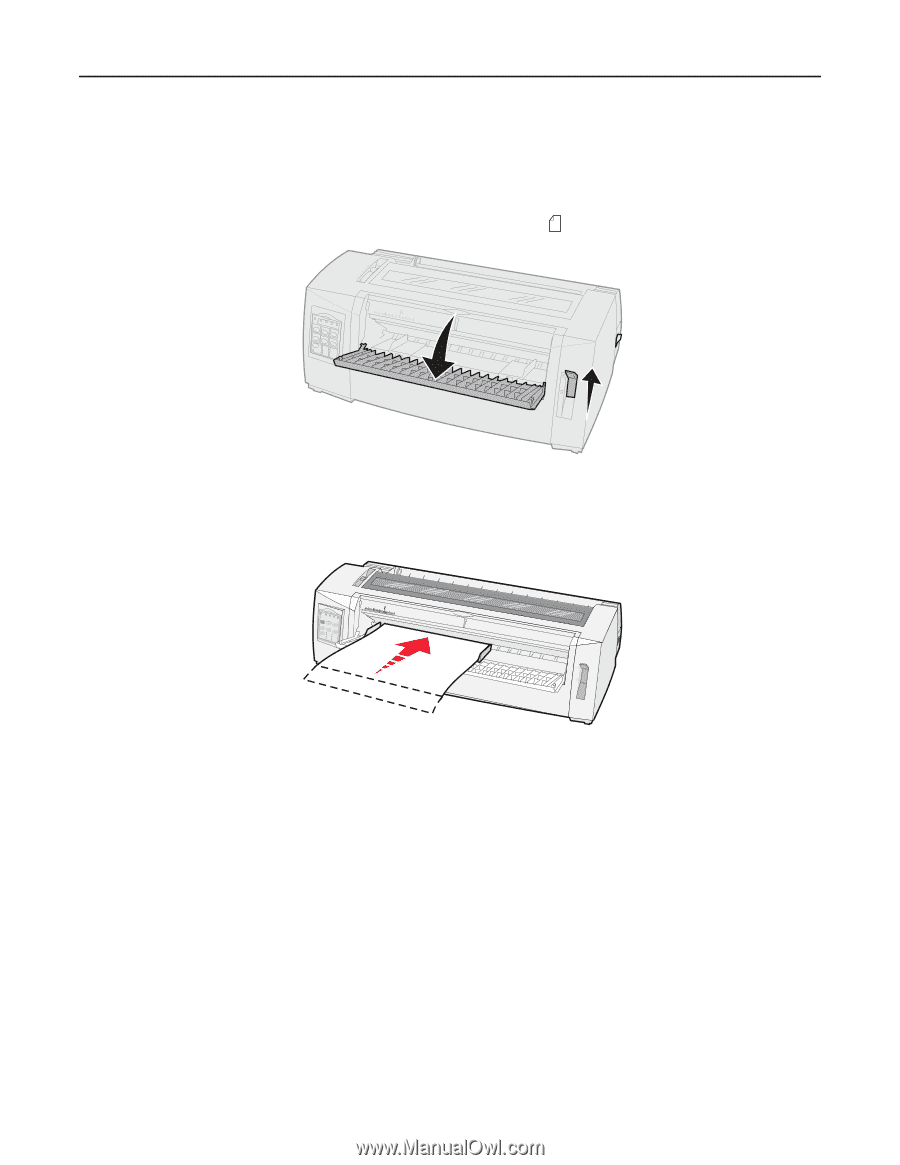
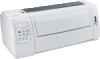
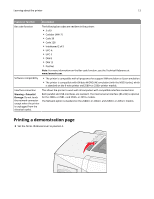
Learning about the printer 12 2 Plug the printer power cord to a properly grounded electrical outlet. Note: The Power light comes on and turns solid green, the Paper Out light is blinking, and the current default font light is solid green. For more information on the control panel lights, see "Understanding the control panel lights" on page 18 3 Open the manual feeder, and then move the paper select lever to the position. 4 Move the left paper guide to the right until it stops. 5 Insert a single sheet of paper into the front of the printer. 6 Adjust the right paper guide to fit the paper width. A 7 Continue pushing the paper into the printer until the Paper Out light stops blinking. • If Auto Cut Sheet Load is set to On, then the paper feeds automatically to the Top‑Of‑Form. • If Auto Cut Sheet Load is set to Off, then press FormFeed. 8 Press and hold Start/Stop for five seconds. 9 Press Font and Start/Stop. Note: Hold down the Font button until all the control panel lights blink. 10 Release the Font button. Note: The Power and Ready lights stay on, and the demonstration page prints.
-
 1
1 -
2
-
3
-
4
-
5
-
6
-
 7
7 -
 8
8 -
 9
9 -
 10
10 -
 11
11 -
 12
12 -
 13
13 -
 14
14 -
 15
15 -
 16
16 -
 17
17 -
18
-
19
-
20
-
21
-
22
-
23
-
24
-
25
-
26
-
27
-
28
-
29
-
30
-
31
-
32
-
33
-
34
-
35
-
36
-
37
-
38
-
39
-
40
-
41
-
42
-
43
-
44
-
45
-
46
-
47
-
48
-
49
-
50
-
51
-
52
-
53
-
54
-
55
-
56
-
57
-
58
-
59
-
60
-
61
-
62
-
63
-
64
-
65
-
66
-
67
-
68
-
69
-
70
-
71
-
72
-
73
-
74
-
75
-
76
-
77
-
78
-
79
-
80
-
81
-
82
-
83
-
84
-
85
 |
 |