Lexmark Optra T614 Administrator's Guide (1.4 MB)
Lexmark Optra T614 Manual
 |
View all Lexmark Optra T614 manuals
Add to My Manuals
Save this manual to your list of manuals |
Lexmark Optra T614 manual content summary:
- Lexmark Optra T614 | Administrator's Guide (1.4 MB) - Page 1
User's Guide High-Capacity Output Stacker Installation Instructions Use this document when you have questions about the Lexmark Optra™ T printer or encounter a problem when using it. This document contains information on operator panel menus, printer messages, troubleshooting, maintenance, and - Lexmark Optra T614 | Administrator's Guide (1.4 MB) - Page 2
printer management software. • MarkNet™ Print Servers to open documents containing information about configuring MarkNet print servers. Lexmark Web site Access our site on the World Wide Web for updated printer drivers, utilities, and documentation: www.lexmark.com Administrator's Guide - Lexmark Optra T614 | Administrator's Guide (1.4 MB) - Page 3
. Operation ReSource is a service mark of Lexmark International, Inc. PCL® is a registered trademark of the Hewlett-Packard Company. PCL 6 is Hewlett-Packard Company's designation of a set of printer commands (language) and functions included in its printer products. This printer is intended to be - Lexmark Optra T614 | Administrator's Guide (1.4 MB) - Page 4
Trademarks The following terms are trademarks or registered trademarks of these companies: Albertus Antique Olive Apple Chancery Arial Candid CG Omega CG Times Chicago Clarendon Eurostile Geneva GillSans Helvetica Hoefler Text Intellifont ITC Avant Garde ITC Bookman ITC Zapf Chancery Joanna MT - Lexmark Optra T614 | Administrator's Guide (1.4 MB) - Page 5
Monaco Mona Lisa NewYork Oxford Palatino Pantone Stempel Garamond Taffy Times New Roman TrueType Univers Wingdings Apple Computer, Inc. International Typeface Corporation Apple Computer, Inc. AlphaOmega Typography Linotype-Hell AG and/or its subsidiaries Pantone, Inc. Linotype-Hell AG and/or its - Lexmark Optra T614 | Administrator's Guide (1.4 MB) - Page 6
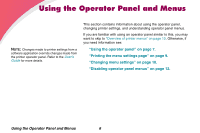
operator panel similar to this, you may want to skip to "Overview of printer menus" on page 13. Otherwise, if you need information see: "Using the operator panel" on page 7. "Printing the menu settings page" on page 9. "Changing menu settings" on page 10. "Disabling operator panel menus" on page 12 - Lexmark Optra T614 | Administrator's Guide (1.4 MB) - Page 7
Ready. • Clear operator panel error messages. • Exit Power Saver mode and jump start the printer. If you've changed printer settings, press Go before sending a job to print. Ready must display for jobs to print. Each end of the button has a function. Press Menu> or - Lexmark Optra T614 | Administrator's Guide (1.4 MB) - Page 8
Clear certain messages from the operator panel. Press Return to return to the previous menu level or menu item. Press Stop while Ready, Busy, or Waiting displays to temporarily stop all activity and take the printer offline. The operator panel status message changes to Not Ready. Press Go to return - Lexmark Optra T614 | Administrator's Guide (1.4 MB) - Page 9
Printing the menu settings page NOTE: Before printing the menu settings page, make sure the selected paper source holds letter-, legal-, or A4-size paper and the PAPER TYPE setting for the source is set to Plain Paper. NOTE: If an error message displays, see "Understanding Printer Messages" on page - Lexmark Optra T614 | Administrator's Guide (1.4 MB) - Page 10
beside the current user default setting for that menu item. Some menu items have submenus. For example, if you select PAPER MENU, and then select the PAPER TYPE menu item, you must select another menu (such as Tray 1 Type) before the available values display. Using the Operator Panel and Menus 10 - Lexmark Optra T614 | Administrator's Guide (1.4 MB) - Page 11
. - A numerical value that you can increase or decrease. 6 Press Menu> or - Lexmark Optra T614 | Administrator's Guide (1.4 MB) - Page 12
menus NOTE: Disabling the operator panel menus does not prevent access to the JOB MENU or to Print and Hold functionality. To disable the operator panel menus so that changes cannot be made to the printer default settings: 1 Turn the printer off. 2 Press and hold Select and Return and turn the - Lexmark Optra T614 | Administrator's Guide (1.4 MB) - Page 13
JOBS Reset Printer Print Buffer Reset Active Bin QUALITY MENU (page 44) Print Resolution Toner Darkness PQET PictureGrade SETUP MENU (page 47) Printer Language Power Saver Resource Save Download Target Print Timeout Wait Timeout Auto Continue Jam Recovery Page Protect Print Area Display Language - Lexmark Optra T614 | Administrator's Guide (1.4 MB) - Page 14
Paper Menu Menu item Paper Source *Factory default Paper Menu Use the PAPER MENU to define all settings relating to print material input and output, as well as the specific print material you are using. Values Tray 1* Tray 2 Tray 3 Tray 4 Tray 5 MP Feeder Env Feeder Manual Paper Manual Env The - Lexmark Optra T614 | Administrator's Guide (1.4 MB) - Page 15
Paper Menu (continued) Menu item PAPER SIZE *Factory default Values Tray x Size (where x represents a tray from 1 to 5) Manual Pap Size Each of the above menu items support the following values as a second menu: A4* (Country specific) A5 JIS B5 Letter* (Country specific) Legal Executive Universal - Lexmark Optra T614 | Administrator's Guide (1.4 MB) - Page 16
Select Manual Env Size when manually feeding a single envelope through the multipurpose feeder. Universal refers to any size that is not considered a standard size. Select Universal from the PAPER SIZE menu when you load print material that doesn't match any of the other available sizes. The printer - Lexmark Optra T614 | Administrator's Guide (1.4 MB) - Page 17
when Configure MP is set to Cassette. Env Feeder Type Manual Env Type Each of the above menu items support the following values as a second menu: Envelope* Custom Type x (where x represents a custom type from 1 to 6) Note: Only installed paper sources display. Using the Operator Panel and Menus 17 - Lexmark Optra T614 | Administrator's Guide (1.4 MB) - Page 18
Paper Menu (continued) Menu item PAPER TYPE (continued) *Factory default Values The PAPER TYPE setting lets you specify the type of print material installed in each paper source. This setting is used by the printer in the following ways: • Enables the printer to optimize print quality for the - Lexmark Optra T614 | Administrator's Guide (1.4 MB) - Page 19
print material used for each of the Custom Types available in the PAPER TYPE menu item. This print material designation optimizes print quality settings when you select print material from a paper default exit for printed material. The standard bin is located on top of the printer. Each additional - Lexmark Optra T614 | Administrator's Guide (1.4 MB) - Page 20
Paper Menu (continued) Menu item Configure Bins *Factory default paper type of the printed media. Each paper type is assigned to an output bin, and the printer directs the output to the assigned output bin. For information on the Type Assignment value, see "ASSIGN TYPE/BIN" on page 21. Using - Lexmark Optra T614 | Administrator's Guide (1.4 MB) - Page 21
a custom paper type 1 to 6) Each of the above menu items support the following values as a second menu: Standard Bin printer automatically print A4-size jobs on letter-size paper and letter-size jobs on A4-size paper, if the requested size is not currently installed in the paper source. Using - Lexmark Optra T614 | Administrator's Guide (1.4 MB) - Page 22
acts like a manual feed slot and you can feed only one sheet of print material through at a time. If you set Configure MP to First, the printer feeds print material from the multipurpose feeder until it is empty, regardless of the paper source or paper size requested for the job. Using the Operator - Lexmark Optra T614 | Administrator's Guide (1.4 MB) - Page 23
setting works in connection with the PAPER TYPE and PAPER WEIGHT settings. You may need to change those settings to optimize print quality for your specific print material. If a user-defined name is available, it displays instead of Custom x Texture. Use MarkVision to create custom type names - Lexmark Optra T614 | Administrator's Guide (1.4 MB) - Page 24
menu: • Light • Normal* • Heavy Select the appropriate PAPER WEIGHT value (Light, Normal, or Heavy) for each PAPER TYPE, including the Custom Types, that you are using. Set the correct PAPER WEIGHT value for your print material to make sure the toner adheres properly to the page. If you have trouble - Lexmark Optra T614 | Administrator's Guide (1.4 MB) - Page 25
of the above menu items supports the following values as a second menu: Off* Duplex This setting provides a way to do simplex printing on preprinted media that have been loaded for duplex printing. When the value is set to Duplex for an associated paper type, the printer operating system is notified - Lexmark Optra T614 | Administrator's Guide (1.4 MB) - Page 26
Finishing Menu Use the FINISHING MENU to define all printer output settings. Finishing Menu Menu item Duplex Duplex Bind Values Off* On Note: Duplex only displays if the duplex unit is installed. Set Duplex to On to print on both sides of the page. Set Duplex to Off to print only on one side of - Lexmark Optra T614 | Administrator's Guide (1.4 MB) - Page 27
Finishing Menu (continued) Menu item Duplex Bind (continued) Values Short Edge print and set Copies to 2, the printer prints page 1, page 1, page 2, page 2, page 3, page 3. For information about how to use the Copies setting with the Collation setting, see page 28. Do Not Print* Print Select Print - Lexmark Optra T614 | Administrator's Guide (1.4 MB) - Page 28
must also let you specify the number of copies needed or let you use the printer default setting for Copies. Select Collation from the printer operator panel or from the printer driver. For best results, select Collated in the printer driver and set the number of copies to one. In your application - Lexmark Optra T614 | Administrator's Guide (1.4 MB) - Page 29
printer. Select Between Pages to insert a blank page between each page of a job. This is useful if you are printing transparencies and want to reduce static build-up when stacking transparencies in the output bin. Tray 1* Tray 2 Tray 3 Tray 4 Tray 5 MP Feeder Env Feeder Note: Only installed paper - Lexmark Optra T614 | Administrator's Guide (1.4 MB) - Page 30
multiple page images on a single page. For example, 2-Up means two page images are printed on one page, 3-Up means three page images are printed on one page, and so forth. The printer uses the Multipage Order, Multipage View, and Multipage Border settings to determine the order and orientation of - Lexmark Optra T614 | Administrator's Guide (1.4 MB) - Page 31
. The positioning of page images depends on if the pages are sent to the printer as portrait or landscape images. These examples show the result of using each Multipage Order setting on a 4-Up print job. Horizontal Portrait Landscape Page 1 Page 2 Page 1 Page 2 Page 3 Page 4 Page 3 Page 4 Rev - Lexmark Optra T614 | Administrator's Guide (1.4 MB) - Page 32
Finishing Menu (continued) Menu item Multipage View Multipage Border *Factory default Values Auto* Long Edge Short Edge Use the Multipage View setting to select the orientation of the printed page with respect to the page images during Multipage Print. Select Auto to allow the printer to choose - Lexmark Optra T614 | Administrator's Guide (1.4 MB) - Page 33
Utilities Menu Use the UTILITIES MENU to print a variety of listings relating to available printer resources, printer settings, and print jobs. Additional menu items let you set up printer hardware and troubleshoot printer problems. Utilities Menu Menu item Print Menus Print Net Setup Print Net1 - Lexmark Optra T614 | Administrator's Guide (1.4 MB) - Page 34
printer language, PCL Fonts or PS Fonts. Press Select to print a list of all the resources stored in flash memory or on a hard disk. The Print Directory menu new resources. The Format Flash menu item only displays if the installed Defective Flash may display when the printer is turned on, or during - Lexmark Optra T614 | Administrator's Guide (1.4 MB) - Page 35
Defragment Flash menu item only displays if the installed flash memory is not defective or Read/Write or Write protected. 51 Defective Flash may display when the printer is turned Do not turn off the printer while the hard disk is formatting. *Factory default Using the Operator Panel and Menus 35 - Lexmark Optra T614 | Administrator's Guide (1.4 MB) - Page 36
of a print job problem. With Hex Trace selected, all data sent to the printer is printed in hexadecimal and character representation. Control codes are not run. To exit Hex Trace, turn the printer off or reset the printer. To reset the printer, press Menu> or or - Lexmark Optra T614 | Administrator's Guide (1.4 MB) - Page 37
Job Menu Job Menu JOB MENU is only available when the printer is busy processing or printing a job, when a printer message displays, when Ready displays, or when the printer is in Hex Trace mode. Press Menu> or - Lexmark Optra T614 | Administrator's Guide (1.4 MB) - Page 38
the printer has processed at least one confidential job. Use your software application or printer driver to Printing is delayed until you enter a PIN assigned to the job. Refer to the User's Guide for more details. When a valid PIN is entered, you may choose to: Print All Jobs PRINT A JOB PRINT - Lexmark Optra T614 | Administrator's Guide (1.4 MB) - Page 39
. Press Menu> or - Lexmark Optra T614 | Administrator's Guide (1.4 MB) - Page 40
Job Menu (continued) Menu item HELD JOBS *Factory default Values Print All Jobs PRINT A JOB Job #3 Username> ... PRINT COPIES - Lexmark Optra T614 | Administrator's Guide (1.4 MB) - Page 41
the HELD JOBS menu, and select the print job. Press Go to exit the menus and begin printing. When all copies are printed, the job is deleted from printer memory. When you select HELD JOBS, you may choose to: Print All Jobs PRINT A JOB PRINT COPIES Delete All Jobs DELETE A JOB Using the Operator - Lexmark Optra T614 | Administrator's Guide (1.4 MB) - Page 42
but remain in the JOB MENU. Select Print All Jobs to print all jobs, exit the menus, and begin printing. All Repeat Print, Reserve Print, and Verify Print jobs are printed. Select PRINT A JOB to choose which jobs to print. A list of available jobs displays. Press Menu> or - Lexmark Optra T614 | Administrator's Guide (1.4 MB) - Page 43
The Waiting state occurs if an incomplete job is sent to the printer or an ASCII job, such as a print screen command, is printing. Reset Active Bin displays if one of the following conditions exist: • Configure Bins in the PAPER MENU is set to either Mailbox, Mail Overflow, or Type Assignment. • If - Lexmark Optra T614 | Administrator's Guide (1.4 MB) - Page 44
Quality Menu Use the QUALITY MENU to change settings affecting the quality of the printed characters and images. Quality Menu Menu item Values Print Resolution 300 dpi 600 dpi* 1200 Image Q 1200 dpi The Print Resolution setting defines the number of dots printed per inch (dpi). The higher the - Lexmark Optra T614 | Administrator's Guide (1.4 MB) - Page 45
Quality Menu (continued) Menu item Values Toner Darkness 1 2 3 4 5 6 7* 8 9 10 Use Toner Darkness to lighten or darken the image appearance in your print jobs and conserve your toner supply. For finer line width, higher definition in graphics, and lighter gray-scale images, decrease the Toner - Lexmark Optra T614 | Administrator's Guide (1.4 MB) - Page 46
Quality Menu (continued) Menu item Values PictureGrade Off On* Use the PictureGrade™ menu item to improve the quality of gray-scale printing at 300, 600, and 1200 dpi resolutions in PostScript emulation. If you select Off, the printer uses the standard screening parameters. If you select On, - Lexmark Optra T614 | Administrator's Guide (1.4 MB) - Page 47
language as the default does not prevent the software application from sending print jobs that use the other printer language. Power Saver Disabled 1...120 (20*) The Power Saver menu item lets you reduce power usage when the printer is idle by determining the length of time (in minutes) the - Lexmark Optra T614 | Administrator's Guide (1.4 MB) - Page 48
that RAM provides. You can add resources to flash memory or to the hard disk until the option is full. Use your software application or the printer utilities to download resources to the printer. The Download Target menu item only displays if formatted flash memory or a hard disk is installed in the - Lexmark Optra T614 | Administrator's Guide (1.4 MB) - Page 49
Timeout off. When Print Timeout is disabled, the printer does not print the last page of a print job until one of the following occurs: • The printer receives enough information to fill the page. • The printer receives a Form Feed command. • You select Print Buffer from the JOB MENU. See page 43 - Lexmark Optra T614 | Administrator's Guide (1.4 MB) - Page 50
Setup Menu (continued) Menu item Values Auto Continue Disabled* 5...255 Set Auto Continue to a value between 5 seconds and 255 seconds to have the printer continue printing after it detects one of the following errors: 34 Short Paper 35 Res Save Off Deficient Memory 37 Insufficient Collation - Lexmark Optra T614 | Administrator's Guide (1.4 MB) - Page 51
Setup Menu (continued) Menu item Auto Continue (continued) Values 61 Defective Disk 62 Disk Full 63 Unformatted Disk 80 Scheduled Maintenance 88 Toner Low Print Jobs on Disk? If one of these errors occurs and Auto Continue is set to Disabled, the printer stops and waits for operator intervention. - Lexmark Optra T614 | Administrator's Guide (1.4 MB) - Page 52
Menu (continued) Menu item Values Page Protect Off* On Set Page Protect to On to make sure an entire page is processed before it is printed. This may be helpful if you are having trouble printing a page properly because of complex page errors. If you still cannot print the page, your printer - Lexmark Optra T614 | Administrator's Guide (1.4 MB) - Page 53
if you do not want the alarm to sound. Toner Alarm Off* Single Continuous The Toner Alarm setting lets you set the printer to stop printing when a toner low condition occurs. If you select Single or Continuous, the printer stops printing, displays 88 Toner Low, and sounds the alarm. If you select - Lexmark Optra T614 | Administrator's Guide (1.4 MB) - Page 54
in your printer, set Job Accounting to On to use the disk to store statistical information about your most recent print jobs. The statistics include whether the job printed with or without errors, the time required to print the job, the size (in bytes) of the job, the requested paper size and - Lexmark Optra T614 | Administrator's Guide (1.4 MB) - Page 55
PCL Emul Menu Use the PCL EMUL MENU to change printer settings that only affect jobs printed using the PCL emulation printer language. PCL Emul Menu Menu item Font Source Font Name Point Size (only displays for PostScript or typographic fonts) * Factory default Values Resident* Download Flash - Lexmark Optra T614 | Administrator's Guide (1.4 MB) - Page 56
PCL Emul Menu (continued) Menu item Values Pitch (only displays for fixed or used when printing with a selected font. Symbol sets support the different requirements for languages or specific applications, such as math symbols for scientific text. The printer displays only the symbol sets supported - Lexmark Optra T614 | Administrator's Guide (1.4 MB) - Page 57
is LANDSCAPE orientation. 1...255 60* (Country specific) 64* (Country specific) Use the Lines per Page menu item to change the number of lines that print on each page. The setting can range from 1 to 255 lines per page. The printer sets the amount of space between each line (vertical line spacing - Lexmark Optra T614 | Administrator's Guide (1.4 MB) - Page 58
LaserJet 5 printer. When you select 203 mm, the width of the logical page is wide enough to print eighty 10-pitch characters. Assign MP Feeder Assign Tray x (where x represents a tray from 1 to 5) Assign Env Feeder Assign Man Paper Assign Man Env Each of the above menu items supports the following - Lexmark Optra T614 | Administrator's Guide (1.4 MB) - Page 59
* Factory default Values The TRAY RENUMBER menu item lets you configure your printer to work with printer drivers or applications that use different source assignments to request a given input source. Select Off to use the factory default paper source assignments. Select a numeric value (0 ... 199 - Lexmark Optra T614 | Administrator's Guide (1.4 MB) - Page 60
jobs printed using the PostScript emulation printer language. PostScript Menu Menu item Values Print PS Error Off* On Select On to print PostScript emulation errors. If an error occurs, the job stops processing, the error message prints, and the printer discards the job. If Print PS Error is - Lexmark Optra T614 | Administrator's Guide (1.4 MB) - Page 61
language. If both PCL SmartSwitch and PS SmartSwitch are set to Off, the printer uses the language specified in the Printer Language menu as the default. If only one SmartSwitch setting is set to Off, the printer uses the language that has its SmartSwitch setting set to On as the default. * Factory - Lexmark Optra T614 | Administrator's Guide (1.4 MB) - Page 62
Menu (continued) Menu item NPA Mode Parallel Buffer * Factory default Values On Off Auto* NPA is a mode of bidirectional communication that follows the conventions defined in Network Printing Alliance Protocol, A Printer on the amount of memory in your printer, the size of the other link buffers - Lexmark Optra T614 | Administrator's Guide (1.4 MB) - Page 63
prints. The Job Buffering menu item only displays if the installed hard disk is formatted and is not defective, Read/Write or Write protected, and if Job Buffer Size is not set to Disabled. 61 Defective Disk may display when the printer Use Standard only if you experience parallel interface problems. - Lexmark Optra T614 | Administrator's Guide (1.4 MB) - Page 64
Parallel Menu (continued) Menu item Parallel Mode 1 Parallel Mode 2 * Factory default Values Off On* The Parallel Mode 1 setting controls the pull up resistors on the parallel port signals. It is useful for personal computers that have open collector outputs on the parallel port signals. Set - Lexmark Optra T614 | Administrator's Guide (1.4 MB) - Page 65
is a standard feature on Optra T612 and T612n printers. SERIAL OPTION x only displays if a Tri-Port interface card is installed. Use the SERIAL MENU to change settings affecting jobs sent to the printer through the serial interface port. The SERIAL MENU only displays when a serial interface - Lexmark Optra T614 | Administrator's Guide (1.4 MB) - Page 66
Serial Menu (continued) Menu item NPA Mode Serial Buffer * Factory default Values On Off Auto* NPA is a mode of bidirectional communication that follows the conventions defined in Network Printing Alliance Protocol, A Printer/Host Control Specification Developed by the NPA. NPA mode requires - Lexmark Optra T614 | Administrator's Guide (1.4 MB) - Page 67
the host computer while the job prints. The Job Buffering menu item only displays if the installed hard disk is formatted and is not defective, Read/Write or Write protected, and if Job Buffer Size is not set to Disabled. 61 Defective Disk may display when the printer is turned on, or during - Lexmark Optra T614 | Administrator's Guide (1.4 MB) - Page 68
printer supports hardware handshaking, software handshaking, and combined hardware and software handshaking as indicated in the list of values for this menu the printer sends a continuous stream of XONs to the host computer to indicate that the serial port is ready to receive more data. Using the - Lexmark Optra T614 | Administrator's Guide (1.4 MB) - Page 69
Serial Menu (continued) Menu item Baud Data Bits * Factory default Values 1200 2400 sent to or from your computer. 138200, 172800, 230400, and 345600 only display for the STANDARD SERIAL MENU. Refer to the Technical Reference for information about the range of baud values. 7 8* This setting lets - Lexmark Optra T614 | Administrator's Guide (1.4 MB) - Page 70
Menu (continued) Menu error, the port sends an inverted question mark to the printer printer transmits XOFF and XON with odd parity. If the printer detects a parity error, the port sends X'5F' to the printer DSR determines if the printer uses the Data Set The serial interface uses DSR to distinguish - Lexmark Optra T614 | Administrator's Guide (1.4 MB) - Page 71
interface is a standard feature on the Optra T616n, T614n, T612n, and T610n printers. Use the NETWORK MENU to change settings affecting jobs sent to the printer through the network port. The NETWORK MENU only displays when a print server port exists on the printer as a standard feature or as an - Lexmark Optra T614 | Administrator's Guide (1.4 MB) - Page 72
Menu (continued) Menu item NPA Mode Network Buffer * Factory default Values Off Auto* NPA is a mode of bidirectional communication that follows the conventions defined in Network Printing Alliance Protocol, A Printer job to the printer, you may want to increase of memory in your printer, the size of - Lexmark Optra T614 | Administrator's Guide (1.4 MB) - Page 73
to Off, print jobs are not buffered. Note: Changing the Job Buffering setting automatically resets the printer. STD NET SETUP Values for this menu item are supplied by the specific network card. Open the menu to see the available values. or Refer to the documentation on the Drivers, MarkVision - Lexmark Optra T614 | Administrator's Guide (1.4 MB) - Page 74
language. If both PCL SmartSwitch and PS SmartSwitch are set to Off, the printer uses the language specified in the Printer Language menu as the default. If only one SmartSwitch is set to On, the printer uses that language as the default. PS SmartSwitch Off On* If PS SmartSwitch is set to On - Lexmark Optra T614 | Administrator's Guide (1.4 MB) - Page 75
Menu (continued) Menu item NPA Mode Infrared Buffer * Factory default Values Off Auto* NPA is a mode of bidirectional communication that follows the conventions defined in Network Printing Alliance Protocol, A Printer job to the printer, you may want to increase of memory in your printer, the size of - Lexmark Optra T614 | Administrator's Guide (1.4 MB) - Page 76
to let the printer automatically set the window size during a power on reset to maximize link performance. In most cases, Auto is the recommended setting. If you have trouble printing when you use the infrared port, changing the Window Size setting to 1 may resolve the problem. Using the Operator - Lexmark Optra T614 | Administrator's Guide (1.4 MB) - Page 77
recommended setting. If you have trouble printing when you use the infrared port, selecting a high Transmit Delay setting, such as 15, may resolve the problem. 2400 9600 19200 38400 57600 115200 576000 1152000* 4000000 The maximum baud rate possible for both the printer and the infrared adapter is - Lexmark Optra T614 | Administrator's Guide (1.4 MB) - Page 78
language. If both PCL SmartSwitch and PS SmartSwitch are set to Off, the printer uses the language specified in the Printer Language menu as the default. If only one SmartSwitch is set to On, the printer uses that language as the default. PS SmartSwitch Off On* If PS SmartSwitch is set to On - Lexmark Optra T614 | Administrator's Guide (1.4 MB) - Page 79
Menu (continued) Menu item NPA Mode LocalTalk Buffer * Factory default Values Off Auto* NPA is a mode of bidirectional communication that follows the conventions defined in Network Printing Alliance Protocol, A Printer job to the printer, you may want to increase of memory in your printer, the size of - Lexmark Optra T614 | Administrator's Guide (1.4 MB) - Page 80
print jobs are buffered to the hard disk. If Job Buffering is set to Off, print jobs are not buffered. Changing the Job Buffering setting automatically resets the printer. 1...10 (2*) Use the printer. Lexmark (Printer Name) This setting identifies the printer model name stored in printer memory. - Lexmark Optra T614 | Administrator's Guide (1.4 MB) - Page 81
language. If both PCL SmartSwitch and PS SmartSwitch are set to Off, the printer uses the language specified in the Printer Language menu as the default. If only one SmartSwitch is set to On, the printer uses that language as the default. PS SmartSwitch Off On* If PS SmartSwitch is set to On - Lexmark Optra T614 | Administrator's Guide (1.4 MB) - Page 82
Menu (continued) Menu item NPA Mode USB Buffer * Factory default Values On Off Auto* NPA is a mode of bidirectional communication that follows the conventions defined in Network Printing Alliance Protocol, A Printer job to the printer, you may want to increase of memory in your printer, the size of - Lexmark Optra T614 | Administrator's Guide (1.4 MB) - Page 83
operations. See "61 Defective Disk" on page 112. If Job Buffering is set to On, print jobs are buffered to the hard disk. If Job Buffering is set to Off, print jobs are not buffered. Note: Changing the Job Buffering setting automatically resets the printer. Using the Operator Panel and Menus 83 - Lexmark Optra T614 | Administrator's Guide (1.4 MB) - Page 84
is a standard feature on the Optra T612 and T612n printers. SERIAL OPTION x only displays if a Tri-Port interface card is installed. Use the FAX MENU to change settings affecting fax data received by the printer through the serial interface port. The FAX MENU only displays when a serial interface - Lexmark Optra T614 | Administrator's Guide (1.4 MB) - Page 85
Fax Menu (continued) Menu item Fax Baud Fax Data Bits * Factory default Values 1200 2400 4800 9600 19200* 38400 57600 115200 This setting bits that are sent in each transmission frame. Refer to the Technical Reference for more information about data bits. Using the Operator Panel and Menus 85 - Lexmark Optra T614 | Administrator's Guide (1.4 MB) - Page 86
Menu (continued) Menu per byte. The printer transmits XOFF and XON with odd parity. If the printer detects a parity error, it sends X'5F' to the printer instead of the and uses even parity when it transmits XON and XOFF. Refer to the Technical Reference for more information about parity. Using the - Lexmark Optra T614 | Administrator's Guide (1.4 MB) - Page 87
Fax Buffer setting automatically resets the printer. Off* On Job Buffering lets you delay processing of a print job. The job is temporarily stored on a hard disk before being printed, usually freeing the host computer while the job prints. The Job Buffering menu item only displays if the installed - Lexmark Optra T614 | Administrator's Guide (1.4 MB) - Page 88
lets you specify the size print material used for printing fax data. Incoming faxes are automatically formatted to print on the paper size set in the Fax Paper Size menu item. The printer automatically prints from the paper source containing the correct paper size and paper type as specified in the - Lexmark Optra T614 | Administrator's Guide (1.4 MB) - Page 89
the type of print material used for printing fax data. The printer automatically prints from the paper source containing the correct paper size and paper type as specified in the Fax Paper Size and Fax Paper Type settings. If no paper source contains the correct paper size and paper type, you are - Lexmark Optra T614 | Administrator's Guide (1.4 MB) - Page 90
) Menu item Fax Output Bin * Factory default Values Standard Bin* Bin x (where x represents an output option from 1 to 10) Note: Only installed output options display. The Fax Output Bin setting identifies the default exit for printed fax data. The standard bin is located on top of the printer - Lexmark Optra T614 | Administrator's Guide (1.4 MB) - Page 91
after the fuser unit has been replaced. See "Maintaining Your Printer" on page 122 for more details. Press Select to print the quality test pages. The first page contains a combination of graphics and text. The remaining pages contain graphics only. Note: Make sure PAPER SIZE in the PAPER MENU is - Lexmark Optra T614 | Administrator's Guide (1.4 MB) - Page 92
items support the following values as a second menu: Normal* Narrow If a user-defined name is available, it displays instead of Custom x Width. Use MarkVision to create custom type names. The name is truncated to 14 characters. Press Select to exit the CONFIG MENU. The printer automatically restarts - Lexmark Optra T614 | Administrator's Guide (1.4 MB) - Page 93
display on the second line of the operator panel. Attendance messages indicate printer errors that you must resolve before you can continue printing. Service messages indicate printer failures that may require servicing. For more information, click the appropriate link below: "Status messages" on - Lexmark Optra T614 | Administrator's Guide (1.4 MB) - Page 94
material in the printer paper path prints. Press Go to return to Busy. • Cancel the current job. Press Menu> or or or or - Lexmark Optra T614 | Administrator's Guide (1.4 MB) - Page 95
reclaim storage space occupied by deleted resources. DO NOT POWER OFF No button actions are possible while this message displays. Deleting Jobs The printer is deleting one or more Print and Hold jobs. This message displays if you select Delete All Jobs or Delete A Job and there are no jobs in the - Lexmark Optra T614 | Administrator's Guide (1.4 MB) - Page 96
while this message displays. This message displays if the code in internal print server x, where x represents network port 1 or 2, has not possible while this message displays. The printer menus are disabled. This message displays when Menu> or - Lexmark Optra T614 | Administrator's Guide (1.4 MB) - Page 97
Menu> or or or or - Lexmark Optra T614 | Administrator's Guide (1.4 MB) - Page 98
the printer paper path prints. Press Go to return to the previous message. • Cancel the current job. Press Menu> or or or or - Lexmark Optra T614 | Administrator's Guide (1.4 MB) - Page 99
for deletion. No button actions are possible while either of these messages displays. See PRINT A JOB or Print All Jobs on page 39 for more details. The printer is ready to receive and process data. • Press Menu> or - Lexmark Optra T614 | Administrator's Guide (1.4 MB) - Page 100
and Hex Trace mode is active. Hex Trace isolates the source of a print job problem. When Hex Trace is selected, all data sent to the printer prints in hexadecimal and character representation. Control codes print, but do not execute. • Turn the printer off to exit Hex Trace. • Press Stop to take the - Lexmark Optra T614 | Administrator's Guide (1.4 MB) - Page 101
1 to the right of the Waiting message. • Print the contents of the buffer. Press Go, Menu>, or or - Lexmark Optra T614 | Administrator's Guide (1.4 MB) - Page 102
items to maintain top performance, and avoid print quality and paper feed problems. This message displays until maintenance is performed and the printer maintenance counter is reset. See "Maintaining Your Printer" on page 122. The printer is locked onto network interface port x, where x represents - Lexmark Optra T614 | Administrator's Guide (1.4 MB) - Page 103
remaining toner, remove the print cartridge, shake it gently, and reinstall it in the printer. You can repeat this process until the print quality becomes unacceptable. Before the toner supply is depleted, the printer might display Toner Low again until you replace the print cartridge. Paper tray - Lexmark Optra T614 | Administrator's Guide (1.4 MB) - Page 104
in numerical order. For paper jam errors, the entire paper path must be cleared of print material before you can continue printing. Refer to the User's Guide for detailed information. Attendance message 31 Defective Print Cartridge 32 Unsupported Print Cartridge 34 Short Paper Meaning and required - Lexmark Optra T614 | Administrator's Guide (1.4 MB) - Page 105
the printer. Press Menu> or or - Lexmark Optra T614 | Administrator's Guide (1.4 MB) - Page 106
Menu> or or - Lexmark Optra T614 | Administrator's Guide (1.4 MB) - Page 107
. Try to simplify the print job. • Cancel the current job. Press Menu> or or or or - Lexmark Optra T614 | Administrator's Guide (1.4 MB) - Page 108
displays when you turn the printer on. You must format the flash memory before you can perform any flash memory operations. To format the flash memory, select Format Flash from the UTILITIES MENU. Press Go to clear the message and continue printing. If the error message remains, the flash memory - Lexmark Optra T614 | Administrator's Guide (1.4 MB) - Page 109
connected for fax processing. See "Fax Menu" on page 84. 54 Std Network Software Error 54 Network x Software Error The printer has detected that a network port is installed but cannot establish communications with it. • It may be necessary to program new firmware in the network interface via the - Lexmark Optra T614 | Administrator's Guide (1.4 MB) - Page 110
available. However, any fax data stored in the fax buffer is printed. See "Fax Menu" on page 84. Data is sent to the printer across the serial port, but the serial port is disabled. When the serial error displays, the reporting of other serial errors is suppressed until the menus are entered or the - Lexmark Optra T614 | Administrator's Guide (1.4 MB) - Page 111
the parallel port. • Reset the printer. Press Menu> or or - Lexmark Optra T614 | Administrator's Guide (1.4 MB) - Page 112
Disk 62 Disk Full 63 Unformatted Disk 70 - 79 messages 80 Scheduled Maintenance 81 Engine Code CRC Failure 88 Toner Low Meaning and required action The printer detects a defective hard disk. This message displays when you turn the printer on, or during hard disk format or write operations. Press Go - Lexmark Optra T614 | Administrator's Guide (1.4 MB) - Page 113
page will print. The printer detects a paper jam under the print cartridge and further back in the printer. Open the upper front door, remove the print cartridge, and gently remove the jammed print material. Reinstall the cartridge and close the upper front door. Refer to the User's Guide for more - Lexmark Optra T614 | Administrator's Guide (1.4 MB) - Page 114
999 Service messages Meaning and required action The printer detects a paper jam in the multipurpose feeder. If the print material is visible from the front of the multipurpose feeder, pull it out gently. If only a small portion is visible, open the upper front door, remove the print cartridge, and - Lexmark Optra T614 | Administrator's Guide (1.4 MB) - Page 115
size and type print material in the paper source. The printer automatically clears the message and continues printing the job. • Press Select to clear the message and continue printing. • Cancel the current job. Press Menu> or or - Lexmark Optra T614 | Administrator's Guide (1.4 MB) - Page 116
of a hardware failure, turn the printer off and back on. If the error recurs, turn the printer off, remove the optional device, and call for service. The upper front door is open or the print cartridge is not installed. Close the door or install the print cartridge, then close the door. The duplex - Lexmark Optra T614 | Administrator's Guide (1.4 MB) - Page 117
digit Personal Identification Number (PIN) associated with the CONFIDENTIAL JOB menu item. Use the printer operator panel buttons to enter the number. Refer to the User's Guide for more details. The printer is trying to feed print material from a paper source it detects is empty. Line 1 displays the - Lexmark Optra T614 | Administrator's Guide (1.4 MB) - Page 118
of print materials in trays 1 - 5, multipurpose feeder, or envelope feeder. • Cancel the current job. Press Menu> or or or or - Lexmark Optra T614 | Administrator's Guide (1.4 MB) - Page 119
: • Insert the paper tray to clear the message and continue printing. • Cancel the current job. Press Menu> or or or or - Lexmark Optra T614 | Administrator's Guide (1.4 MB) - Page 120
the message and continue printing. • Cancel the current job. Press Menu> or or or or - Lexmark Optra T614 | Administrator's Guide (1.4 MB) - Page 121
All Output Bins Remove Paper Meaning and required action The printer has detected all output bins are full because all the bins are linked together as one bin. Remove the print material from all output bins and press Go to continue printing. The printer has detected all output - Lexmark Optra T614 | Administrator's Guide (1.4 MB) - Page 122
the print cartridge, fuser assembly, charge roll, and transfer roll. Replacement of these items should be done at regular intervals to maintain top performance, optimize print quality, and avoid printing problems. For your convenience, Lexmark offers a maintenance kit that contains these parts. See - Lexmark Optra T614 | Administrator's Guide (1.4 MB) - Page 123
used print cartridge. 2 Clean the printer. 3 Install the new print cartridge. 4 Replace the fuser cleaner if you are printing special label applications. 5 Follow the instructions on the new print cartridge box to return the used print cartridge to Lexmark for recycling. When you return a used print - Lexmark Optra T614 | Administrator's Guide (1.4 MB) - Page 124
charge roll kit when toner fog or background shading appears on printed pages. See page 129 for ordering a charge roll. Complete the following steps to replace the charge roll. Refer to the documentation that comes with the charge roll for detailed installation information. 1 Turn the printer off - Lexmark Optra T614 | Administrator's Guide (1.4 MB) - Page 125
should order a new transfer roll when light print, toner fog or background shading appears on printed pages. See page 129 for ordering a installation information. 1 Turn the printer off and unplug the printer power cord. 2 Open the front doors and remove the print cartridge. 3 Remove the old transfer - Lexmark Optra T614 | Administrator's Guide (1.4 MB) - Page 126
or Canada, call 1-800-438-2468 for information about Lexmark Authorized Supplies Dealers in your area. In other countries, contact the place where you bought your printer. You should order a new fuser assembly when toner fog or background shading appears on printed pages. See page 129 for ordering - Lexmark Optra T614 | Administrator's Guide (1.4 MB) - Page 127
fuser assembly, the charge roll, and the transfer roll. See the following table for the maintenance kit part number for your specific printer. Description Volts/Watts Maintenance kit for Optra T616(n) and T614(n) 220V, 875W Maintenance kit for Optra T612(n) and T610(n) 220V, 550W Maintenance kit - Lexmark Optra T614 | Administrator's Guide (1.4 MB) - Page 128
your printer: Print cartridge part numbers* Optra T print cartridge average yield*** Print coverage (approximate) 12A5840 10,000 pages 5% 12A5845 25,000 pages 5% 12A5849 (special label cartridge, is 25,000 pages 5% shipped with a label fuser cleaner**) * Sold at a special price with - Lexmark Optra T614 | Administrator's Guide (1.4 MB) - Page 129
kit, use Lexmark part number 99A1017. Transfer roll To order a transfer roll kit, use Lexmark part number 99A1015. Fuser assembly See the following table for the fuser assembly part number for your specific printer. Description Volts/Watts Part number Fuser assembly for Optra T612(n) and T610 - Lexmark Optra T614 | Administrator's Guide (1.4 MB) - Page 130
temperature • Direct sunlight • Dusty places • A car for a long period of time • An environment where corrosive gases are present • An environment with salty air Maintaining Your Printer 130 - Lexmark Optra T614 | Administrator's Guide (1.4 MB) - Page 131
on. This often fixes the problem. • Your printer driver settings are correct. If the problem persists, click the appropriate text below for more information: "Display problems" on page 132. "Printing problems" on page 133. "Print quality problems" on page 135. "Option problems" on page 139. "Network - Lexmark Optra T614 | Administrator's Guide (1.4 MB) - Page 132
display, turn the printer off and call the Lexmark Customer Support Center. Settings in the software application, the printer driver, or the printer utilities are overriding the settings in the operator panel. • Change the menu settings from the printer driver, the printer utilities, or the software - Lexmark Optra T614 | Administrator's Guide (1.4 MB) - Page 133
, baud, parity, and data bit settings. The settings on the printer and on the host computer should match. Connected to the USB port, but Make sure you are using Windows 98 or another USB-capable operating system supported by Lexmark. the printer will not print. Solving Printer Problems 133 - Lexmark Optra T614 | Administrator's Guide (1.4 MB) - Page 134
Problem Action Print material misfeeds or multiple feeds occur. • Make sure the print material you are using meets the specifications for your printer. Refer to the User's Guide for more details. • Flex print material before loading it in any of the paper sources. • Make sure the print material - Lexmark Optra T614 | Administrator's Guide (1.4 MB) - Page 135
the PAPER WEIGHT and PAPER TEXTURE settings in the PAPER MENU. See "PAPER TYPE" on page 17. • Verify that the print material is within the printer specifications. Refer to the User's Guide for more details. • If the problem continues, call the Lexmark Customer Support Center. Toner appears on - Lexmark Optra T614 | Administrator's Guide (1.4 MB) - Page 136
appear on the page. • The toner may be low. Remove the cartridge. To utilize the remaining toner, shake the cartridge gently. Reinstall the same print cartridge. • If you are using pre-printed forms, make sure the ink can withstand temperatures of 212°C (414°F). Solving Printer Problems 136 - Lexmark Optra T614 | Administrator's Guide (1.4 MB) - Page 137
edges. • Change the Print Resolution setting in the QUALITY MENU to 600 dpi or 1200 dpi. See "Print Resolution" on page 44. • Turn PQET in the QUALITY MENU to On. See "PQET" on page 45. • If you are using downloaded fonts, verify that the fonts are supported by the printer, the host computer, and - Lexmark Optra T614 | Administrator's Guide (1.4 MB) - Page 138
Problem Part or all of the page is printed in black. Action • Check the print cartridge to see if it is installed correctly. • If the charge roll has been replaced, verify that it is installed correctly. The job prints, but the left and • Make sure the PAPER SIZE setting in the PAPER MENU is - Lexmark Optra T614 | Administrator's Guide (1.4 MB) - Page 139
the envelopes are loaded correctly. Refer to the User's Guide for more details. Duplex unit: • Make sure the connection between the duplex unit and the printer is secure. If the duplex unit is listed on the menu settings page, but print material jams when it enters or exits the duplex unit, the - Lexmark Optra T614 | Administrator's Guide (1.4 MB) - Page 140
Problem Option does not operate correctly after it is installed. Action Output expander: Make sure the connection between each output expander or the connection between the output expander and the printer is secure. If the output expander is listed on the menu settings page, but print material jams - Lexmark Optra T614 | Administrator's Guide (1.4 MB) - Page 141
sure no objects are placed between the two infrared ports. USB/Parallel interface: • Make sure the USB/Parallel interface card is securely connected to the printer system board. • Make sure you are using the correct cable and that it is securely connected. Solving Printer Problems 141 - Lexmark Optra T614 | Administrator's Guide (1.4 MB) - Page 142
, call your service representative. Problem Job did not print or incorrect characters printed. Action If you are using either a Lexmark internal print server or external print server, verify that it is set up properly and the network cable is connected. Note: Refer to the Drivers, MarkVision, and - Lexmark Optra T614 | Administrator's Guide (1.4 MB) - Page 143
installed an optional interface card, refer to the Setup to the printer? Guide. Where are the printer escape Refer to the Technical Reference available on the Drivers, MarkVision and Utilities CD or at the Lexmark Web codes listed? site, http://www.lexmark.com. Solving Printer Problems 143 - Lexmark Optra T614 | Administrator's Guide (1.4 MB) - Page 144
Keep the following guidelines in mind when removing any options: • Remove all print material from any option before removing it. • To remove any paper option, you must first remove any options or the printer installed above it. • All options should be removed individually; never attempt to - Lexmark Optra T614 | Administrator's Guide (1.4 MB) - Page 145
cover to the printer or topmost output option when you finish removing output options. In addition, it may be necessary to remove the paper bail from the top cover, depending on the type of output option to which it is attached. Refer to the Setup Guide for more - Lexmark Optra T614 | Administrator's Guide (1.4 MB) - Page 146
b Pull the tray straight out toward you to remove the upper tabs from the output expander slots. 3 The output option may have a wire paper bail attached. If so, remove the tips of the paper bail from the ends of the plastic bracket on the bottom of the output option. Refer to the Setup - Lexmark Optra T614 | Administrator's Guide (1.4 MB) - Page 147
lift the option straight up until it is completely disconnected from the option below it or from the printer. Set it aside. WARNING:The edges of the mounting brackets could damage tabletops or fabrics. 5 Refer to the Setup Guide when you are ready to re-attach options. Removing Options 147 - Lexmark Optra T614 | Administrator's Guide (1.4 MB) - Page 148
Removing the envelope feeder 1 Remove envelopes from the envelope feeder. Removing Options 148 - Lexmark Optra T614 | Administrator's Guide (1.4 MB) - Page 149
2 Push the envelope support to the closed position. 3 Open the upper front door. Removing Options 4 Pull the envelope feeder up slightly and straight out of the printer. Set it aside. 5 Close both front doors. 6 Refer to the Setup Guide when you are ready to re-attach options. 149 - Lexmark Optra T614 | Administrator's Guide (1.4 MB) - Page 150
sure your fingers are not under the printer when you set it down. Use the handholds on the printer or ask someone to help you lift it. 1 Ask someone to help you lift the printer by the handholds and set it aside. 2 Refer to the Setup Guide when you are ready to re-attach options - Lexmark Optra T614 | Administrator's Guide (1.4 MB) - Page 151
Removing a paper tray or duplex unit 1 Carefully lift the option straight up until it is completely disconnected from the option below it. Set it aside. 2 Refer to the Setup Guide when you are ready to re-attach options. Removing Options 151 - Lexmark Optra T614 | Administrator's Guide (1.4 MB) - Page 152
. If you did not save the packaging, wrap it in paper and store it in a box. 5 If you need to install a replacement memory option or other option on the system board, refer to the Setup Guide. 6 Refer to the Setup Guide for instructions on closing the printer system board. Removing Options 152 - Lexmark Optra T614 | Administrator's Guide (1.4 MB) - Page 153
in its original packaging. If you did not save the packaging, wrap the card in paper and store it in a box. 4 If you need to install another option on the system board, refer to the Setup Guide. 5 Refer to the Setup Guide for instructions on closing the printer system board. Removing Options 153 - Lexmark Optra T614 | Administrator's Guide (1.4 MB) - Page 154
. Well-chosen typefaces make a document easier to read. The printer has numerous resident fonts in PCL 6 and PostScript 3 emulations. Weight refers to the thickness of the lines that form the characters. Thicker lines result in darker characters. Some words commonly used to describe the weight - Lexmark Optra T614 | Administrator's Guide (1.4 MB) - Page 155
and extended are three common styles that modify the character widths. Some fonts combine several weight and style modifications; for example, Helvetica Narrow Bold Italic. A group of several weight and style variations of a single typeface is called a typeface family. Most typeface families have - Lexmark Optra T614 | Administrator's Guide (1.4 MB) - Page 156
space fonts, each character has the same width. Pitch is used to specify the size of fixed space fonts. It is a measure of the number of characters that will print in one horizontal inch of type. For example, all 10-pitch fonts print 10 characters per inch (cpi) and all 12-pitch fonts - Lexmark Optra T614 | Administrator's Guide (1.4 MB) - Page 157
Understanding Fonts illustration shows samples of a font printed in different point sizes: 48 point 36 point 24 of the lowest character in the font. Due to the definition of point size, different fonts printed at the same point size may appear quite different in size. This is because there are other - Lexmark Optra T614 | Administrator's Guide (1.4 MB) - Page 158
when you turn off or reset the printer. Scalable fonts provide the flexibility of printing in many different point sizes. Your printer uses different scalable font formats for downloading fonts to the printer. PCL 6 emulation uses Intellifont and TrueType scalable fonts. PostScript 3 emulation - Lexmark Optra T614 | Administrator's Guide (1.4 MB) - Page 159
languages. The following tables list all the fonts resident in your printer. See page 172 for instructions on how to print samples of the fonts. You can select the resident fonts from your software application, or from the operator panel if you are using PCL 6 emulation. Understanding Fonts 159 - Lexmark Optra T614 | Administrator's Guide (1.4 MB) - Page 160
Understanding Fonts Resident Scalable Fonts PCL 6 emulation PostScript 3 emulation Albertus Medium AlbertusMT AlbertusMT-Italic AlbertusMT-Light Albertus Extra Bold Antique Olive AntiqueOlive-Roman Antique Olive Italic AntiqueOlive-Italic Antique Olive Bold AntiqueOlive-Bold - Lexmark Optra T614 | Administrator's Guide (1.4 MB) - Page 161
Understanding Fonts Resident Scalable Fonts (continued) PCL 6 emulation PostScript 3 emulation Clarendon Condensed Bold Coronet Coronet-Regular CourierPS Courier CourierPS Oblique Courier-Oblique CourierPS Bold Courier-Bold CourierPS Bold Italic Courier-BoldOblique CG Omega CG Omega - Lexmark Optra T614 | Administrator's Guide (1.4 MB) - Page 162
Understanding Fonts Resident Scalable Fonts (continued) PCL 6 emulation PostScript 3 emulation Helvetica Bold Helvetica-Bold Helvetica Bold Italic Helvetica-BoldOblique Helvetica Narrow Helvetica-Narrow Helvetica Narrow Italic Helvetica-Narrow-Oblique Helvetica Narrow Bold Helvetica- - Lexmark Optra T614 | Administrator's Guide (1.4 MB) - Page 163
Understanding Fonts Resident Scalable Fonts (continued) PCL 6 emulation PostScript 3 emulation Letter Gothic Bold LetterGothic-Bold LetterGothic-BoldSlanted Marigold Marigold Century Schoolbook Roman NewCenturySchlbk-Roman Century Schoolbook Italic NewCenturySchlbk-Italic Century - Lexmark Optra T614 | Administrator's Guide (1.4 MB) - Page 164
Understanding Fonts Resident Scalable Fonts (continued) PCL 6 emulation PostScript 3 emulation Times Bold Italic Times-BoldItalic Times New Roman TimesNewRomanPSMT Times New Roman Italic TimesNewRomanPS-ItalicMT Times New Roman Bold TimesNewRomanPS-BoldMT Times New Roman Bold Italic - Lexmark Optra T614 | Administrator's Guide (1.4 MB) - Page 165
Understanding Fonts Resident Scalable Fonts (continued) PCL 6 emulation PostScript 3 emulation Univers-Light Univers-LightOblique Clarendon Clarendon-Light Clarendon-Bold Helvetica-Condensed Helvetica-Condensed-Bold Helvetica-Condensed-BoldObl Helvetica-Condensed-Oblique StempelGaramond - Lexmark Optra T614 | Administrator's Guide (1.4 MB) - Page 166
Understanding Fonts Resident Scalable Fonts (continued) PCL 6 emulation PostScript 3 emulation MonaLisa-Recut Candid Bodoni Bodoni-Italic Bodoni-Bold Bodoni-BoldItalic Bodoni-Poster Bodoni-PosterCompressed CooperBlack CooperBlack-Italic Copperplate-ThirtyTwoBC Copperplate- - Lexmark Optra T614 | Administrator's Guide (1.4 MB) - Page 167
Understanding Fonts Resident Scalable Fonts (continued) PCL 6 emulation PostScript 3 emulation GillSans-Condensed GillSans-BoldCondensed GillSans-Light GillSans-LightItalic GillSans-ExtraBold Goudy Goudy-Italic Goudy-Bold Goudy-BoldItalic Goudy-ExtraBold HoeflerText-Regular - Lexmark Optra T614 | Administrator's Guide (1.4 MB) - Page 168
Resident Scalable Fonts (continued) PCL 6 emulation PostScript 3 emulation LubalinGraph-BookOblique LubalinGraph-Demi LubalinGraph-DemiOblique PCL 6 emulation Line Printer 16 POSTNET Barcode PostScript 3 emulation Understanding Fonts 168 - Lexmark Optra T614 | Administrator's Guide (1.4 MB) - Page 169
, a symbol set also defines which character will print for each key on the keyboard (or more specifically, for each code point). Some applications require different characters at some code points. To support multiple applications and languages, your printer has 83 symbol sets for the resident PCL - Lexmark Optra T614 | Administrator's Guide (1.4 MB) - Page 170
-15 Latin 9 PC-8 Bulgarian PC-8 Danish/Norwegian (437N) PC-8 Greek Alternate (437G) PC-8 Turkish (437T) PC-8 Latin/Greek PC-8 PC Nova PC-8 Polish Mazovia PC-8 Code Page 437 PC-775 Baltic (PC-8 Latin 6) PC-850 Multilingual PC-851 Greece PC-852 Latin 2 PC-869 Greece PC-911 Katakana PC-1004 OS - Lexmark Optra T614 | Administrator's Guide (1.4 MB) - Page 171
changes, the printer resets, or the printer is turned off. MarkVision includes a remote management function that lets you manipulate the font files you have downloaded to flash memory or hard disk. See the Drivers, MarkVision and Utilities CD for more informa- tion about MarkVision. Understanding - Lexmark Optra T614 | Administrator's Guide (1.4 MB) - Page 172
1 Make sure the printer power is on and the Ready status message displays. 2 Press Menu> or until you see UTILITIES MENU. 4 Press Select. 5 Press Menu> until Print Fonts displays. 6 Press Select. 7 Press Menu> or - Lexmark Optra T614 | Administrator's Guide (1.4 MB) - Page 173
20.4) 45 (20.4) 52 3 (23.6) 44.5 (20.2) 45 (20.4) 1 Weight of printer includes print cartridge. 2 Height of printer with included 500-sheet drawer. 3 Weight of printer with included 500-sheet drawer. 43.5 (19.7) 43.5 (19.7) Duty cycle Optra T616(n) Up to 200,000 pages per month Maximum Duty - Lexmark Optra T614 | Administrator's Guide (1.4 MB) - Page 174
technical inaccuracies or typographical errors. Changes are periodically used instead. Evaluation and verification of operation in conjunction with other products, programs, or services, except those expressly designated by the manufacturer, are the user's responsibility. © Copyright 1999 Lexmark
-
 1
1 -
 2
2 -
 3
3 -
 4
4 -
 5
5 -
 6
6 -
 7
7 -
8
-
9
-
10
-
11
-
12
-
13
-
14
-
15
-
16
-
17
-
18
-
19
-
20
-
21
-
22
-
23
-
24
-
25
-
26
-
27
-
28
-
29
-
30
-
31
-
32
-
33
-
34
-
35
-
36
-
37
-
38
-
39
-
40
-
41
-
42
-
43
-
44
-
45
-
46
-
47
-
48
-
49
-
50
-
51
-
52
-
53
-
54
-
55
-
56
-
57
-
58
-
59
-
60
-
61
-
62
-
63
-
64
-
65
-
66
-
67
-
68
-
69
-
70
-
71
-
72
-
73
-
74
-
75
-
76
-
77
-
78
-
79
-
80
-
81
-
82
-
83
-
84
-
85
-
86
-
87
-
88
-
89
-
90
-
91
-
92
-
93
-
94
-
95
-
96
-
97
-
98
-
99
-
100
-
101
-
102
-
103
-
104
-
105
-
106
-
107
-
108
-
109
-
110
-
111
-
112
-
113
-
114
-
115
-
116
-
117
-
118
-
119
-
120
-
121
-
122
-
123
-
124
-
125
-
126
-
127
-
128
-
129
-
130
-
131
-
132
-
133
-
134
-
135
-
136
-
137
-
138
-
139
-
140
-
141
-
142
-
143
-
144
-
145
-
146
-
147
-
148
-
149
-
150
-
151
-
152
-
153
-
154
-
155
-
156
-
157
-
158
-
159
-
160
-
161
-
162
-
163
-
164
-
165
-
166
-
167
-
168
-
169
-
170
-
171
-
172
-
173
-
174
 |
 |

1
Administrator’s Guide
Administrator’s Guide
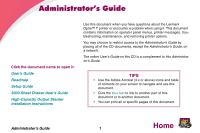
Use this document when you have questions about the Lexmark
Optra™ T printer or encounter a problem when using it. This document
contains information on operator panel menus, printer messages, trou-
bleshooting, maintenance, and removing printer options.
You may choose to restrict access to the
Administrator’s Guide
by
placing all of the CD documents, except the
Administrator’s Guide
, on
a network.
The online
User’s Guide
on this CD is a complement to this
Administra-
tor’s Guide
.
Click the document name to open it:
User’s Guide
Roadmap
Setup Guide
2000-Sheet Drawer User’s Guide
High-Capacity Output Stacker
Installation Instructions
Home
TIPS
•
Use the Adobe Acrobat (3.x or above) icons and table
of contents on your screen to navigate and use this
document.
•
Click the
blue text
to link to another part of this
document or to another document.
•
You can print all or specific pages of this document.