Lexmark T620 2000-Sheet Drawer User's Guide (2.1 MB) - Page 12
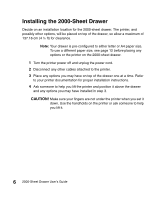
Installing the 2000-Sheet Drawer
 |
View all Lexmark T620 manuals
Add to My Manuals
Save this manual to your list of manuals |
Page 12 highlights
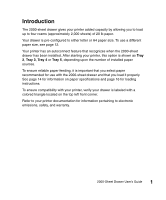
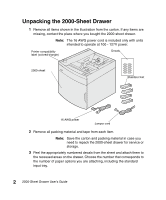
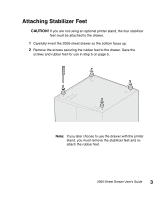
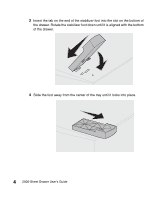
Installing the 2000-Sheet Drawer Decide on an installation location for the 2000-sheet drawer. The printer, and possibly other options, will be placed on top of the drawer, so allow a maximum of 137.16 cm (4 ½ ft) for clearance. Note: Your drawer is pre-configured to either letter or A4 paper size. To use a different paper size, see page 12 before placing any options or the printer on the 2000-sheet drawer. 1 Turn the printer power off and unplug the power cord. 2 Disconnect any other cables attached to the printer. 3 Place any options you may have on top of the drawer one at a time. Refer to your printer documentation for proper installation instructions. 4 Ask someone to help you lift the printer and position it above the drawer and any options you may have installed in step 3. CAUTION! Make sure your fingers are not under the printer when you set it down. Use the handholds on the printer or ask someone to help you lift it. 6 2000-Sheet Drawer User's Guide
-
 1
1 -
2
-
3
-
4
-
5
-
6
-
 7
7 -
 8
8 -
 9
9 -
 10
10 -
 11
11 -
 12
12 -
 13
13 -
 14
14 -
 15
15 -
 16
16 -
 17
17 -
18
-
19
-
20
-
21
-
22
-
23
-
24
-
25
-
26
-
27
-
28
-
29
-
30
-
31
-
32
-
33
-
34
-
35
-
36
-
37
-
38
-
39
-
40
-
41
-
42
-
43
-
44
-
45
-
46
-
47
-
48
-
49
-
50
-
51
-
52
-
53
-
54
-
55
-
56
-
57
-
58
-
59
-
60
-
61
-
62
-
63
-
64
-
65
-
66
-
67
-
68
-
69
-
70
-
71
-
72
-
73
-
74
-
75
-
76
-
77
-
78
-
79
-
80
-
81
-
82
-
83
-
84
-
85
-
86
-
87
-
88
-
89
-
90
-
91
-
92
-
93
-
94
-
95
-
96
-
97
-
98
-
99
-
100
-
101
-
102
-
103
-
104
-
105
-
106
-
107
-
108
-
109
-
110
-
111
-
112
-
113
-
114
-
115
-
116
-
117
-
118
-
119
-
120
-
121
-
122
-
123
-
124
-
125
-
126
-
127
-
128
-
129
-
130
-
131
-
132
-
133
-
134
-
135
-
136
-
137
-
138
-
139
-
140
-
141
-
142
-
143
-
144
-
145
-
146
-
147
-
148
-
149
-
150
-
151
-
152
-
153
-
154
-
155
-
156
-
157
-
158
-
159
-
160
-
161
-
162
-
163
-
164
-
165
-
166
-
167
-
168
-
169
-
170
-
171
-
172
-
173
-
174
-
175
-
176
-
177
-
178
-
179
-
180
-
181
-
182
-
183
-
184
-
185
-
186
-
187
-
188
-
189
-
190
-
191
-
192
-
193
-
194
-
195
-
196
-
197
-
198
-
199
-
200
-
201
-
202
-
203
-
204
-
205
-
206
-
207
-
208
-
209
-
210
-
211
-
212
-
213
-
214
-
215
-
216
 |
 |