Lexmark T620 2000-Sheet Drawer User's Guide (2.1 MB) - Page 8
Unpacking the 2000-Sheet Drawer - printer drawers
 |
View all Lexmark T620 manuals
Add to My Manuals
Save this manual to your list of manuals |
Page 8 highlights
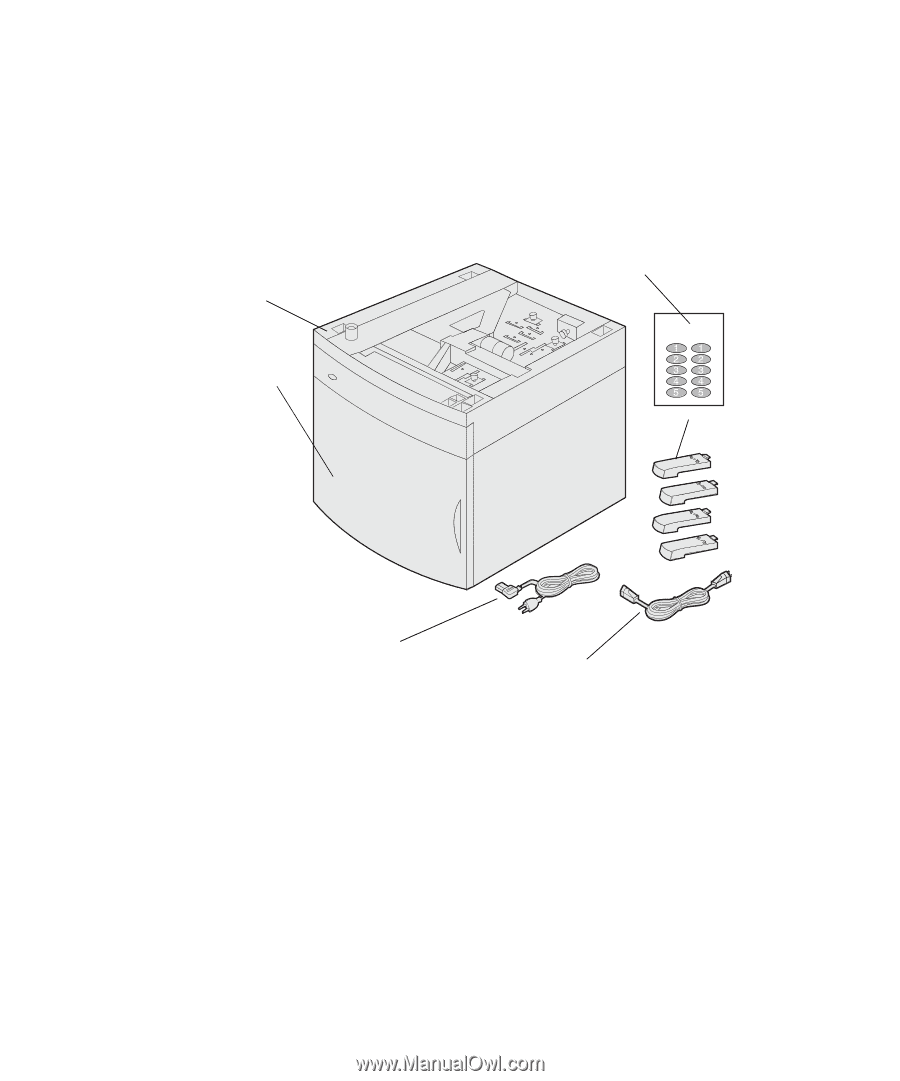
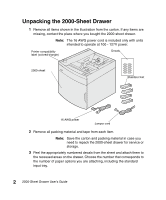
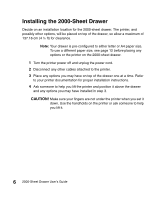
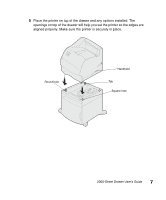
Unpacking the 2000-Sheet Drawer 1 Remove all items shown in the illustration from the carton. If any items are missing, contact the place where you bought the 2000-sheet drawer. Note: The 16 AWG power cord is included only with units intended to operate at 100 - 127V power. Printer compatibility label (colored triangle) Decals 2000-sheet Stabilizer feet 16 AWG power Jumper cord 2 Remove all packing material and tape from each item. Note: Save the carton and packing material in case you need to repack the 2000-sheet drawer for service or storage. 3 Peel the appropriately numbered decals from the sheet and attach them to the recessed areas on the drawer. Choose the number that corresponds to the number of paper options you are attaching, including the standard input tray. 2 2000-Sheet Drawer User's Guide
-
 1
1 -
2
-
 3
3 -
 4
4 -
 5
5 -
 6
6 -
 7
7 -
 8
8 -
 9
9 -
 10
10 -
 11
11 -
 12
12 -
 13
13 -
14
-
15
-
16
-
17
-
18
-
19
-
20
-
21
-
22
-
23
-
24
-
25
-
26
-
27
-
28
-
29
-
30
-
31
-
32
-
33
-
34
-
35
-
36
-
37
-
38
-
39
-
40
-
41
-
42
-
43
-
44
-
45
-
46
-
47
-
48
-
49
-
50
-
51
-
52
-
53
-
54
-
55
-
56
-
57
-
58
-
59
-
60
-
61
-
62
-
63
-
64
-
65
-
66
-
67
-
68
-
69
-
70
-
71
-
72
-
73
-
74
-
75
-
76
-
77
-
78
-
79
-
80
-
81
-
82
-
83
-
84
-
85
-
86
-
87
-
88
-
89
-
90
-
91
-
92
-
93
-
94
-
95
-
96
-
97
-
98
-
99
-
100
-
101
-
102
-
103
-
104
-
105
-
106
-
107
-
108
-
109
-
110
-
111
-
112
-
113
-
114
-
115
-
116
-
117
-
118
-
119
-
120
-
121
-
122
-
123
-
124
-
125
-
126
-
127
-
128
-
129
-
130
-
131
-
132
-
133
-
134
-
135
-
136
-
137
-
138
-
139
-
140
-
141
-
142
-
143
-
144
-
145
-
146
-
147
-
148
-
149
-
150
-
151
-
152
-
153
-
154
-
155
-
156
-
157
-
158
-
159
-
160
-
161
-
162
-
163
-
164
-
165
-
166
-
167
-
168
-
169
-
170
-
171
-
172
-
173
-
174
-
175
-
176
-
177
-
178
-
179
-
180
-
181
-
182
-
183
-
184
-
185
-
186
-
187
-
188
-
189
-
190
-
191
-
192
-
193
-
194
-
195
-
196
-
197
-
198
-
199
-
200
-
201
-
202
-
203
-
204
-
205
-
206
-
207
-
208
-
209
-
210
-
211
-
212
-
213
-
214
-
215
-
216
 |
 |