Lexmark X2580 Getting Started - Page 28
Copying, Copying using the control panel, Making a copy, Copying 4 x 6 photos
 |
View all Lexmark X2580 manuals
Add to My Manuals
Save this manual to your list of manuals |
Page 28 highlights
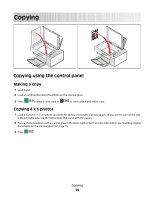
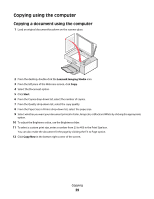
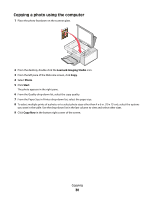
Copying Copying using the control panel Making a copy 1 Load paper. 2 Load an original document facedown on the scanner glass. 3 Press to start a color copy or to start a black-and-white copy. Copying 4 x 6 photos 1 Load a 4 x 6 (10 x 15 cm) photo card with the glossy or printable side facing you. (If you are not sure which side is the printable side, see the instructions that came with the paper.) 2 Place a photo facedown on the scanner glass in the lower right corner. For more information, see "Loading original documents on the scanner glass" on page 19. 3 Press . Copying 28
-
 1
1 -
2
-
3
-
4
-
5
-
6
-
7
-
8
-
9
-
10
-
11
-
12
-
13
-
14
-
15
-
16
-
17
-
18
-
19
-
20
-
21
-
22
-
 23
23 -
 24
24 -
 25
25 -
 26
26 -
 27
27 -
 28
28 -
 29
29 -
 30
30 -
 31
31 -
 32
32 -
 33
33 -
34
-
35
-
36
-
37
-
38
-
39
-
40
-
41
-
42
-
43
-
44
-
45
-
46
-
47
-
48
-
49
-
50
-
51
-
52
-
53
-
54
-
55
-
56
-
57
-
58
 |
 |

Copying
Copying using the control panel
Making a copy
1
Load paper.
2
Load an original document facedown on the scanner glass.
3
Press
to start a color copy or
to start a black-and-white copy.
Copying 4 x 6 photos
1
Load a 4 x 6 (10 x 15 cm) photo card with the glossy or printable side facing you. (If you are not sure which side
is the printable side, see the instructions that came with the paper.)
2
Place a photo facedown on the scanner glass in the lower right corner. For more information, see “Loading original
documents on the scanner glass” on page 19.
3
Press
.
Copying
28