Lexmark Z1420 Getting Started
Lexmark Z1420 - Single Function Wireless Inkjet Prin Manual
 |
UPC - 734646022750
View all Lexmark Z1420 manuals
Add to My Manuals
Save this manual to your list of manuals |
Lexmark Z1420 manual content summary:
- Lexmark Z1420 | Getting Started - Page 1
Started February 2007 www.lexmark.com Lexmark and Lexmark with diamond design are trademarks of Lexmark International, Inc., registered in the United States and/or other countries. All other trademarks are the property of their respective owners. © 2007 Lexmark International, Inc. All rights - Lexmark Z1420 | Getting Started - Page 2
a lightning storm. SAVE THESE INSTRUCTIONS. Operating system notice All features and functions are operating system-dependent. For complete descriptions: • Windows users-See the User's Guide. • Macintosh users-If your product supports Macintosh, see the Mac Help installed with the printer software. - Lexmark Z1420 | Getting Started - Page 3
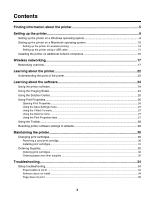
the printer 30 Changing print cartridges...30 Removing a used print cartridge...30 Installing print cartridges...31 Ordering Supplies...32 Ordering print cartridges...32 Ordering paper and other supplies ...32 Troubleshooting...34 Setup troubleshooting...34 Power button is not lit ...34 Software - Lexmark Z1420 | Getting Started - Page 4
after installation 49 Finding your MAC address...50 Resetting an internal wireless print server to factory default 50 Uninstalling and reinstalling the software 50 Advanced wireless setup 52 Adding a printer to an existing ad hoc wireless network 52 Creating an ad hoc wireless network 53 - Lexmark Z1420 | Getting Started - Page 5
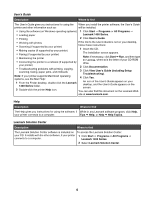
setting up hardware and software (on Windows operating systems) and some basic instructions for using the printer. You can find this document in the printer box or on the Lexmark Web site at www.lexmark.com. Note: If your printer supports Macintosh operating systems, see the Mac Help: 1 From the - Lexmark Z1420 | Getting Started - Page 6
) The installation screen appears. • Maintaining the printer Note: If necessary, click Start Œ Run, and then type D:\setup, where D is the letter of your CD-ROM • Connecting the printer to a network (if supported by drive. your printer) 2 Click Documentation. • Troubleshooting problems with - Lexmark Z1420 | Getting Started - Page 7
free of defects in printer, or set forth at printer. materials and workmanship for a www.lexmark.com. period of 12 months after the 1 Click CUSTOMER SUPPORT. original date of purchase. 2 Click Warranty Information. 3 From the Statement of Limited Warranty section, click Inkjet & All-In-One - Lexmark Z1420 | Getting Started - Page 8
Record the following information (located on the store receipt and the back of the printer), and have it ready when you contact us so that we may serve you faster: • Machine Type number • Serial number • Date purchased • Store where purchased 8 - Lexmark Z1420 | Getting Started - Page 9
Item SSID (name of your network) Security key (password) Description 4 Follow the instructions in the following sections to set up the printer: • For printing on a Windows operating system using a wireless connection or USB cable, see "Setting up the printer on a Windows operating system" on page - Lexmark Z1420 | Getting Started - Page 10
. Note: If the install screen does not appear automatically, click Start ΠRun, and then type D:\setup.exe, where D is the letter of your CD-ROM drive. 3 Follow the instructions on the computer screen to set up the printer. Your security software may notify you that Lexmark software is trying to - Lexmark Z1420 | Getting Started - Page 11
to be sure that all tape and packing material is completely removed from the printer. 3 Raise the paper support, and extend the paper exit tray. 4 Load paper, and adjust the paper guide. 5 Raise the antenna of the wireless print server. Note: Make sure you remove any tape on the antenna first. 11 - Lexmark Z1420 | Getting Started - Page 12
6 Insert the power supply. 7 Connect the power cord. 8 Make sure the power is on. 2 1 9 Open the access cover. 12 - Lexmark Z1420 | Getting Started - Page 13
Insert the cartridges, and then close the cartridge carrier lids. Note: The number of cartridges may vary by model. 13 Close the access cover. 1 2 14 To set up the printer on a Macintosh computer: • For printing using a wireless connection, see "Setting up the printer for wireless printing " on - Lexmark Z1420 | Getting Started - Page 14
the initial setup of the printer. For more information, see "Setting up the printer on a Macintosh operating system" on page 10. • If you previously set up the printer with a computer and want to set it up on another computer on your wireless network, see "Installing the printer on additional - Lexmark Z1420 | Getting Started - Page 15
password for your wireless network security. • Your connection to the Internet will be restored when you reconnect to your original network. 17 Insert the CD for Macintosh. 18 From the Finder desktop, double-click the Lexmark 1400 Series Installer icon 19 Double-click the Install icon. 20 Click - Lexmark Z1420 | Getting Started - Page 16
do not need to repeat the connection steps for each computer you want to print to the printer. • The printer should appear as a highlighted printer in the installation. If multiple printers appear in the list, make sure you select the printer with the correct IP address/MAC address. If you need help - Lexmark Z1420 | Getting Started - Page 17
servers built in or installed in them so that they can communicate over a network. Lexmark internal print servers are devices made by Lexmark to enable Lexmark printers to be connected to wired or wireless networks. Scenario 1: Laptop and printer connected wirelessly with Internet • A computer is - Lexmark Z1420 | Getting Started - Page 18
, or switch. • The network is connected to the Internet through a DSL or a cable modem. Scenario 4: Computer, laptop, and printer connected wirelessly without Internet • A computer, a laptop, and a printer are connected wirelessly to a wireless access point. • The network has no connection to the - Lexmark Z1420 | Getting Started - Page 19
if they have unique and valid IP addresses. A unique IP address means no two devices on the same network have the same IP address. You can locate the printer IP address by printing out the network setup page. How to locate the IP address of a computer Windows users only 1 Click Start ΠPrograms or - Lexmark Z1420 | Getting Started - Page 20
. If the printer does not respond: a Print a setup page. b Check that the printer has an IP address. c Under Network Card, check that the Status is listed as Connected. d Check that the computer has an IP address. e For additional information, refer to the "Wireless troubleshooting" section of - Lexmark Z1420 | Getting Started - Page 21
setup page. b Check that the printer has an IP address. c Under Network Card, check that the Status is listed as Connected. d Check that the computer has an IP address. e For additional information, refer to the "Wireless troubleshooting" section of the "Troubleshooting" chapter. Types of wireless - Lexmark Z1420 | Getting Started - Page 22
• Troubleshoot. 3 Access cover • Install or change the print cartridges. • Clear paper jams. 4 Wi-Fi indicator Check wireless status: • Off indicates that the printer is not turned on. • Orange - indicates that the printer is ready to be configured for wireless printing but is not connected to - Lexmark Z1420 | Getting Started - Page 23
a power source using the power cord. 1 Plug the power cord all the way into the power supply on the printer. 2 Plug the power cord into an electrical outlet that other electrical devices have been using. 2 1 3 If the light is not on, press . 3 Internal wireless adapter Connect to a wireless network - Lexmark Z1420 | Getting Started - Page 24
, double-click the Lexmark 1400 Series folder. 2 Double-click the printer Help icon. Using the printer software Use this software Imaging Studio Solution Center Print Properties Toolbar To Print documents or photos. Find troubleshooting, maintenance, and cartridge-ordering information. Select - Lexmark Z1420 | Getting Started - Page 25
of the Welcome screen: Click To Setup and diagnose printer • Check ink levels. • Order print cartridges. • Find maintenance information. • Select other Solution Center tabs for more information, including how to change printer settings and troubleshooting. Using the Solution Center The Solution - Lexmark Z1420 | Getting Started - Page 26
fix blurry edges. • Troubleshoot other ink problems. Learn how to contact us by telephone or on the World Wide Web. Advanced • Change the appearance of the Printing Status window. • Download the newest software files. • Turn printing voice notification on or off. • Change network printing settings - Lexmark Z1420 | Getting Started - Page 27
on the three main tabs of the Print Properties software: Quality/Copies, Paper Setup, and Print Layout. Tab Quality/Copies Paper Setup Print Layout Options • Select a Quality/Speed setting. • Select a Paper Type. • Customize how the printer prints several copies of a single print job: collated or - Lexmark Z1420 | Getting Started - Page 28
the Toolbar The Toolbar lets you create printer-friendly versions of Web pages. Note: The Toolbar launches automatically when you browse the Web using Microsoft Windows Internet Explorer version 5.5 or later. Click Normal To • Select Page Setup options. • Select Options to customize the toolbar - Lexmark Z1420 | Getting Started - Page 29
Click Preview To Preview a Web page before printing. Resetting printer software settings to defaults Windows 2000, Windows XP, or Windows Vista users: 1 Click Start ΠSettings ΠPrinters or Printers and Faxes. 2 Right-click the Lexmark 1400 Series icon. 3 Click Printing Preferences. 4 Click the - Lexmark Z1420 | Getting Started - Page 30
3 Press down on the cartridge carrier lever to raise the cartridge carrier lid. 4 Remove the used print cartridge. If the cartridge you removed is not empty and you want to use it later, see "Preserving the print cartridges" in the "Maintaining the printer" chapter of the User's Guide on the CD. 30 - Lexmark Z1420 | Getting Started - Page 31
Installing print cartridges 1 If you are installing new print cartridges, remove the sticker and tape from the back and bottom of the cartridges. 1 2 Warning: Do not touch the gold contact area on the back or the metal nozzles on the bottom of the cartridges. 2 Press down on the cartridge carrier - Lexmark Z1420 | Getting Started - Page 32
yield value in accordance with ISO/IEC 24711 (FDIS). 2 Licensed Return Program Cartridge Lexmark 1480 models Item Color cartridge Black cartridge Photo cartridge Part number 2 3 31 Ordering paper and other supplies To order supplies or to locate a dealer near you, visit our Web site at www - Lexmark Z1420 | Getting Started - Page 33
vary by country or region. Paper size • Letter • A4 • 4 x 6 in. • 10 x 15 cm • Letter • A4 • 4 x 6 in. • 10 x 15 cm •L For information on how to purchase Lexmark Premium Photo Paper, Lexmark Photo Paper, or Lexmark PerfectFinish Photo Paper in your country or region, go to www - Lexmark Z1420 | Getting Started - Page 34
with Service Pack 3 or later • Windows XP • Windows Vista • Mac OS X Check your system requirements Check that your computer meets the minimum system requirements listed on the printer box. Check your USB connection Follow these steps if you are not using the printer on a wireless network: 1 Check - Lexmark Z1420 | Getting Started - Page 35
, see "Error messages" in the "Troubleshooting" chapter of the User's Guide on the CD. Check power If the light is not on, see "Power button is not lit" on page 34. Reload paper Remove and then load paper. Check ink Check the ink levels, and install new print cartridges if necessary. Check print - Lexmark Z1420 | Getting Started - Page 36
Plug the power cord into the wall outlet. 6 Press to turn the printer on. Uninstall and reinstall software Uninstall the printer software, and then reinstall it. For more information, see "Uninstalling and reinstalling the software" on page 50. Wireless troubleshooting Printing a network setup page - Lexmark Z1420 | Getting Started - Page 37
The SSID of the printer must match the SSID of the wireless network. Windows users only 1 If you do not know the SSID of the network, use the following steps to obtain it before rerunning the Wireless Setup Utility. a Enter the IP address of your wireless access point (wireless router) into the Web - Lexmark Z1420 | Getting Started - Page 38
the USB symbol . 3 Firmly plug the square end of the USB cable into the USB port on the back of the printer. 4 Cancel the software installation. 5 Click Start ΠPrograms or All Programs ΠLexmark 1400 Series. 6 Click Wireless Setup. 7 Follow the prompts on the computer screen to reinstall the - Lexmark Z1420 | Getting Started - Page 39
help finding the MAC address, see "Finding your MAC address" on page 50. Wi-Fi indicator light is blinking orange during installation When the Wi-Fi indicator light is blinking orange, it indicates that the printer has been set up for wireless networking but cannot connect to the network for which - Lexmark Z1420 | Getting Started - Page 40
the MAC address for the printer to your network. If you need help finding the MAC address, see "Finding your MAC address" on page 50. Ping the wireless access point (wireless router) to make sure the network is working Windows users only 1 If you do not already know it, find the IP address of - Lexmark Z1420 | Getting Started - Page 41
system or wireless network software. 2 Ping the wireless access point (wireless router). a From the Applications folder, click the Utilities folder. b Double-click the Network Utility application. c Type the IP address of the wireless access point (wireless router) in the network address field. For - Lexmark Z1420 | Getting Started - Page 42
them on the network. Windows users only 1 Click Start ΠPrograms or All Programs ΠLexmark 1400 Series. 2 Click Wireless Setup. Note: You may be prompted to connect the printer to the computer again using the installation cable as part of the setup process. 3 Follow the instructions on the computer - Lexmark Z1420 | Getting Started - Page 43
your computer. 3 Follow the instructions on the screen. Note: You must install the printer driver on each computer that uses the network printer. Check if printer is connected to the wireless network 1 Print a network setup page. For more information, see "Printing a network setup page" on page 36 - Lexmark Z1420 | Getting Started - Page 44
Close the window, and try printing again. Reinstall software Uninstall and then reinstall the printer software. Note: If more than one printer appears in the "Select your printer" list, pick the printer with the MAC address that matches the address on the back of your printer. Wireless printer is no - Lexmark Z1420 | Getting Started - Page 45
by periods, such as 192.168.0.100. Your IP address might also start with the numbers 10 or 169. This is determined by your operating system or wireless network software. 2 Ping the wireless access point (wireless router). a Click: • In Windows XP: Start Œ Programs or All Programs Œ Accessories - Lexmark Z1420 | Getting Started - Page 46
system or wireless network software. 2 Ping the wireless access point (wireless router). a From the Applications folder, click the Utilities folder. b Double-click the Network Utility application. c Type the IP address of the wireless access point (wireless router) in the network address field. For - Lexmark Z1420 | Getting Started - Page 47
have an IP address, see the documentation that came with your wireless access point (wireless router) to learn how to connect your computer to the wireless network. b The printer may need to be reconfigured for new wireless network settings. For more information, see "Run the wireless setup again - Lexmark Z1420 | Getting Started - Page 48
them on the network. Windows users only 1 Click Start ΠPrograms or All Programs ΠLexmark 1400 Series. 2 Click Wireless Setup Utility. Note: You may be prompted to connect the printer to the computer again using the installation cable as part of the setup process. 3 Follow the instructions on the - Lexmark Z1420 | Getting Started - Page 49
To change your password, network name, or other wireless setting: Windows users only 1 Click Start ΠPrograms or All Programs ΠLexmark 1400 Series. 2 Click Wireless Setup Utility. Note: You may be prompted to connect the printer to the computer again using the installation cable as part of the - Lexmark Z1420 | Getting Started - Page 50
before reinstalling the printer software. 6 Insert the CD for Windows, and then follow the instructions on the computer screen to reinstall the software. Note: If the install screen does not appear automatically after you restart your computer, click Start ΠRun, and then type D:\setup.exe, where - Lexmark Z1420 | Getting Started - Page 51
system. 6 Select the file you want to download, and then follow the directions on the computer screen. Note: If you have multiple printers on your network, make sure you know the MAC address of the printer you are installing. For more information, see "Finding your MAC address" on page 50. 51 - Lexmark Z1420 | Getting Started - Page 52
your printer model. Note: If your printer is not shown, manually type the printer IP address in the browser address field. For example: http://10.168.0.101 Note: If you do not know the IP address of the printer, print the network setup page to find it. 10 Click Configuration. 11 Click Wireless. 52 - Lexmark Z1420 | Getting Started - Page 53
• Faster performance • Easier setup You can also set up a wireless network without a wireless access point (wireless router). This is called an ad hoc network. Windows users only 1 Click: • In Windows XP: Start Œ Settings or Control Panel Œ Network Connection • In Windows Vista: The Start icon - Lexmark Z1420 | Getting Started - Page 54
and then click the Refresh network list button. 21 Click Start ΠPrograms or All Programs ΠLexmark 1400 Series. 22 Click Wireless Setup Utility. Note: You may be prompted to connect the printer to the computer again using the installation cable as part of the setup process. 23 Follow the prompts - Lexmark Z1420 | Getting Started - Page 55
: The MAC address appears on an adhesive label located on the back of your printer. 6 Insert the CD for Macintosh to run the wireless setup. 7 From the Finder desktop, double-click the Lexmark 1400 Series Installer icon 8 Double-click the Install icon. 9 Click Continue. 10 Follow the instructions on - Lexmark Z1420 | Getting Started - Page 56
in conjunction with other products, programs, or services, except those expressly designated by the manufacturer, are the user's responsibility. For Lexmark technical support, visit support.lexmark.com. For information on supplies and downloads, visit www.lexmark.com. If you don't have access to - Lexmark Z1420 | Getting Started - Page 57
End-user license agreement* Opening this package, installing the printing device software, or using the print cartridges inside, confirms your acceptance of the following license/agreement: The patented print cartridges contained inside are licensed for a single use only and is/are designed to stop - Lexmark Z1420 | Getting Started - Page 58
IP address DHCP server infrastructure mode installation cable internal wireless print server IP (Internet Protocol) address ipconfig MAC (Media Access Control) address MAC filtering network adapter/card network hub network name ping printer nickname router security key signal strength SSID (Service - Lexmark Z1420 | Getting Started - Page 59
) USB cable USB port WEP (Wired Equivalent Privacy) wireless access point wireless router Wi-Fi WPA (Wi-Fi Protected Access) WPA2 An address assigned to a network printer or print server by the manufacturer. To find the UAA, print a network setup page and look for the UAA listing. A lightweight
-
 1
1 -
 2
2 -
 3
3 -
 4
4 -
 5
5 -
 6
6 -
 7
7 -
8
-
9
-
10
-
11
-
12
-
13
-
14
-
15
-
16
-
17
-
18
-
19
-
20
-
21
-
22
-
23
-
24
-
25
-
26
-
27
-
28
-
29
-
30
-
31
-
32
-
33
-
34
-
35
-
36
-
37
-
38
-
39
-
40
-
41
-
42
-
43
-
44
-
45
-
46
-
47
-
48
-
49
-
50
-
51
-
52
-
53
-
54
-
55
-
56
-
57
-
58
-
59
 |
 |
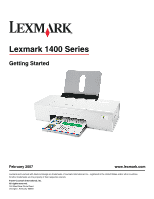
Lexmark 1400 Series
Getting Started
February 2007
www.lexmark.com
Lexmark and Lexmark with diamond design are trademarks of Lexmark International, Inc., registered in the United States and/or other countries.
All other trademarks are the property of their respective owners.
© 2007 Lexmark International, Inc.
All rights reserved.
740 West New Circle Road
Lexington, Kentucky 40550