Linksys WMB54G User Guide - Page 14
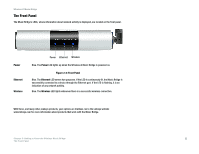
Connecting the Power, LED Status, Setup Wizard. - wireless g
 |
UPC - 745883568949
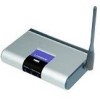
View all Linksys WMB54G manuals
Add to My Manuals
Save this manual to your list of manuals |
Page 14 highlights
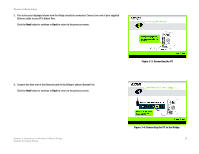
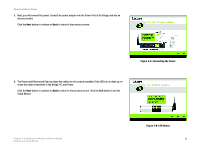
Wireless-G Music Bridge 5. Next, you will connect the power. Connect the power adapter into the Power Port of the Bridge and into an electrical outlet. Click the Next button to continue or Back to return to the previous screen. Figure 3-5: Connecting the Power 6. The Power and Ethernet will light up when the cables are all correctly installed. If the LEDs do not light up, recheck the cable connections to the Bridge, PC, and Power. Click the Next button to continue or Back to return to the previous screen. Click the Exit button to exit the Setup Wizard. Chapter 3: Setting up the Wireless-G Music Bridge Starting the Setup Wizard Figure 3-6: LED Status 8
-
 1
1 -
2
-
3
-
4
-
5
-
6
-
7
-
8
-
 9
9 -
 10
10 -
 11
11 -
 12
12 -
 13
13 -
 14
14 -
 15
15 -
 16
16 -
 17
17 -
 18
18 -
 19
19 -
20
-
21
-
22
-
23
-
24
-
25
-
26
-
27
-
28
-
29
-
30
-
31
-
32
-
33
-
34
-
35
-
36
-
37
-
38
-
39
-
40
-
41
-
42
-
43
-
44
-
45
-
46
-
47
-
48
-
49
-
50
-
51
-
52
-
53
-
54
-
55
-
56
-
57
 |
 |

8
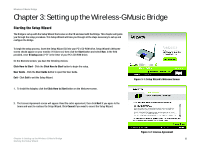
Chapter 3: Setting up the Wireless-G Music Bridge
Starting the Setup Wizard
Wireless-G Music Bridge
5.
Next, you will connect the power. Connect the power adapter into the Power Port of the Bridge and into an
electrical outlet.
Click the
Next
button to continue or
Back
to return to the previous screen.
6.
The Power and Ethernet will light up when the cables are all correctly installed. If the LEDs do not light up, re-
check the cable connections to the Bridge, PC, and Power.
Click the
Next
button to continue or
Back
to return to the previous screen. Click the
Exit
button to exit the
Setup Wizard.
Figure 3-5: Connecting the Power
Figure 3-6: LED Status