Lowrance Auto-Standby button Metal NAIS 400 Owners Manual - Page 22
The AIS transceiver is supplied with a USB port for connection to, on your chartplotter.
 |
View all Lowrance Auto-Standby button Metal manuals
Add to My Manuals
Save this manual to your list of manuals |
Page 22 highlights
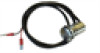
Fig. 11 NMEA0183 data only a single NMEA 0183 port. An additional sensor, such as a gyrocompass, can be connected to the AIS transceiver via the low speed port and the AIS transceiver can be connected via the high speed port to the chartplotter resulting in the chartplotter receiving both AIS information and heading information simultaneously. Please ensure your equipment is configured to use the correct baud rate for the port it is connected to. Red Black Light green Orange Brown Blue White Green Purple Pink Grey Yellow Power in + Power in - Switch input + Switch input - Transmit + Transmit - Receive + Receive - NMEA0183 Port 1 38,400baud (chart plotter) Transmit + Transmit - Receive + Receive - NMEA0183 Port 2 4,800baud (other NMEA0183 device) Figure 11 Connecting to the NMEA 0183 data port Step 7 - Connection to an NMEA 2000 network (optional) The AIS transceiver can be connected to an NMEA 2000 network by a suitable Navico NMEA 2000 network cable available from your local Navico dealer. If your vessel has an NMEA 2000 network, please refer to the relevant documentation for your NMEA 2000 equipment. Once connected, and with your chartplotter also connected to your NMEA 2000 network, you will be able to receive AIS targets on your chartplotter. Step 8 - USB Connection (optional) The AIS transceiver is supplied with a USB port for connection to a PC or Mac. The USB connector can be connected directly to the USB port on the PC or Mac via the supplied USB cable. To enable connection of the AIS transceiver to a PC, the USB drivers must be installed first. The USB drivers are installed as part of the proAIS2 installation process. Please install proAIS2 as described in section 4 before attempt- Installation | NAIS-400 User Manual | 21
-
 1
1 -
2
-
3
-
4
-
5
-
6
-
7
-
8
-
9
-
10
-
11
-
12
-
13
-
14
-
15
-
16
-
 17
17 -
 18
18 -
 19
19 -
 20
20 -
 21
21 -
 22
22 -
 23
23 -
 24
24 -
 25
25 -
 26
26 -
 27
27 -
28
-
29
-
30
-
31
-
32
 |
 |
