Marantz SR4300 User Guide - Page 27
Preference, Pro Logic
 |
View all Marantz SR4300 manuals
Add to My Manuals
Save this manual to your list of manuals |
Page 27 highlights
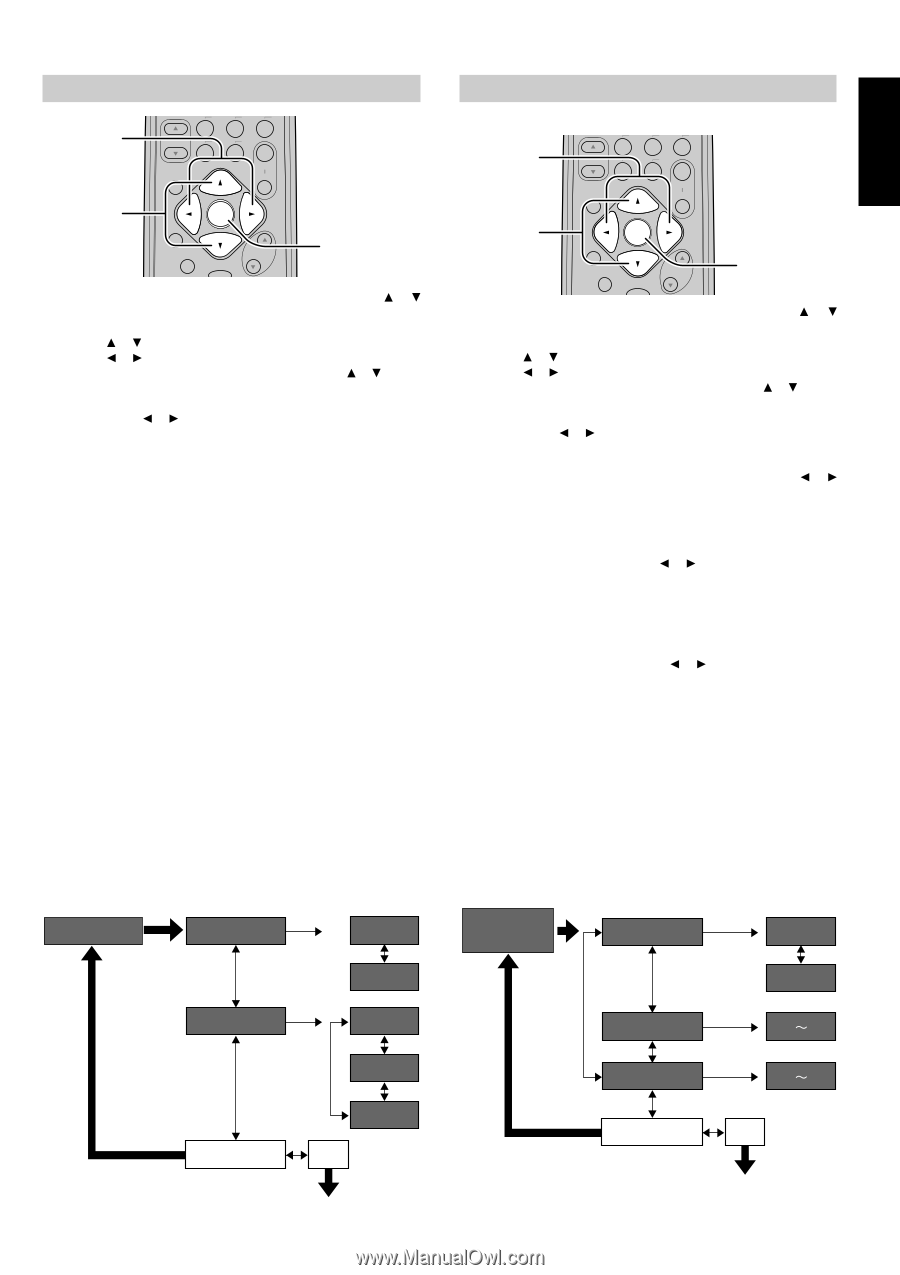
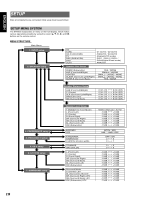
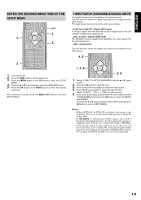
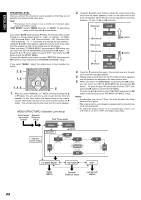
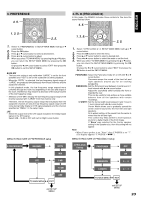
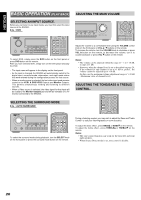
3. PREFERENCE 4. 5. BASS SETUP/T.TONE M-CH ST 7 2CH 8 F.DIRECT A/D 0 6.1CH -IN 9 OFF MENU 1. 3. 5. S-DIRECT OK MUTE NIGHT VOLUME 2. 5. 1. Select "3. PREFERENCE" in SETUP MAIN MENU with or cursor button. 2. Press the OK button. 3. Press or cursor button to select a desired item. 4. Press or cursor button to adjust. 5. When you select "TO MAIN MENU" by pressing the or button, you can return the SETUP MAIN MENU by pressing the OK button . Or press the or cursor button to select "EXIT" then press the OK button to exit the SETUP MENU. BASS MIX • The bass mix setting is only valid when "LARGE" is set for the front speakers and "YES" is set for the subwoofer at stereo playback . • When the "BOTH" is selected, the low frequency signal range of "LARGE" are produced simultaneously from those channels and the subwoofer channel. In this playback mode, the low frequency range expand more uniformly through the room, but depending on the size and shape of the room, interference may result in a decrease of the actual volume of the low frequency range. • Selection of the "MIX" will play the low frequency signal range of the channel selected with "LARGE" from that channel only. Therefore, the low frequency signal range that are played from the subwoofer channel are only the low frequency signal range of LFE (only during Dolby Digital or DTS signal playback) and the channel specified as "SMALL" in the setup menu. LFE • Select the output level of the LFE signal included in the Dolby Digital signal or the DTS signal. Select 0dB, -10 dB or OFF with Left or Right cursor button. MENU STRUCTURE of PREFERENCE setup 3.PREFERENCE BASSMIX BOTH MIX LFE 0 dB -10 dB TO MAIN MENU OFF EXIT exit SETUP MENU 4. PL II (PRO LOGIC II) In this mode, the SR4300 includes three controls to fine-tune the sound-field as follow. 4. 5. BASS M-CH ST 7 2CH 8 F.DIRECT A/D 6.1CH -IN 9 0 SETUP/T.TONE OFF MENU 1. 3. 5. S-DIRECT OK MUTE NIGHT VOLUME 2. 5. 1. Select "4.PRO LOGIC II" in SETUP MAIN MENU with or cursor button. 2. Press the OK button to enter the menu. 3. Press or cursor button to select a desired item. 4. Press or cursor button to select the mode or set the level. 5. When you select "TO MAIN MENU" by pressing the or button, you can return the SETUP MAIN MENU by pressing the OK button . Or press the or cursor button to select "EXIT" then press the OK button to exit the SETUP MENU. PANORAMA: Select the Panorama mode On or Off with or cursor button. Panorama wraps the sound of the front left and right speakers around you for an exciting perspective. DIMENSION: Set the Dimension level between 0 and 6 level in 1 level interval with or cursor button. Adjust the soundfield either towards the front or towards the rear. This can be useful to help achieve a more suitable balance from all the speakers with certain recordings. C WIDTH: Set the Center width level between 0 and 7 level in 1 level interval with or cursor button. Center Width allows you to gradually spread the center channel sound into the front left and right speakers. At its widest setting, all the sound from the center is mixed into the left and right. This control may help achieve a more spacious sound or a better blend of the front image. If "None" was selected for the Center speaker setting in the Speaker size, then this setting will not appear. Note: • When Center speaker is set "None", then C.WIDTH is set "7". (The display appears "C.WIDTH MENU STRUCTURE of PROLOGIC II setup 4.PROLOGIC II setup PANORAMA OFF ON DIMENSION 0 6 C.WIDTH 0 7 TO MAIN MENU EXIT exit SETUP MENU 23 ENGLISH
-
 1
1 -
2
-
3
-
4
-
5
-
6
-
7
-
8
-
9
-
10
-
11
-
12
-
13
-
14
-
15
-
16
-
17
-
18
-
19
-
20
-
21
-
 22
22 -
 23
23 -
 24
24 -
 25
25 -
 26
26 -
 27
27 -
 28
28 -
 29
29 -
 30
30 -
 31
31 -
 32
32 -
33
-
34
-
35
-
36
-
37
-
38
-
39
-
40
-
41
-
42
-
43
-
44
-
45
 |
 |