Maytag MDB4621AWB Installation Instructions
Maytag MDB4621AWB - Full Console Dishwasher Manual
 |
View all Maytag MDB4621AWB manuals
Add to My Manuals
Save this manual to your list of manuals |
Maytag MDB4621AWB manual content summary:
- Maytag MDB4621AWB | Installation Instructions - Page 1
Installer: Leave Installation Instructions with homeowner. Homeowner: Keep Installation Instructions for future reference. Save Installation Instructions for local electrical inspector's use. Call your dealer when you have questions or need service. When you call, you will need the dishwasher model - Maytag MDB4621AWB | Installation Instructions - Page 2
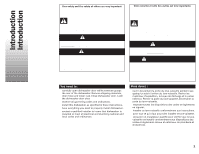
We have provided many important safety messages in this manual and on your appliance. Always read and obey all install this dishwasher as specified in these instructions. ✔ have everything you need to properly install dishwasher. ✔ contact a qualified installer to insure that dishwasher is installed - Maytag MDB4621AWB | Installation Instructions - Page 3
tools and parts before starting installation. Read and follow the instructions provided with any tools listed here. All installations • pliers are the proper size to connect your household wiring to 16gauge wiring in dishwasher • small level • 90° elbow with 3/8" N.P.T. external threads on - Maytag MDB4621AWB | Installation Instructions - Page 4
hose are within the shaded area. If dishwasher will be left unused for a period of time or in a location where it may be subject to freezing, follow "Winterizing" instructions in Use and Care Guide. Inspecter l'emplacement où le lave-vaisselle doit être installé. L'endroit doit comporter les caract - Maytag MDB4621AWB | Installation Instructions - Page 5
dishwasher opening is uneven (example: tile flooring only part way into opening) you will need to take special care in measuring dimensions and in leveling dishwasher sera exposé au gel, suivre les instructions de "Préparation pour l'hiver" dans le Guide d'utilisation et d'entretien. CONSEIL UTILE : - Maytag MDB4621AWB | Installation Instructions - Page 6
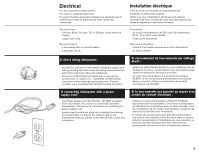
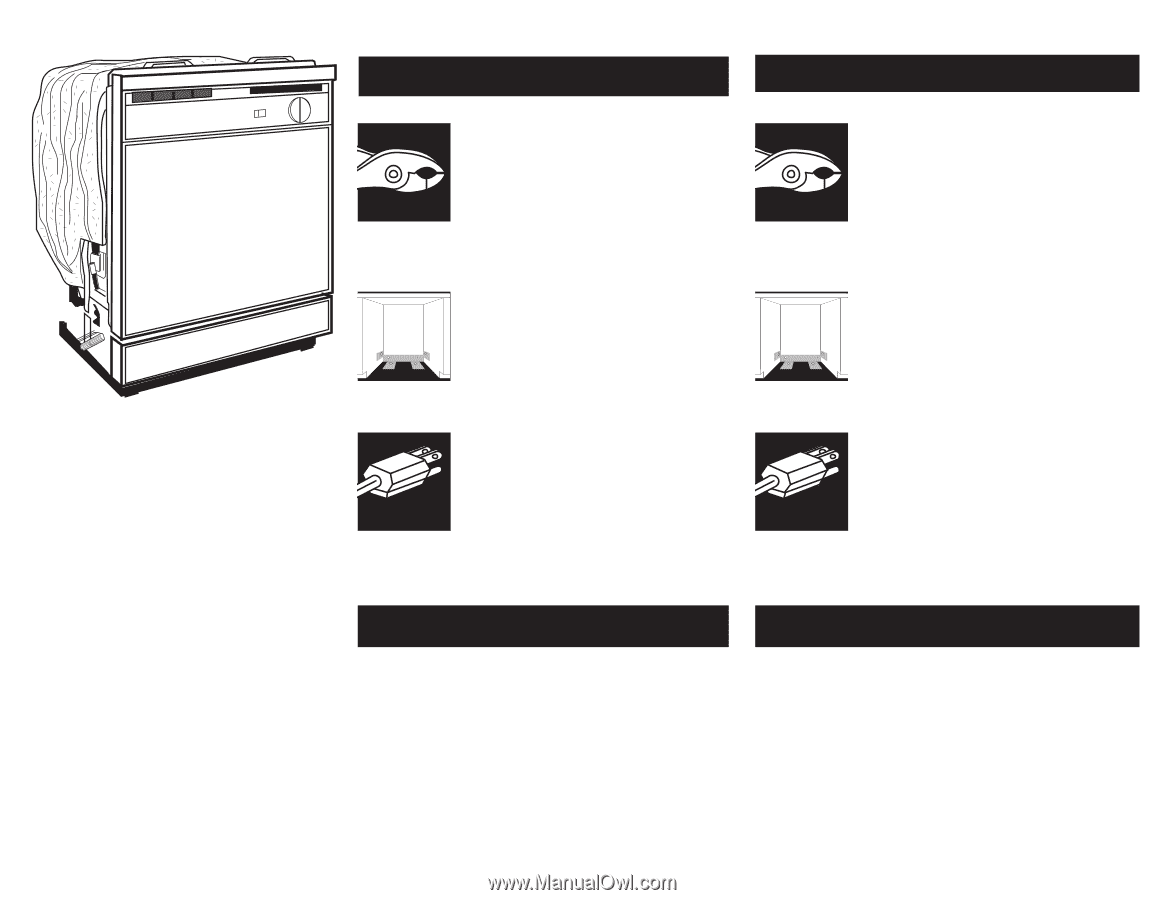
with a power supply cord: ✔ use Power Supply Cord Kit (Part No. 4317824) available from your dealer. This cord kit is marked for use with dishwashers. Follow the kit instructions for installing the power supply cord. ✔ power supply cord must plug into a mating three-prong, grounded outlet, located - Maytag MDB4621AWB | Installation Instructions - Page 7
psi (103-827 kPa) water pressure. ✔ 120°F (49°C) water at dishwasher. ✔ 3/8" O.D. copper tubing with compression fitting (1/2" minimum plastic tubing is eau. Drain You must: ✔ use the new drain hose supplied with your dishwasher or a new drain hose that meets all current AHAM/IAPMO test standards - Maytag MDB4621AWB | Installation Instructions - Page 8
dishwasher. Failure to do so can result in death or electrical shock. Risque de choc électrique Interrompre l'alimentation électrique au niveau du tableau de distribution (boîte de fusibles ou disjoncteurs) avant d'entreprendre l'installation du lave-vaisselle. Le non-respect de ces instructions - Maytag MDB4621AWB | Installation Instructions - Page 9
ouverture, passer à l'étape 10, page 11. If you are installing a new dishwasher, complete all of the following steps: Si vous installez un lave Les ouverturesfacultatives sont indiquées. Metal cabinet: Cover hole with Grommet (Part No. 302797) available from your dealer. Placard en bois : poncer - Maytag MDB4621AWB | Installation Instructions - Page 10
Wood cabinet: Sand hole until smooth. Metal cabinet: Cover hole with Grommet (Part No. 302797) supplied with the power supply cord kit. Cordon de courant é . Install a mating, three-prong, grounding-type wall receptacle Ấ in the cabinet next to the dishwasher opening. Go to step 6. Installer dans - Maytag MDB4621AWB | Installation Instructions - Page 11
copper tubing Ầ required. Attach copper tubing to water line with manual shutoff valve. Carefully feed copper tubing through hole in cabinet ( far enough into the cabinet opening to connect it to dishwasher inlet on the front left of dishwasher. Mesurer la longueur totale du tube Ầ de cuivre requis - Maytag MDB4621AWB | Installation Instructions - Page 12
* Ậ to connect air gap to waste tee ắ. This connection ắ must be before drain trap Ắ and at least 20" (50.8 cm) above the floor where dishwasher will be installed. Go to step 12. Pas de broyeur de déchets plus brise-siphon 1. Couper l'extrémité du tuyau de décharge Ẩ au besoin (ne pas couper - Maytag MDB4621AWB | Installation Instructions - Page 13
Ắ and at least 20" (50.8 cm) above the floor where dishwasher will be installed. It is recommended that the drain hose be looped up and securely fastened be installed. It is recommended that the drain hose be looped up and securely fastened to the underside of the counter. Go to step 12. Ẩ * Parts - Maytag MDB4621AWB | Installation Instructions - Page 14
installer le lave-vaisselle. Le non-respect de cette instruction peut causer une blessure au dos ou d'autres blessures. 1. Put dishwasher corner posts Ạ behind dishwasher le support Ầ de la valve d'arrivée d'eau avec des attaching elbow to water inlet valve. pinces durant l'installation du - Maytag MDB4621AWB | Installation Instructions - Page 15
box. If using conduit, use a U.L.-listed/CSA-certified conduit connector. If you are installing a power supply cord kit, do so now and follow kit instructions. HELPFUL TIP: Put cardboard under dishwasher until it is installed in cabinet opening. The cardboard will help protect floor covering during - Maytag MDB4621AWB | Installation Instructions - Page 16
right side of opening. IMPORTANT: If your model has the drain connector located near the back of the dishwasher, it will be easier to connect the drain hose to the connector now before moving the dishwasher completely into the cabinet opening. For instructions, go to "Drain Connection", Step 8 on - Maytag MDB4621AWB | Installation Instructions - Page 17
-vaisselle du plancher lors du réglage des pieds avant. 13. ẵ Ặ ặ Check that leveling legs ẵ are firmly against the floor. Place level on the rack guide Ặ on one side of the dishwasher tub. Check that dishwasher is level from front to back. Adjust leveling leg or add shims under rear wheel until - Maytag MDB4621AWB | Installation Instructions - Page 18
électrique Vérifier les exigences de l'installation électrique (voir les pages 4 à dishwasher model is not equipped with a power supply cord go to Step 2. If a power supply cord is attached to dishwasher but dishwasher it does not touch dishwasher motor or lower part of dishwasher tub. Pull direct - Maytag MDB4621AWB | Installation Instructions - Page 19
de rallonge. Le non-respect de ces instructions peut causer un décès, un incendie ou un sized to connect direct wire to 16-gauge dishwasher wire: taille suffisante pour connecter les fils du terminal box cover ầ with wires inside terminal Réinstaller le couvercle ầ de la boîte de connexion - Maytag MDB4621AWB | Installation Instructions - Page 20
-type plug. Some models are already equipped with a power supply cord. If a power supply cord is not supplied, use Power Supply Cord Kit (Part No. 4317824) available from your dealer. This cord kit is marked for use with dishwashers. Follow the kit instructions for installing the power supply cord - Maytag MDB4621AWB | Installation Instructions - Page 21
copper tubing. CONSEIL UTILE : Tenir le support de la valve d'arrivée d'eau avec des pinces durant l'installation du tube de cuivre. 5. ậ 6. ẫ Ẫ To prevent vibration during operation, route the water supply line so that it does not touch the dishwasher base, frame or motor. With copper tubing - Maytag MDB4621AWB | Installation Instructions - Page 22
, use a 5/16" nut driver to tighten drain hose securely to connector. IMPORTANT: If your model has the drain connector located near the back of the dishwasher, go back to Step 10 on Page 5 and continue with installation. D'après le modèle que vous avez, le raccord au tuyau de décharge peut être - Maytag MDB4621AWB | Installation Instructions - Page 23
arrière parte trasera front avant parte delantera Secure dishwasher to countertop with two, No. 10 x 1/2" Phillips-head screws ạ. The dishwasher must be la cuve. Si l'espacement n'est pas uniforme, desserrer les vis du support et déplacer légèrement la cuve. Serrer les vis. Retirer la serviette - Maytag MDB4621AWB | Installation Instructions - Page 24
1. 2. 3. 4. Ấ E. Check Operation Read the Use and Care Guide that came with your dishwasher. Vérification du fonctionnement Lire le manuel du propriétaire livré avec le lave-vaisselle. Check that all parts have been installed and no steps were skipped. Check that you have all the tools you used. - Maytag MDB4621AWB | Installation Instructions - Page 25
F. To change door panel color (For models so equipped.) NOTE: If your model has a plastic door color panel, both sides of the panel are the same color. Changement de la couleur du panneau de la porte (Pour les - Maytag MDB4621AWB | Installation Instructions - Page 26
4. Bow door panel(s) and insert other side of door panel(s) Cintrer le panneau et insérer l'autre côté dans into door frame. l'encadrement de porte. 5. Ả Push in on door panel(s) near the top and slide panel(s) and Pousser le panneau vers le haut et insérer le panneau et la spacer up inside - Maytag MDB4621AWB | Installation Instructions - Page 27
G. To change access panel color (For models so equipped.) Changement de la couleur du panneau d'accès (Pour les modèles ainsi équipés.) 1. Handle panels carefully. Push up with thumbs on each end - Maytag MDB4621AWB | Installation Instructions - Page 28
Duty Spring Kit, Part No. 4318050. Maximum door panel weight is 8 pounds (3.6 kg). Dishwasher door panel and access panel (if model is so equipped) de ressorts de service rigoureux, Pièce N° 4318050. Le poids maximal du panneau de porte est de 3,6 kg (8 lb). Il est possible d'installer sur le lave- - Maytag MDB4621AWB | Installation Instructions - Page 29
(5.6 mm) thickness. Custom panels less than 7/32" (5.6 mm) thick: Install spacers behind panels. access panel frame encadrement du panneau d'accès 1/4" (6.4 mm) . Limer ou poncer les bords des panneaux en bois pour éviter Dishwasher is subject to some humidity. Cover both sides les éclats. and - Maytag MDB4621AWB | Installation Instructions - Page 30
plaque d'espacement ấ Insert top of wood door panel between sides of door frame about 3" (7.5 cm) below console Ả. Rotate wood door panel down against dishwasher door. Slide top edge of wood door panel under bottom edge of console ả. Press lower portion of wood door panel in place between sides of - Maytag MDB4621AWB | Installation Instructions - Page 31
the two screws securing top of access panel to dishwasher frame and tilt access panel forward to install some wood panels. Line up edges of top s'engage dans la rainure de l'élément inférieur de l'encadrement. Pour l'installation de certains panneaux en bois, il peut être nécessaire d'ôter les deux - Maytag MDB4621AWB | Installation Instructions - Page 32
) min. * to front of door frame * jusqu'au devant du cadre de la porte 20-3/4" (52.7 cm) Back view Vue arrière 23-7/8" (60.6 cm) Part No. 8535436 Pièce N° 8535436 ©2004 Printed in U.S.A. Imprimé aux É.-U. 05/2004
-
 1
1 -
 2
2 -
 3
3 -
 4
4 -
 5
5 -
 6
6 -
 7
7 -
8
-
9
-
10
-
11
-
12
-
13
-
14
-
15
-
16
-
17
-
18
-
19
-
20
-
21
-
22
-
23
-
24
-
25
-
26
-
27
-
28
-
29
-
30
-
31
-
32
 |
 |
Installation Instructions
Undercounter Dishwasher
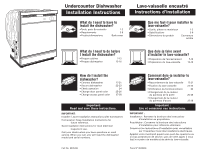
What do I need to have to
install the dishwasher?
What do I need to do before
I install the dishwasher?
How do I install the
dishwasher?
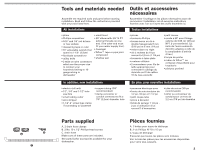
• Tools, parts & materials
1-2
• Requirements
3-6
• Product dimensions
Back cover
• Prepare cabinet
7-12
• Prepare dishwasher
13-16
• Connect dishwasher
17-21
• Secure dishwasher
22-23
• Check operation
24
• Change door panel color
25-26
• Change access panel color
27-28
Important:
Read and save these instructions.
IMPORTANT:
Installer: Leave Installation Instructions with homeowner.
Homeowner: Keep Installation Instructions for
future reference.
Save Installation Instructions for local electrical
inspector’s use.
Call your dealer when you have questions or need
service. When you call, you will need the dishwasher
model and serial numbers.
Instructions d’installation
Lave-vaisselle encastré
Que me faut-il pour installer le
lave-vaisselle?
Que dois-je faire avant
d’installer le lave-vaisselle?
Comment dois-je installer le
lave-vaisselle?
• Outils, pièces et matériaux
1-2
• Spécifications
3-6
• Dimensions du produit
Couverture
arrière
• Préparation de l’encastrement
7-12
• Préparation du lave-vaisselle
13-16
• Raccordement du lave-vaisselle
17-21
• Fixation du lave-vaisselle
22-23
• Vérification du fonctionnement
24
• Changement de la couleur
du panneau de la porte
25-26
• Changement de la couleur
du panneau d’accès
27-28
Important :
Lire et conserver ces instructions.
Pièce N° 8535436
Part No. 8535436
IMPORTANT :
Installateur : Remettre la brochure des instructions
d’installation au propriétaire.
Propriétaire : Conserver la brochure des instructions
d’installation pour référence ultérieure.
Conserver les instructions d’installation pour consultation
par l’inspecteur local des installations électriques.
Appelez votre marchand quand vous avez des questions ou
si vous avez besoin de service. Lors de votre appel, il vous
faut le numéro de modèle et de série du lave-vaisselle.