Maytag MEDC500VW User Instructions - Page 4
Dryer Use - installation
 |
UPC - 883049145747
View all Maytag MEDC500VW manuals
Add to My Manuals
Save this manual to your list of manuals |
Page 4 highlights
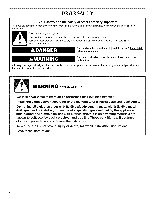
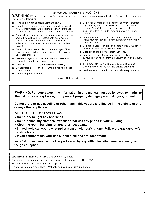
J__.3_}°C'._.(.:.0_°__/_15 _-_O_/_____"_H__I Your dryer must be properly installed and vented to achieve maximum drying efficiency and shorten drying times. Use the minimum recommended installation clearances found in the Installation Instructions. See the Installation Instructions for more information. 1. I)o not use plastic vent or metal foil vent. Use 4" (102 mm) metal or flexible metal vent. Do not kink or crush flexible metal vent. It must be completely extended to allow adequate exhaust air to flow. Check vent after installation. Refer to the Installation Instructions for proper length requirements of vent. Fire Hazard Use a heavy metal vent. Do not use a plastic vent. Do not use a metal foil vent. Failure to follow these instructions can result in death or fire. If the dryer is not properly installed and vented, it will not be covered under the warranty. Proper venting of your dryer is important for satisfactory drying results. See the Installation Instructions for more detail NOTE: Service calls caused by improper venting will be paid for by the customeD whether it was a paid installation or self-installed. 2. Use a 4" (102 mm) exhaust hood. 3. Use the straightest path possible when routing the vent. Good Better 4. Use damps to sea[ all joints. Do not use duct tape, screws, or other fastening devices that extend into the interior of the vent to secure vent, which can catch [int. 5. Clean exhaust vent periodically, depending on use, but at least every 2 years, or when installing your dryer in a new location. When cleaning is complete, be sure to follow the Installation Instructions supplied with your dryer for final product check. DRYER USE Explosion Hazard Keep flammable materials and vapors, such as gasoline, away from dryer. Do not dry anything that has ever had anything flammable on it (even after washing). Failure to folow these instructions can result in death, explosion, or fire. Fire Hazard No washer can completely remove oil. Do not dry anything that has ever had any type of oil on it (including cooking oils). Items containing foam, rubber, or plastic must be dried on a clothesline or by using an Air Cycle. Failure to follow these instructions or fire. can result in death WARNING: To reduce the risk of fire, electric shock, or injury to persons, read the IMPORTANT SAFETY INSTRUCTIONS before operating this appliance. This booklet covers several different models. Your dryer may not have all of the cycles and features described. Before using your dryeD wipe the dryer drum with a damp cloth to remove dust from storing and shipping. 4 1, Clean lint screen before each load. See "Cleaning the I.int Screen." 2. I.oad clothes loosely into the dryer and close the door. Do not pack the dryer. Allow space for clothes to tumble freely. 3. Turn the Cycle Control knob to the recommended cycle for the type of load being dried. Use the Energy Preferred Automatic Setting to dry most heavy to medium-weight fabrics.
-
 1
1 -
 2
2 -
 3
3 -
 4
4 -
 5
5 -
 6
6 -
 7
7 -
 8
8 -
 9
9 -
 10
10 -
11
-
12
-
13
-
14
-
15
-
16
-
17
-
18
-
19
-
20
 |
 |
