NEC 8M-B70AU Operation Manual 8M-B70AU - Page 8
Menu Operation
 |
View all NEC 8M-B70AU manuals
Add to My Manuals
Save this manual to your list of manuals |
Page 8 highlights
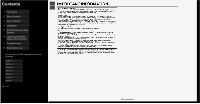
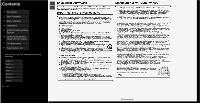
Contents 1. Part Names 2. Basic Operation 3. Menu Operation 4. USB Media 5. AQUOS LINK and Other Devices 6. Operating the Monitor Using a PC (IP control) 7. Troubleshooting 8. Specifications, etc. You can select an OSD language from among 7 languages. English >> Deutsch >> Français >> Italiano >> Español Polski >> Ver. 1.01 > Part Names < Monitor Rear Name Headphone terminal (Ø 3.5, stereo mini jack) 1 It allows sounds to come out from the speakers even after headphones are connected. USB1 terminal 2 Connect USB memory. You can enjoy photo / music / video files stored in USB memory on the Monitor. You can use the multimedia auto play function. USB2 terminal 3 Connect USB memory. You can enjoy photo / music / video files stored in USB memory on the Monitor. You can use the multimedia auto play function. INPUT 1 to 3 (HDMI) 4 Connect 4K or 2K output HDMI compatible device. INPUT 5 (AV input) (dual as INPUT 1 / INPUT 6 / INPUT 7 audio input) 5 Connect the analog audio output from a video game console, video camera or 8K video device. Be sure to use the supplied conversion cable. When using any conversion cable other than the supplied one, the Monitor may not operate properly, or a part may be broken. 3-34 Page 3-4 to 4-1 ― 5-1 to 5-9, 5-15, 5-17, 5-18, 5-31, 5-32 3-35, 5-19, 5-31, 5-32, 5-33 1-2
-
 1
1 -
2
-
 3
3 -
 4
4 -
 5
5 -
 6
6 -
 7
7 -
 8
8 -
 9
9 -
 10
10 -
 11
11 -
 12
12 -
 13
13 -
14
-
15
-
16
-
17
-
18
-
19
-
20
-
21
-
22
-
23
-
24
-
25
-
26
-
27
-
28
-
29
-
30
-
31
-
32
-
33
-
34
-
35
-
36
-
37
-
38
-
39
-
40
-
41
-
42
-
43
-
44
-
45
-
46
-
47
-
48
-
49
-
50
-
51
-
52
-
53
-
54
-
55
-
56
-
57
-
58
-
59
-
60
-
61
-
62
-
63
-
64
-
65
-
66
-
67
-
68
-
69
-
70
-
71
-
72
-
73
-
74
-
75
-
76
-
77
-
78
-
79
-
80
-
81
-
82
-
83
-
84
-
85
-
86
-
87
-
88
-
89
-
90
-
91
-
92
-
93
-
94
-
95
-
96
-
97
-
98
-
99
-
100
-
101
-
102
-
103
-
104
-
105
-
106
-
107
-
108
-
109
-
110
-
111
-
112
-
113
-
114
-
115
-
116
-
117
-
118
-
119
-
120
-
121
-
122
-
123
-
124
-
125
-
126
-
127
-
128
-
129
-
130
-
131
-
132
-
133
-
134
-
135
-
136
-
137
-
138
-
139
-
140
-
141
-
142
-
143
-
144
-
145
-
146
-
147
-
148
-
149
-
150
-
151
-
152
-
153
-
154
-
155
 |
 |
