NEC LCD19WV User Manual - Page 7
continued
 |
UPC - 805736020038
View all NEC LCD19WV manuals
Add to My Manuals
Save this manual to your list of manuals |
Page 7 highlights
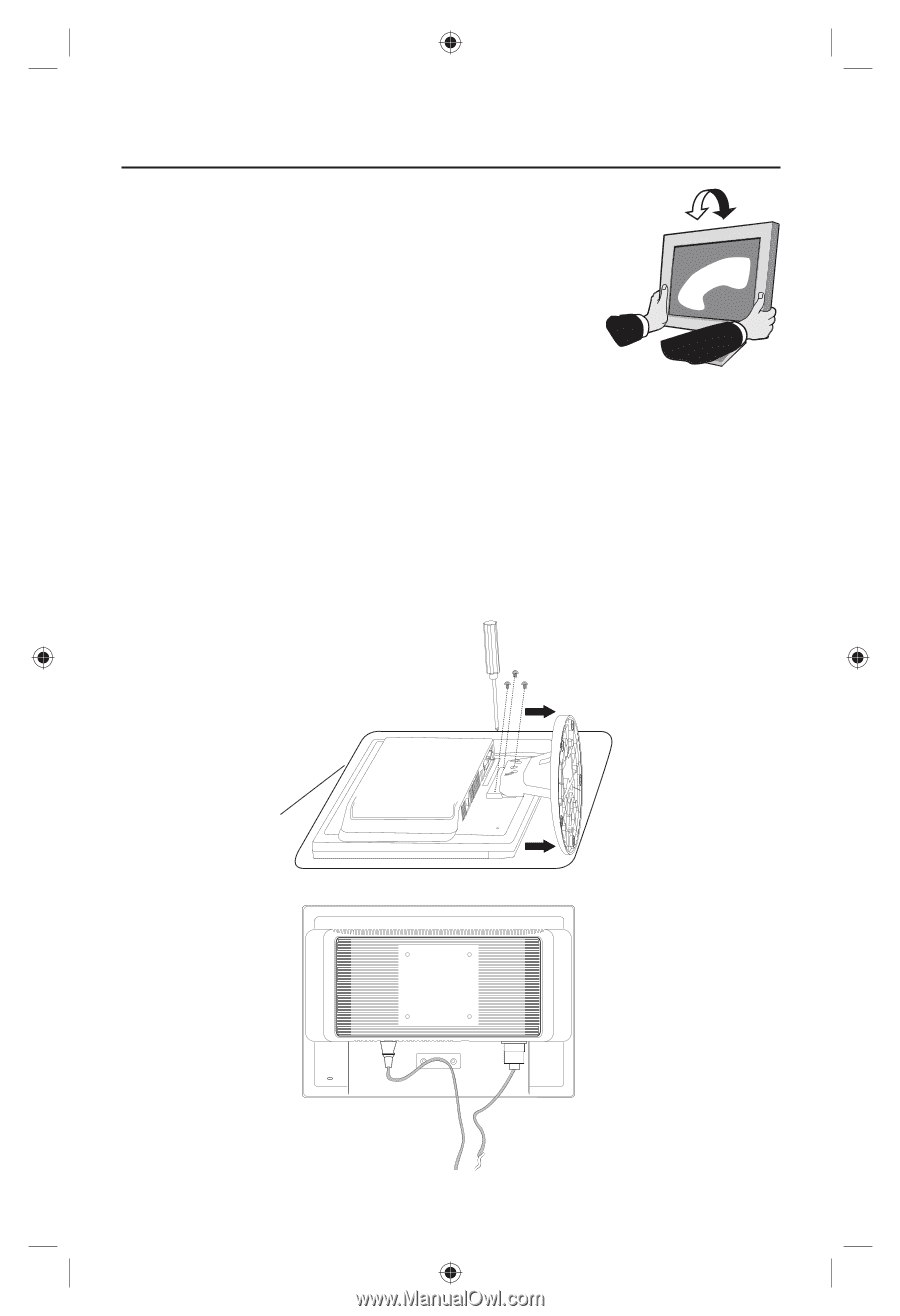
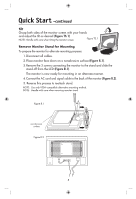
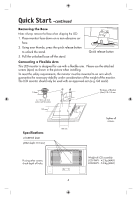
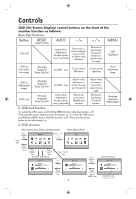
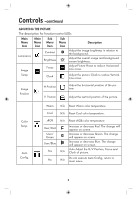
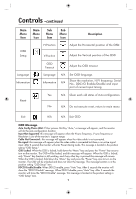
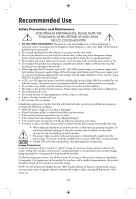
Quick Start -continued Tilt Grasp both sides of the monitor screen with your hands and adjust the tilt as desired (Figure TS.1). NOTE: Handle with care when tilting the monitor screen. Figure TS.1 Remove Monitor Stand for Mounting To prepare the monitor for alternate mounting purposes: 1. Disconnect all cables. 2. Place monitor face down on a nonabrasive surface (Figure R.1). 3. Remove the 3 screws connecting the monitor to the stand and slide the stand off from the LCD (Figure R.1). The monitor is now ready for mounting in an alternate manner. 4. Connect the AC cord and signal cable to the back of the monitor (Figure R.2). 5. Reverse this process to reattach stand. NOTE: Use only VESA-compatible alternative mounting method. NOTE: Handle with care when removing monitor stand. Figure R.1 non-abrasive surface Figure R.2 5
-
 1
1 -
 2
2 -
 3
3 -
 4
4 -
 5
5 -
 6
6 -
 7
7 -
 8
8 -
 9
9 -
 10
10 -
 11
11 -
 12
12 -
13
-
14
-
15
-
16
-
17
-
18
-
19
-
20
-
21
-
22
-
23
-
24
-
25
-
26
-
27
-
28
-
29
-
30
-
31
-
32
-
33
-
34
-
35
-
36
-
37
-
38
-
39
-
40
-
41
-
42
-
43
-
44
-
45
-
46
-
47
-
48
-
49
-
50
-
51
-
52
-
53
-
54
-
55
-
56
-
57
-
58
-
59
-
60
-
61
-
62
-
63
-
64
-
65
-
66
-
67
-
68
-
69
-
70
-
71
 |
 |