NEC NP-UM330X User's Manual - Page 30
Adjusting horizontal/vertical position, Adjusting the focus (Focus ring)
 |
View all NEC NP-UM330X manuals
Add to My Manuals
Save this manual to your list of manuals |
Page 30 highlights
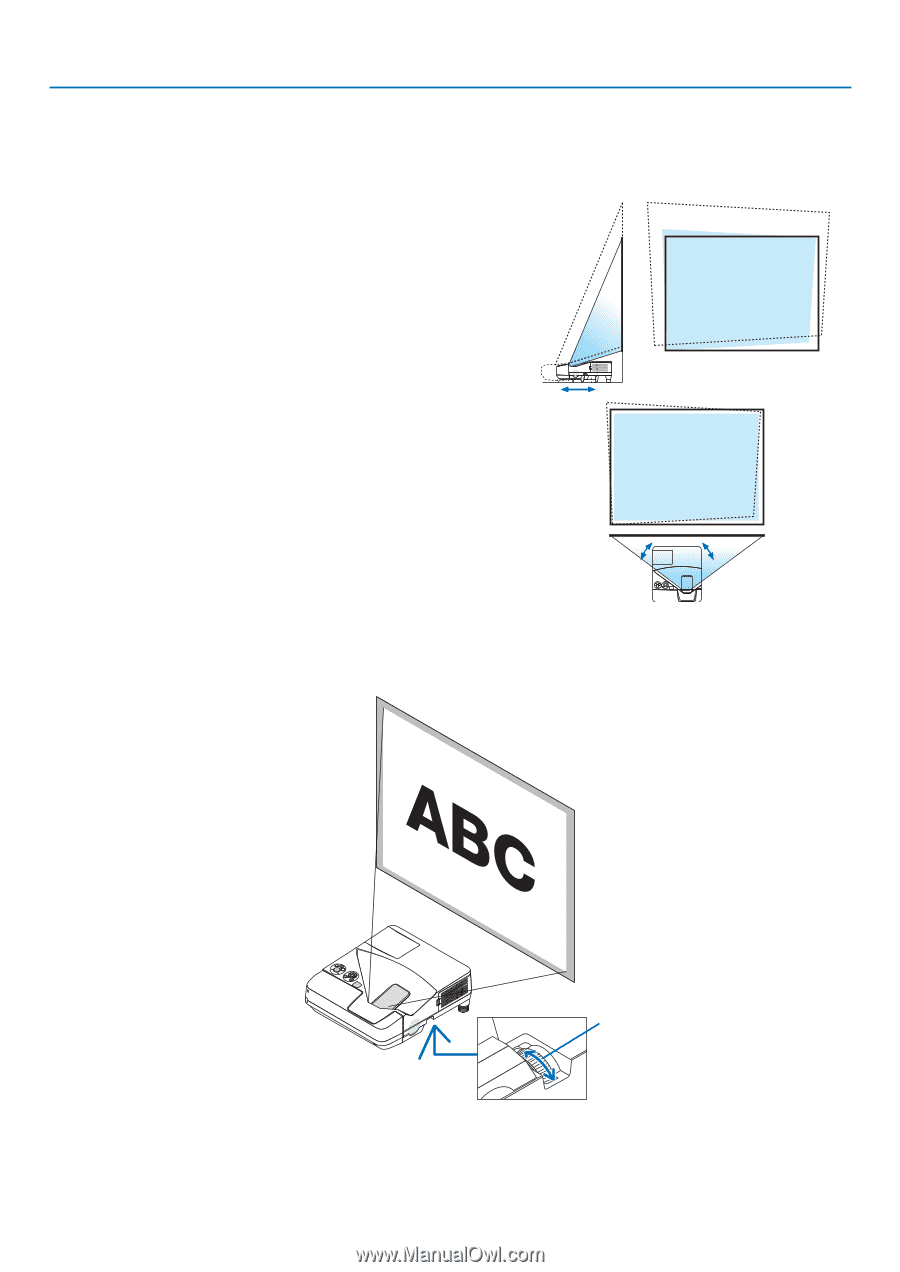
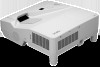
2. Projecting an Image (Basic Operation) Adjusting horizontal/vertical position The throw distance can affect the size and the height of the projected image. Before installing the projector, decide the throw distance according to "Setting Up the Screen and the Projector" (→ page 103, 104) It is recommended to display the test pattern while adjusting the image. (→ page 92) 1. Move the projector back and forth and left and right so that the image fits the screen width. You can reduce the image size to 70% by using [DIGITAL ZOOM] from the menu. 2. Place the projector so that it is parallel with the screen. If the top side of the image is not parallel with its bottom side, rotate the projector slightly to adjust it. If the side of the image shows outside the screen, move it to the center line of the screen. Adjusting the focus (Focus ring) • Rotate the focus ring until you obtain the best focus. Focus ring (view from the bottom) 20
-
 1
1 -
2
-
3
-
4
-
5
-
6
-
7
-
8
-
9
-
10
-
11
-
12
-
13
-
14
-
15
-
16
-
17
-
18
-
19
-
20
-
21
-
22
-
23
-
24
-
 25
25 -
 26
26 -
 27
27 -
 28
28 -
 29
29 -
 30
30 -
 31
31 -
 32
32 -
 33
33 -
 34
34 -
 35
35 -
36
-
37
-
38
-
39
-
40
-
41
-
42
-
43
-
44
-
45
-
46
-
47
-
48
-
49
-
50
-
51
-
52
-
53
-
54
-
55
-
56
-
57
-
58
-
59
-
60
-
61
-
62
-
63
-
64
-
65
-
66
-
67
-
68
-
69
-
70
-
71
-
72
-
73
-
74
-
75
-
76
-
77
-
78
-
79
-
80
-
81
-
82
-
83
-
84
-
85
-
86
-
87
-
88
-
89
-
90
-
91
-
92
-
93
-
94
-
95
-
96
-
97
-
98
-
99
-
100
-
101
-
102
-
103
-
104
-
105
-
106
-
107
-
108
-
109
-
110
-
111
-
112
-
113
-
114
-
115
-
116
-
117
-
118
-
119
-
120
-
121
-
122
-
123
-
124
-
125
-
126
-
127
-
128
-
129
-
130
-
131
-
132
-
133
-
134
-
135
-
136
-
137
-
138
-
139
-
140
-
141
-
142
-
143
-
144
-
145
-
146
-
147
-
148
-
149
 |
 |