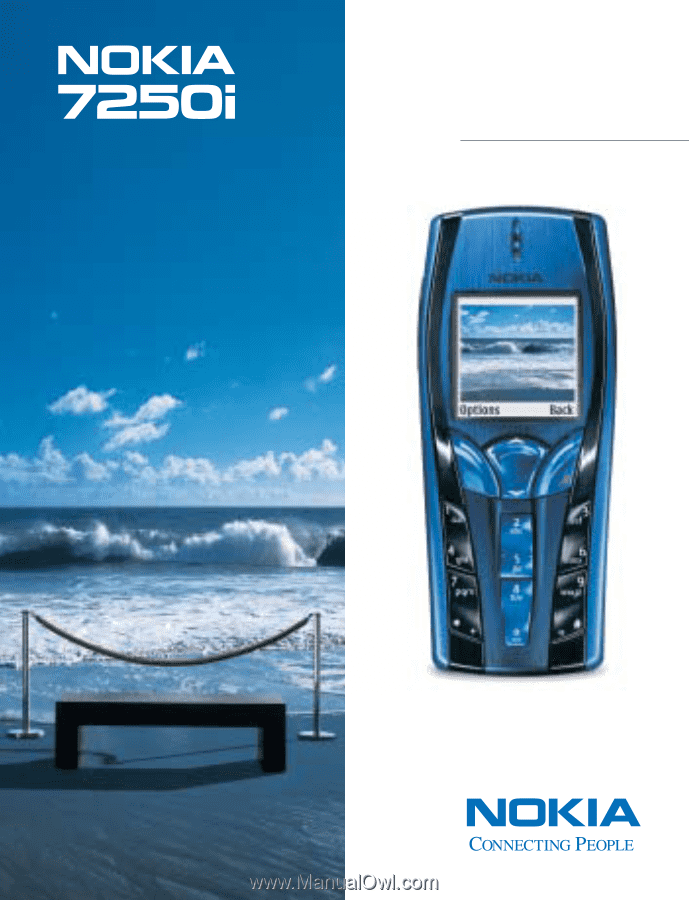
Nokia 7250i Nokia 7250i User Guide in English
Nokia 7250i Manual
 |
View all Nokia 7250i manuals
Add to My Manuals
Save this manual to your list of manuals |
Nokia 7250i manual content summary:
- Nokia 7250i | Nokia 7250i User Guide in English - Page 1
User Guide All screen images are simulated. - Nokia 7250i | Nokia 7250i User Guide in English - Page 2
Nokia 7250i User Guide - Nokia 7250i | Nokia 7250i User Guide in English - Page 3
User Guide for Nokia 7250i Phone What information is needed? My number Voice mail number Service provider's number Provider's customer care Model number Phone type Electronic serial number (ESN) Numbers Where is the number? Wireless service provider Wireless service provider Wireless service - Nokia 7250i | Nokia 7250i User Guide in English - Page 4
The wireless phone described in this guide is approved for use in GSM 900, 1800, and 1900 networks. LEGAL INFORMATION Part No. 9355971, Issue No. 1 Copyright © 2003 Nokia. All rights reserved. Nokia, Nokia Connecting People, Nokia 7250i, and the Nokia Original Accessories logos are trademarks or - Nokia 7250i | Nokia 7250i User Guide in English - Page 5
NOTES - Nokia 7250i | Nokia 7250i User Guide in English - Page 6
4 Wireless network services 4 General Packet Radio Service (GPRS 4 MIDP Java™ applications 4 Polyphonic sound (MIDI 5 Advanced multimedia player 5 Browser 5 Special user interface features 6 3 Welcome and quick guide 7 Register your phone 7 E-Newsletters 7 Nokia 7250i phone at a glance - Nokia 7250i | Nokia 7250i User Guide in English - Page 7
30 5 Text entry 31 Standard mode 31 Predictive text input 32 Enter punctuation and special characters 34 6 Phone security 35 Keyguard 35 PIN code request 35 Call restrictions 36 Fixed dialing 37 Closed user groups 39 Security levels 40 Access codes 40 7 Advanced multimedia player 43 - Nokia 7250i | Nokia 7250i User Guide in English - Page 8
) number 78 Search for an entry in contacts 78 Make a call from contacts 79 Add an image to a name or number 79 Edit a contact entry 79 Delete names and numbers 79 Copy contact entries 80 Business cards 81 1-touch dialing 81 View info, service, and own numbers 83 Caller groups 83 Select - Nokia 7250i | Nokia 7250i User Guide in English - Page 9
profile 86 Settings (Menu 5 87 Over the Air (OTA) settings service 87 Personal shortcuts 87 Time and date settings 89 Call settings 90 Phone settings 93 Display settings 96 Tone settings 98 Enhancement settings 99 Security settings 101 Restore factory settings 101 Radio (Menu 6 102 Turn - Nokia 7250i | Nokia 7250i User Guide in English - Page 10
CSD 135 Data communication applications 136 Nokia PC Suite 137 Services (Menu 14 138 Notes on wireless Internet access 138 Set up for browsing 139 Sign on to the wireless Internet 139 Navigate the wireless Internet 140 Examples of wireless Internet sites 141 Bookmarks 142 File upload 142 - Nokia 7250i | Nokia 7250i User Guide in English - Page 11
while online 144 Security 145 Allow or reject cookies 145 Create a digital signature 146 Appearance settings 147 Go to (Menu 15 147 SIM services (Menu 16 147 9 Hardware and enhancements 148 Hardware 148 About enhancements 151 Power 153 Audio 155 Data 157 Car 158 Covers and cases - Nokia 7250i | Nokia 7250i User Guide in English - Page 12
or illegal. Further detailed information is given in this manual. Do not switch on the phone when wireless phone use is prohibited or phone at a refueling point. Don't use near fuel or chemicals. SWITCH OFF NEAR BLASTING Don't use the phone where blasting is in progress. Observe restrictions - Nokia 7250i | Nokia 7250i User Guide in English - Page 13
TO OTHER DEVICES When connecting to any other device, read its user guide for detailed safety instructions. Do not connect incompatible products. CALLING Ensure the phone is switched on and in service. Enter the phone number, including the area code, then press the Talk key. To end a call, press the - Nokia 7250i | Nokia 7250i User Guide in English - Page 14
in standby mode, use it as a thumbnail picture in contacts, save it in a compatible PC using Nokia PC Suite software, and upload it to a web address with the content image uploader. When you attach a picture to an entry in your list of contacts, the picture is displayed when your contact calls you - Nokia 7250i | Nokia 7250i User Guide in English - Page 15
the PC Connectivity Guide. The PC Connectivity Guide, Nokia PC Suite, and all related software can be downloaded from the U.S. Mobile Phone products section of www.nokia.com. • MIDP JAVA™ APPLICATIONS Your phone supports Java 2 Micro Edition, J2METM, and includes some Java applications and games - Nokia 7250i | Nokia 7250i User Guide in English - Page 16
for polyphonic sounds and the phone can play four instruments simultaneously. The phone supports scalable polyphonic MIDI (SP-MIDI) format. You can receive polyphonic ringing tones using a multimedia service (see "Read and reply to a multimedia message" on page 65) or download them using the gallery - Nokia 7250i | Nokia 7250i User Guide in English - Page 17
keys to navigate through the menus. In the Grid interface, multiple menu icons appear on a single display. Use all four scroll keys to navigate through the icons. With the Go to menu feature, you can create a convenient shortcut menu available through the Right selection key that lists the functions - Nokia 7250i | Nokia 7250i User Guide in English - Page 18
an Xpress-on™ color cover. For more information on connectivity, refer to the PC Connectivity Guide. The PC Connectivity Guide, Nokia PC Suite, and all related software can be downloaded from the U.S. Mobile Phone products section of www.nokia.com. • REGISTER YOUR PHONE Be sure to register your - Nokia 7250i | Nokia 7250i User Guide in English - Page 19
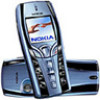
• NOKIA 7250i PHONE AT A GLANCE IR port Power key Earpiece + Volume keys - Camera (back) Display screen Left selection key Talk key Right selection key End key Number keys Scroll keys Star key Pound key Connection ports [ 8 ] Microphone - Nokia 7250i | Nokia 7250i User Guide in English - Page 20
• GET THE MOST OUT OF THIS GUIDE The "Nokia 7250i phone at a glance" diagram on page 8 illustrates the various components of your phone. Familiarize yourself with the diagram to help you better understand the instructions that follow. Terms This guide uses certain terms for the steps that you - Nokia 7250i | Nokia 7250i User Guide in English - Page 21
if this guide says Select clues Text clues make instructions easy to follow. Bold indicates one of the following items: • A word or phrase on the display • Special text such as an alternate method to do something. Note: Explains a feature or points out an important concept. Warning: Helps you avoid - Nokia 7250i | Nokia 7250i User Guide in English - Page 22
key OR call your voice mailbox number (contact your service provider for complete details). Send text messages Select Menu > Messages > Text messages > Create message. Enter a message, select Options > Send, enter the recipient's phone number, and select OK. Read new message Select Show. Reply to - Nokia 7250i | Nokia 7250i User Guide in English - Page 23
"Troubleshooting" on page 167. Information label We also recommend that you write down the following information and have it available if you call. • The International Mobile Equipment Identifier (IMEI) printed on the back of the phone, beneath the battery • Your zip code Contact Nokia Please - Nokia 7250i | Nokia 7250i User Guide in English - Page 24
services Service providers may differ in their support of features. Before you sign up, make sure a service provider supports the features that you need. Guide updates From time to time, Nokia updates this guide to reflect changes. The latest version may be available at www.nokia.com. Online - Nokia 7250i | Nokia 7250i User Guide in English - Page 25
screen is "home base" and indicates that the phone is in standby mode. Signal strength Battery level Menu Contacts HOME-The name of your service provider may appear here. Signal strength-A higher bar indicates a stronger network signal. Battery level-A higher bar indicates more power in the - Nokia 7250i | Nokia 7250i User Guide in English - Page 26
and quick guide Screen saver The phone automatically activates a digital clock screen saver to save power in standby mode. Press any key to deactivate the screen saver. For more information, see "Set screen saver timeout" on page 98. Wallpaper You can set the phone to display a background picture - Nokia 7250i | Nokia 7250i User Guide in English - Page 27
(or is not active) in the network. • SHARED MEMORY The following features in this phone may share memory: contacts, text and multimedia messages, images and ringing tones in gallery, calendar, to-do notes, and Java games and applications. Using any such features may reduce the memory available for - Nokia 7250i | Nokia 7250i User Guide in English - Page 28
being copied, modified, transferred or forwarded. • ACCESSIBILITY SOLUTIONS Nokia is committed to making mobile phones easy to use for all individuals. For more information about phone features, enhancements, alternate format user guides, and other Nokia products designed with your needs in mind - Nokia 7250i | Nokia 7250i User Guide in English - Page 29
is outlined, and the name of the menu appears at the top of the display. 3 When the desired menu is highlighted, press the Left selection key. 4 If can go directly to almost any menu or submenu, as well as activate most features by using a shortcut. Select Menu, then within 3 seconds, press the key - Nokia 7250i | Nokia 7250i User Guide in English - Page 30
mailbox number .0-1-4-2 INFO MESSAGES 0-1-5 Info service 0-1-5-1 Topics 0-1-5-2 Language 0-1-5-3 Info topics saved on SIM card . . . . .0-1-5-4 MESSAGE GPRS DATA COUNTER 2-7 Data sent in last session . 2-7-1 Data received in last session 2-7-2 All sent data 2-7-3 All received data 2-7-4 - Nokia 7250i | Nokia 7250i User Guide in English - Page 31
phone to SIM card . 3-4-1 From SIM card to phone . 3-4-2 SETTINGS 3-5 Memory in use 3-5-1 Contacts view 3-5-2 Memory status 3-5-3 1-TOUCH DIALING 3-6 INFO NUMBERS 3-7 SERVICE DATE SETTINGS. . . 5-2 Clock 5-2-1 Date 5-2-2 Auto-update of date and time 5-2-3 CALL SETTINGS 5-3 Call forwarding - Nokia 7250i | Nokia 7250i User Guide in English - Page 32
5-7-5 Charger 5-7-6 SECURITY SETTINGS 5-8 PIN code request 5-8-1 Call restrictions 5-8-2 Fixed dialing 5-8-3 Closed user group 5-8-4 Security level 5-8-5 Access codes 5-8-6 RESTORE FACTORY SETTINGS 5-9 6 RADIO OPTIONS 6-1 Turn off 6-1-1 Save channel 6-1-2 Automatic tuning 6-1-3 Manual - Nokia 7250i | Nokia 7250i User Guide in English - Page 33
1-4-2 DOWNLOAD LINKS 1-4-3 SERVICE INBOX 1-4-4 SETTINGS 1-4-5 Connection settings . . . 1-4-5-1 Appearance settings . . 1-4-5-2 Security settings . . . . . 1-4-5-3 Service inbox settings . 1-4-5-4 GO TO ADDRESS 1-4-6 CLEAR THE CACHE 1-4-7 15 GO TO 16 SIM SERVICES Note: Some phone features are - Nokia 7250i | Nokia 7250i User Guide in English - Page 34
SIM CARD The SIM card and its contacts can easily be damaged by scratches or bending, so be careful when handling, inserting, or removing the card. Before installing the SIM card, always make sure that the phone is switched off and that you have removed the cover and battery. REMOVE THE BACK COVER - Nokia 7250i | Nokia 7250i User Guide in English - Page 35
card holder toward the bottom end of the phone until it unlocks. 5 Swing the SIM card holder open. 6 Insert the SIM card into the holder (beveled corner last) with the gold contacts facing toward the top end of the phone. 7 Close the SIM card holder. 8 Slide the SIM card holder toward the top end of - Nokia 7250i | Nokia 7250i User Guide in English - Page 36
the power key on top of the phone for at least 3 seconds. If the phone displays Insert SIM card even though the SIM card is properly inserted, or SIM card not supported, contact your service provider. 2 If the phone asks for a PIN code, enter the PIN code (displayed as ****) and select OK. See "PIN - Nokia 7250i | Nokia 7250i User Guide in English - Page 37
3 If the phone asks for a security code, enter the security code and select OK. See "Security code" on page 41 for more information. Note: If the language that appears in your display is not correct, see "Set the display language" on page 93 for information on changing the display language. • SET - Nokia 7250i | Nokia 7250i User Guide in English - Page 38
code, the area code without a leading zero (if necessary), and the phone number. Make a conference call Conference calling is a network service that allows up to six persons to take part in a conference call. 1 Make a call to the first participant. 2 To call a new participant, select Options > New - Nokia 7250i | Nokia 7250i User Guide in English - Page 39
with Keyguard on, simply press the Talk key. During the call, all features function as normal. When you end or reject the call, the keypad automatically numbers programmed into your phone (for example, 911). Enter the emergency number and press the Talk key. The number is displayed only after you - Nokia 7250i | Nokia 7250i User Guide in English - Page 40
use your phone as a loudspeaker during a call. Do not hold the phone to your ear enhancements are connected. Note: When you select the New call option from the in-call menu, the the display. 2 When you connect and the prerecorded greeting begins, follow the automated instructions to listen to your - Nokia 7250i | Nokia 7250i User Guide in English - Page 41
call are network services. During a contacts menu. Menu-Display the main menus. Hold-Place the current call on hold. Unhold-Remove the current call from hold status. Lock keypad-Lock the keypad to prevent an accidental key press. New call-Place a new the handsfree feature in your phone. Handset- - Nokia 7250i | Nokia 7250i User Guide in English - Page 42
these functions. Do not switch on the phone when the use of a wireless phone is prohibited or when it may cause interference or danger. You can use two methods for entering text and numbers. • Standard mode is the only way to enter names into contacts and to rename caller groups. • Predictive text - Nokia 7250i | Nokia 7250i User Guide in English - Page 43
display switches from Abc to 123 (or vice versa). • PREDICTIVE TEXT INPUT Predictive text input allows you to write messages quickly using your keypad and the built-in phone dictionary. It is much faster than using the standard mode key. The phone "guesses" the word you are trying to spell. [ 32 ] - Nokia 7250i | Nokia 7250i User Guide in English - Page 44
encounter a word that predictive text does not recognize, a question mark (?) follows the word and Spell appears in the lower left of the display. Select Spell, enter your new word using the keypad, and select Save. The word is added to the dictionary and to the message that you are writing. Keep - Nokia 7250i | Nokia 7250i User Guide in English - Page 45
Predictive text example To write Nokia with predictive text on and with the English dictionary selected, press each of the following keys once: the 6 key the 6 key the 5 key the 4 key the 2 key The illustration above simulates your display each time a key is pressed. • ENTER PUNCTUATION AND - Nokia 7250i | Nokia 7250i User Guide in English - Page 46
array of security features prevents accidental calls, allows you to restrict the calls your phone can make and receive, and keeps your stored information safe. • KEYGUARD With Keyguard, you can lock the keypad to prevent keys from being pressed accidentally. If the keypad is locked, it unlocks when - Nokia 7250i | Nokia 7250i User Guide in English - Page 47
and select OK. A message appears in the display confirming your selection. • CALL RESTRICTIONS This network service lets you restrict the calls your phone can make and receive. Check with your service provider for details. Note: When calls are restricted, calls may be possible to emergency numbers - Nokia 7250i | Nokia 7250i User Guide in English - Page 48
status-The phone lists the call types with call restriction active. 4 Select OK. Change your restriction password Contact your service provider for your original restriction password. 1 Select Menu > Settings > Security settings > Access codes > Change restriction password. 2 Enter your new password - Nokia 7250i | Nokia 7250i User Guide in English - Page 49
dialing not active and then Fixed dialing list empty appear in the display. You are prompted to enter the PIN2 code. 3 Enter the PIN2 code and select OK. 4 Enter the fixed dialing number, or select Find to retrieve a number from contacts and select OK. 5 Enter a name for the number and select OK - Nokia 7250i | Nokia 7250i User Guide in English - Page 50
empty appears in the display. • You cannot access SIM memory manually (view or copy numbers on the SIM card) while fixed dialing is active. • CLOSED USER GROUPS This network service specifies the group of people whom you can call and who can call you. Default resets the phone to use a user group - Nokia 7250i | Nokia 7250i User Guide in English - Page 51
the original) that is inserted after you power off the phone. There are three security levels: Off-Owner and Nonowner cards are treated the same. Memory-Nonowner cards can access SIM memory. Any changes to the memory setting requires the security code. The owner card has access to all features, but - Nokia 7250i | Nokia 7250i User Guide in English - Page 52
to enter the new security code. 3 Enter the new security code (up to 10 characters) and select OK. You are prompted to reenter the new security code for verification. 4 Enter the new security code again and select OK. A message appears in the display confirming your security code has been changed - Nokia 7250i | Nokia 7250i User Guide in English - Page 53
must be obtained from your service provider. If you enter an incorrect PUK or PUK2 code 10 times in succession, SIM rejected appears in the display and the SIM card can no longer be used. You must contact your service provider for a new SIM card. Wallet code The wallet code is needed to access the - Nokia 7250i | Nokia 7250i User Guide in English - Page 54
to use these functions. Do not switch on the phone when the use of a wireless phone is prohibited or when it may cause interference or danger. The advanced multimedia player gives you a wide array of options for handling image, audio, video, and image animation files. There is no menu item for the - Nokia 7250i | Nokia 7250i User Guide in English - Page 55
on your phone: • Messages (Menu 1) • Call log (Menu 2) • Contacts (Menu 3) • Profiles (Menu 4) • Settings (Menu 5) • Radio (Menu 6) • Camera (Menu 7) • Gallery (Menu 8) • Organizer (Menu 9) • Games (Menu 10) • Applications (Menu 11) • Extras (Menu 12) • Connectivity (Menu 13) • Services (Menu 14 - Nokia 7250i | Nokia 7250i User Guide in English - Page 56
and sent as a series. The series of messages is linked by the compatible phone when received and displayed as a single SMS message. For this feature to work properly, the receiving phone must also support linked messages. While receiving linked messages, you can start reading the first part before - Nokia 7250i | Nokia 7250i User Guide in English - Page 57
SEND AND RECEIVE MESSAGES You will need the following to send and receive messages: • A messaging service through your service provider • A message center number, which must be saved to your phone (if your service provider has not done so already). See "Save your message center number" on page 48 - Nokia 7250i | Nokia 7250i User Guide in English - Page 58
contact-Insert a name from contacts into your message. Insert number-Insert a number from contacts the original text in the reply, a template, or empty screen. Use detail-Extract to your phone's calendar as a reminder note for the current day. Message details-View the sender's name and phone number, - Nokia 7250i | Nokia 7250i User Guide in English - Page 59
MESSAGE TYPE You can choose the type of message sent by your phone. Types include Text, E-mail, Page, and Fax. The default message type is Text. Note: This feature must be supported by your service provider. 1 From the menus, select Messages > Message settings > Text messages > Sending profile - Nokia 7250i | Nokia 7250i User Guide in English - Page 60
that purpose. You can save these distribution lists in phone memory. Note that the phone sends the message separately to each recipient in the options are available: View list-View the details or delete the contacts in the selected list. Add list-Add a new distribution list. Rename list-Change the - Nokia 7250i | Nokia 7250i User Guide in English - Page 61
Clear list-Delete all names and phone numbers from the selected list. Delete list-Delete the selected distribution list. View Messages > Text message > Create message. After a brief pause, the message entry screen appears in the display. 2 Write your message and select Options > Save message. [ 50 ] - Nokia 7250i | Nokia 7250i User Guide in English - Page 62
> My folders > Options > Add folder. 2 Enter a name for the new folder and select OK. The folder is added. REMOVE A FOLDER Only folders created pause, the folder opens. Any folders that you have created appear in the display. 2 Scroll to the folder you wish to remove and select Options > Delete - Nokia 7250i | Nokia 7250i User Guide in English - Page 63
message memory is full and you have more messages waiting at the network, blinks in on the start screen. You can do the messages > Delete messages. After a brief pause, a list of your folders appears in the display. 2 Select the folder containing the messages you want to delete. You are asked to - Nokia 7250i | Nokia 7250i User Guide in English - Page 64
the text message settings interface. For more details about text message services, contact your service provider. 1 From the menus, select Messages > Message Settings > Text messages > Sending profile. 2 If more than one message profile set is supported by your SIM card, select the set you want to - Nokia 7250i | Nokia 7250i User Guide in English - Page 65
service. In home network cannot receive multimedia messages outside the home network. Incoming multimedia messages-Select Retrieve to receive multimedia messages, or Reject if you do not wish to receive multimedia messages. Connection settings-Define connection parameters for multimedia data - Nokia 7250i | Nokia 7250i User Guide in English - Page 66
service provider. For more information, contact your service provider. • WRITE AND SEND A TEXT MESSAGE Note: This feature uses details about messaging services, check with your service provider. • READ MESSAGES When you receive a message, your phone beeps and Message received appears in the display - Nokia 7250i | Nokia 7250i User Guide in English - Page 67
select Options > Reply. 2 Select a Start reply with option: • Empty screen • Original text • Template • Yes • No • OK • Thank you • Congratulations • Happy > Forward. 2 Enter the recipient's phone number, or select Find to retrieve a number from contacts. 3 Select OK. The message is forwarded. - Nokia 7250i | Nokia 7250i User Guide in English - Page 68
them to your phone or other compatible phones using Nokia PC Suite. Note: This function can be used only if it is supported by your service provider. Only phones that offer picture message features can receive and display picture messages. Contact your service provider for details. Receive a picture - Nokia 7250i | Nokia 7250i User Guide in English - Page 69
for about 121 characters in the message. If you try and insert a picture into a message that is almost pause, the message edit screen appears in the display. 2 Write a message using the keypad (or Enter the phone number for your recipient, or select Find to retrieve a number from contacts, and select OK - Nokia 7250i | Nokia 7250i User Guide in English - Page 70
display the words "Message Sent." This is an indication that the message has been sent by your device to the message center number programmed into your device. This is not an indication that the message has been received at the intended destination. For more details about messaging services new - Nokia 7250i | Nokia 7250i User Guide in English - Page 71
Find to retrieve an e-mail address from contacts, and select OK. 3 Enter a subject details about messaging services, check with your service provider. Receive a message or e-mail When you receive a text message or e-mail, n Message(s) received appears in the display, where n is the number of new - Nokia 7250i | Nokia 7250i User Guide in English - Page 72
. Note: This function can be used only if it is supported by your service provider. For availability and a subscription to the multimedia messaging service, contact your service provider. Only compatible devices can receive and display multimedia messages. Note: The default setting of the multimedia - Nokia 7250i | Nokia 7250i User Guide in English - Page 73
the display. 2 Select Yes to allow advertisements or No to block advertisements. EDIT MULTIMEDIA CONNECTION SETTINGS Contact your service mode-Select session mode Temporary or Permanent. Data bearer-Select the data bearer (always GPRS). Bearer settings-Set each of the following settings for the data - Nokia 7250i | Nokia 7250i User Guide in English - Page 74
when inserted into a message, or No to keep the original size. Allow multimedia reception-Select Yes, No, or In home network for your multimedia service. In home network cannot receive multimedia messages outside the home network. Incoming multimedia messages-Select Retrieve to receive multimedia - Nokia 7250i | Nokia 7250i User Guide in English - Page 75
send a multimedia message For availability and subscription to the MMS, contact your service provider. 1 From the menus, select Messages > Multimedia messages > Create message. After a brief pause, the message entry screen appears in the display. 2 Enter the text of your message and select Options - Nokia 7250i | Nokia 7250i User Guide in English - Page 76
at the intended destination. For more details about messaging services, check with your service provider. Read and reply to a multimedia message When a multimedia message is being received, appears (blinking) in the display. Once the message has been fully downloaded, and Multimedia message received - Nokia 7250i | Nokia 7250i User Guide in English - Page 77
details Multimedia memory full, view waiting msg. appears in the display, memory for multimedia messages is full. You need to prompted to enter the recipient's phone number. 2 Enter the recipient's number or select Find to retrieve a number from contacts, and select OK. 3 original message. [ 66 ] - Nokia 7250i | Nokia 7250i User Guide in English - Page 78
Your service provider may have already saved your voice mailbox number to your phone. If so, the number will appear in the display in mailbox area code and number and select OK. The phone confirms that the number has been saved. Tip: Save yourself the trouble of entering the mailbox codes each time - Nokia 7250i | Nokia 7250i User Guide in English - Page 79
. Dialing codes instruct the receiving system to pause, wait, bypass, or accept the numbers that follow them in the dialing string. Note: Each voice mail service can vary. The examples and steps that follow are for clarification. Check with your service provider if you have specific questions about - Nokia 7250i | Nokia 7250i User Guide in English - Page 80
For example, press the Star key four times to display w (wait character). Pause briefly and the wait character is inserted into the dialing string. Available dialing codes are as follows: * Bypasses a set of instructions. + Precedes an international telephone number. p Pauses for 2.5 seconds before - Nokia 7250i | Nokia 7250i User Guide in English - Page 81
or more info topics to save to your SIM card. • SERVICE COMMANDS Use the Service commands editor to enter and send service requests (also known as USSD commands) to your service provider. Contact your service provider for information about specific service commands. 1 From the menus, select Messages - Nokia 7250i | Nokia 7250i User Guide in English - Page 82
recent call replaces the oldest. For Call log to work properly: • Your service provider must support caller ID, and it must be enabled. • Your calls cannot be blocked. • Your phone must be on and within the service area. • OPTIONS The following options are available from the call log menu: Missed - Nokia 7250i | Nokia 7250i User Guide in English - Page 83
the number and save it to contacts. Add to contact-Add the number to an existing entry in contacts, if the number is not feature does not function while your phone is off or outside of the service area. 1 If # missed call appears in the display, select List. The phone number appears in the display - Nokia 7250i | Nokia 7250i User Guide in English - Page 84
be set for this feature to work accurately. See "Set the clock" on page 26 for instructions on setting your clock. 1 While viewing dialed numbers or a missed or received call, select Options > Call time. The time that the last call occurred appears in the display - Nokia 7250i | Nokia 7250i User Guide in English - Page 85
, dialed, or received calls from phone memory: 1 From the menus, select Call log > Delete recent call lists. After a brief pause, All, Missed, Received and Dialed appear in the display. 2 Select the call type you calls (missed, dialed, and received). Clear timers-Reset all call timers to zero. [ 74 ] - Nokia 7250i | Nokia 7250i User Guide in English - Page 86
(phone or SIM), change contacts view, and check the memory status of your phone and SIM card. 1-touch dialing-Display the list of 1-touch dialing numbers saved to memory. Service numbers-Display a list of numbers related to your service provider. Own numbers-View the numbers (line 1, line 2, data - Nokia 7250i | Nokia 7250i User Guide in English - Page 87
of the following types of information: General phone number Mobile phone number Home phone number Work phone number Fax number E-mail address Web address Street address Note • SAVE CONTACT INFORMATION You can save names and numbers to phone memory or to SIM memory. Quickly save a name and number - Nokia 7250i | Nokia 7250i User Guide in English - Page 88
or Phone and SIM. See "Select contacts view and memory" on page 84. 2 At the start screen, press the Scroll down key and scroll to the entry to which you wish to add a number or text item. 3 Select Details > Options. 4 Select Add number or Add detail, then select the desired number or text type - Nokia 7250i | Nokia 7250i User Guide in English - Page 89
the entry you want to change, and select Details. 2 Scroll to the number you wish to set as default and select Options > As primary number. • SEARCH FOR AN ENTRY IN CONTACTS 1 At the start screen, press the Scroll down key to display the contents of contacts. 2 Press the key which corresponds to the - Nokia 7250i | Nokia 7250i User Guide in English - Page 90
the Talk key. The phone dials the primary number for the contact. • ADD AN IMAGE TO A NAME OR NUMBER 1 At the start screen, press the Scroll down key. 2 Scroll to the name or number to which you want to add an image, and select Details > Options > Add image. The display shows the list of - Nokia 7250i | Nokia 7250i User Guide in English - Page 91
. You are asked to enter the security code. 6 Enter the security code and select OK. • COPY CONTACT ENTRIES 1 At the start screen, select Contacts > Copy. 2 Select either From phone to SIM card or From SIM card to phone. The following options appear in the display: One by one-Selects and copies - Nokia 7250i | Nokia 7250i User Guide in English - Page 92
an entry in contacts using IR or text message, if supported by your service provider. Receive a business card using IR 1 From the menus, select Connectivity > Infrared to ensure IR is activated. When you receive the business card, your phone beeps and a message appears in the display. 2 Select Save - Nokia 7250i | Nokia 7250i User Guide in English - Page 93
to any empty slot and select Assign. 3 Enter the number (including the area code) and select OK, or select Find to retrieve a number from contacts. 4 Enter a name for the number and select OK. If 1-touch dialing is off, the phone displays a prompt asking if you would like to turn 1-touch dialing on - Nokia 7250i | Nokia 7250i User Guide in English - Page 94
have saved the operating number of your phone, as well as various information and service numbers to your SIM card. Note: This feature may not be supported by your SIM card. Contact your service provider for more information. 1 At the start screen, select Contacts, then select one of the following - Nokia 7250i | Nokia 7250i User Guide in English - Page 95
in use-Select the memory you wish to use. Options are Phone, SIM card, or Phone and SIM combined. With Phone and SIM selected, names and numbers are saved to phone memory but entries saved to both memories appear in the display. Contacts view-Select the Name list, Name and number, or Name only - Nokia 7250i | Nokia 7250i User Guide in English - Page 96
phone reacts when you receive a call or a message, how your keypad sounds when you press a key, and more. Ringing options, keypad tones, and other settings for each of the five available profiles can be left at their default setting, or customized to suit profiles appears in the display. 2 Select the - Nokia 7250i | Nokia 7250i User Guide in English - Page 97
missed calls. For example, suppose you attend an event that requires your phone be set to Silent before the event starts, but you forget to the Profiles menu. After a brief pause, the list of profiles appears in the display. 2 Select a profile, then select Timed. 3 Enter the time for the profile - Nokia 7250i | Nokia 7250i User Guide in English - Page 98
on your phone. For more information about the availability of the settings, contact your service provider or nearest authorized Nokia dealer. • to menu. You can also select an operator-specific name for the Right selection key to be displayed in the start screen. Choose functions 1 From the - Nokia 7250i | Nokia 7250i User Guide in English - Page 99
is displayed in the new order. 4 Select Done. A confirmation message appears. 5 Select Yes. The changes are saved. Choose a name 1 From the menus, select Settings > Right selection key settings > Right selection key. 2 Select either an operator-specific name (if available), Go to, or Contacts. The - Nokia 7250i | Nokia 7250i User Guide in English - Page 100
OK. 3 Select am or pm. Show or hide the clock You may display or not display the clock on the start screen. 1 From the menus, select Settings > Time format. 2 Select 24-hour or am/pm. A message appears in the display confirming your selection. Set the date 1 From the menus, select Settings > Time - Nokia 7250i | Nokia 7250i User Guide in English - Page 101
networks. Contact your service provider for availability. ACTIVATE CALL FORWARDING Note: This is a network-dependent feature. Some options listed in the following table may not appear in the display. Contact your service of reach-Forward incoming calls when your phone is off. Forward when not able to - Nokia 7250i | Nokia 7250i User Guide in English - Page 102
feature has been activated successfully. CANCEL CALL FORWARDING From the menus, select Settings > Call settings > Call forwarding > Cancel all call forwarding. Note: Cancel all call forwarding may affect your ability to receive voice mail messages. Contact your service provider for specific details - Nokia 7250i | Nokia 7250i User Guide in English - Page 103
deactivate. Send my caller identity You can prevent your number from being displayed on the receiving party's caller ID. This feature is network-dependent and works on a call-by-call basis. Contact your service provider for more information. 1 From the menus, select Settings > Call settings > Send - Nokia 7250i | Nokia 7250i User Guide in English - Page 104
have not subscribed to this network service, you will not be able to place calls. However, calls on both lines can be answered regardless of the selected line. 2 Select Line 1 or Line 2. A message appears in the display confirming your selection. Tip: If supported by your SIM card, you can prevent - Nokia 7250i | Nokia 7250i User Guide in English - Page 105
:ss format) and select OK. Activate or deactivate cell info display Note: Cell info display is network-dependent and may not work the same in all networks. Contact your service provider for availability. When this function is selected, your phone will indicate when it is used in a system cell based - Nokia 7250i | Nokia 7250i User Guide in English - Page 106
preset by your service provider. Manual-Your phone searches for a network which has a roaming agreement with your service provider. Note: If No system access appears in the display, you will need to switch to Automatic mode, or insert another SIM card into the phone. Confirm SIM service actions This - Nokia 7250i | Nokia 7250i User Guide in English - Page 107
display confirming your selection. Activate or deactivate help text Your phone displays brief descriptions for most menu items. When you arrive at a feature , download them from browser pages or transfer them with PC Suite from your PC and then save them in the Gallery. Your phone supports JPEG - Nokia 7250i | Nokia 7250i User Guide in English - Page 108
or Grid. Show or hide operator logo Note: This feature is network-dependent. Contact your service provider for more information. You can choose whether the display shows the operator logo when the phone is in standby mode. 1 From the menus, select Settings > Display settings > Operator logo. [ 97 ] - Nokia 7250i | Nokia 7250i User Guide in English - Page 109
period of time. Press any key to deactivate the screen saver. The screen saver is also deactivated when the phone is out of the network coverage area. You can set your phone to display a screen saver after a preset time or after a custom time (up to 60 minutes) of your choosing. 1 From the menus - Nokia 7250i | Nokia 7250i User Guide in English - Page 110
in the Enhancement settings menu only after it has been connected to the phone. Once an enhancement has been connected, it always appears in the menu Headset, Handsfree, Loopset, TTY, Music stand, or Charger. A list of options appears in the display. 3 Select the option of your choice and follow - Nokia 7250i | Nokia 7250i User Guide in English - Page 111
car battery when the car ignition is off. Select Ignition on to automatically switch off the phone approximately 20 seconds after the car ignition is turned off. Select Ignition off to leave the phone on when the car ignition is turned off. Loopset options Use loopset-Enable use of the LPS-4 mobile - Nokia 7250i | Nokia 7250i User Guide in English - Page 112
to enter the security code. 2 Enter the security code (the default is 12345) and select OK. A message appears in the display confirming that original settings have been restored. Note: Data that you have entered or downloaded is not deleted. For example, names and numbers in contacts are not - Nokia 7250i | Nokia 7250i User Guide in English - Page 113
FM stereo, connect a DT-1 music stand or HDS-3 stereo headset to the connector on the bottom of the phone. The leads of the headset function as the antenna, so it must be down. Select OK when a channel is found. Manual tuning-Press the Scroll up key or the Scroll down key to search in increments of - Nokia 7250i | Nokia 7250i User Guide in English - Page 114
mode (default) or in stereo. Stereo output is available through a stereo enhancement. Tip: To set the radio frequency, press the Star key. To tune the radio manually , press the Pound key. Note: When an application using a GPRS connection is sending or receiving data, it may - Nokia 7250i | Nokia 7250i User Guide in English - Page 115
in the standby mode, save it in a compatible PC using Nokia PC Suite software, and upload it to a web address with the content image uploader. When you attach a picture to an entry in your list of contacts, the picture is displayed when your contact calls you. Note: This feature uses shared memory - Nokia 7250i | Nokia 7250i User Guide in English - Page 116
photo, Portrait photo, or Night mode. Open Gallery-Display the Photos folder in the Gallery. Set contrast-Increase or decrease contrast of the selected photo using the Scroll right and Scroll left keys. Set as wallpaper-Set the photo as wallpaper. Details-View details of the photo, such as the - Nokia 7250i | Nokia 7250i User Guide in English - Page 117
Settings, then select one of the following: Image quality-Define file compression when saving the image. Select High, Normal, or Basic. High has the least file compression and provides the best image quality, but takes more used, or if you select My title, you can enter or edit a new title. [ 106 ] - Nokia 7250i | Nokia 7250i User Guide in English - Page 118
and save them there. You can download images and tones using MMS, web sites, or Nokia PC Suite. • FOLDERS 1 At the start screen, select Menu 8 (Gallery). 2 Select one of the following options. View folders-Display the folders in the gallery menu. Add folder-Create a new folder. Delete folder-Delete - Nokia 7250i | Nokia 7250i User Guide in English - Page 119
as wallpaper. Set as ring tone-Use the tone as the ringing tone in the current profile. Details-View details of the file, such as the name, time and date the file was created. Sort-Sort the files according to date, type, name, or size. Delete all-Delete all items in the current Gallery folder - Nokia 7250i | Nokia 7250i User Guide in English - Page 120
around the image: a) Select Insert frame. b) Scroll to one of the frame images in the Graphics folder and select Options > Insert. c) When the image is displayed with the frame added, select OK. 7 To insert clip art in the center of the image: a) Select Insert Clip-art. b) Scroll to one of the - Nokia 7250i | Nokia 7250i User Guide in English - Page 121
phone has many useful features for organizing your everyday life, including an alarm clock, a calendar and a to-do list. • ALARM CLOCK The alarm clock is based on the internal clock of your phone phone is off if there is enough power in the battery. display and start screen. appears on the [ 110 ] - Nokia 7250i | Nokia 7250i User Guide in English - Page 122
Organizer > Alarm clock > Alarm time > Off. Alarm off appears briefly in the display. When the alarm sounds Your phone beeps, vibrates, and the display lights up. Stop and Snooze appear in the bottom of the display. WITH THE PHONE ON Select Stop to shut the alarm off. OR Select Snooze. The alarm - Nokia 7250i | Nokia 7250i User Guide in English - Page 123
/15/2003) and select OK. The monthly view appears in the display with the jump date highlighted. Make a note for a specific date You can choose from five types of notes: Meeting, Call, Birthday, Memo, and Reminder. Your phone asks for further information depending on which note you choose. You also - Nokia 7250i | Nokia 7250i User Guide in English - Page 124
are then given the option to set an alarm. Call prompts you to enter a phone number, a name, and the time. You are then given the option to > Calendar. After a brief pause, the monthly view appears in the display with the current date highlighted. Any dates that contain calendar notes are in - Nokia 7250i | Nokia 7250i User Guide in English - Page 125
for today's date. Send a calendar note to another device 1 From the menus, select Organizer > Calendar. After a brief pause, the monthly view appears in the display. Days containing notes are in bold font. 2 Jump or scroll to the date containing the note you wish to send. 3 Select Options > View day - Nokia 7250i | Nokia 7250i User Guide in English - Page 126
is set to receive data using IR. For more information on enabling IR in the receiving device, refer to the user guide for the receiving device. from contacts), and select OK. The note is sent. Receive Calendar notes from another device When you receive a calendar note, your phone displays Calendar - Nokia 7250i | Nokia 7250i User Guide in English - Page 127
the to-do list feature. You may be able to save up to 30 notes, depending on their length. To-do notes are not related to specific dates. Add a do note and select Options > View. The to-do note appears in the display. Options while viewing to-do notes Select Options while viewing the header or body - Nokia 7250i | Nokia 7250i User Guide in English - Page 128
Games > Game downloads. 2 Select one of the options displayed. After a brief pause, the phone connects to the web pages using the currently active set of browser settings. If the connection fails, you may enter the Services menu and activate another set of service settings. See "Options while online - Nokia 7250i | Nokia 7250i User Guide in English - Page 129
data from an Internet page. This feature is shown only if it is supported by the network and an internet address has been provided by the game. Service settings-Some games need specific service settings. Your phone is set to use as default the service settings for the browser. Details-Display - Nokia 7250i | Nokia 7250i User Guide in English - Page 130
), Not allowed (do not allow net access). Update version-Check if a new version of the application is available for download. Web page-Get further information or additional data for the application from an Internet page. This feature must be supported by a service provider. It is only shown if an - Nokia 7250i | Nokia 7250i User Guide in English - Page 131
You can download new Java applications in different ways. Application downloads 1 From the menus, select Applications > App. downloads. After a brief pause, the list of available browser bookmarks appears in the display. Note: This feature is network-dependent. Contact your service provider for - Nokia 7250i | Nokia 7250i User Guide in English - Page 132
the Java Application installer from PC Suite to download the applications in your phone. Note: Only install software from sources that you trust. When you download games or applications, games may be saved in the Applications menu and applications may be saved in the Games menu. • VIEW MEMORY STATUS - Nokia 7250i | Nokia 7250i User Guide in English - Page 133
countdown timer, stopwatch, mobile wallet, and synchronize tool. • CALCULATOR Basic calculations The calculator in your phone adds, subtracts, select Options > Equals. The sum of your calculation appears in the display. Currency conversion You can convert foreign currency to domestic, or vice versa - Nokia 7250i | Nokia 7250i User Guide in English - Page 134
a decimal if needed, and select OK. The converted amount appears in the display. Edit the exchange rate 1 From the menus, select Extras > Calculator > time runs out, your phone sounds an alarm. Note: The countdown timer only works when the phone is on. Once you turn off your phone, the timer is no - Nokia 7250i | Nokia 7250i User Guide in English - Page 135
a new note and select OK. The timer begins running. When the alarm sounds When the time runs out, your phone sounds an alarm, displays the timer note, and flashes its of the screen. Using the stopwatch consumes the battery and the operating time of the phone will be reduced. Be careful not to let - Nokia 7250i | Nokia 7250i User Guide in English - Page 136
appears below the running time. If you split the time more than once, the new measured time appears at the beginning of the list. You can scroll to see stop timing, select Stop. The total time appears at the top of the display. Measure lap time You can use the lap time function when you want to - Nokia 7250i | Nokia 7250i User Guide in English - Page 137
top of the display. Save the SIM card (if present) for signing and verifying transactions. Online purchases and digital signature capabilities are dependent upon your service provider. You can also store important information in a wallet personal note. Security features such as a password and data - Nokia 7250i | Nokia 7250i User Guide in English - Page 138
your wallet code. 2 Enter your wallet code and select OK > Settings > Change code. 3 Enter the original wallet code and select OK. 4 Enter the new wallet code and select OK. 5 Enter the new wallet code again for verification and select OK. A message appears in the display confirming your change - Nokia 7250i | Nokia 7250i User Guide in English - Page 139
and select OK. 4 Select On to activate or Off to deactivate. A message appears in the display confirming you have activated or deactivated code request. Reset the wallet code If you forget the wallet code and wish to erase all the information stored in wallet, follow these steps. Warning: Once you - Nokia 7250i | Nokia 7250i User Guide in English - Page 140
city, state, zip code, and country, phone number, and e-mail data. Your notes are protected by the wallet security feature. 1 From the menus, select Extras > Wallet. After a brief pause, you are prompted to enter your wallet code. 2 Enter your wallet code and select OK > Personal notes > Add new - Nokia 7250i | Nokia 7250i User Guide in English - Page 141
note. Add new-Compose and save a new note. phone synchronization feature allows you to synchronize the calendar and contacts data in your phone with a remote Internet server or a compatible PC. Contacts in your SIM card will not be synchronized. Note: This feature must be supported by your service - Nokia 7250i | Nokia 7250i User Guide in English - Page 142
a text message, Synchronization settings received is displayed. Select Options, then select one of the following: Details-View the received settings first. Save-Save the synchronization settings. Discard-Discard the synchronization settings. SAVE SETTINGS MANUALLY You need to activate the set where - Nokia 7250i | Nokia 7250i User Guide in English - Page 143
Contact your service provider, if necessary, for this information.) Synchronization server-Enter the name of the server and select OK. Synchronize from your phone If you have saved data want to use other services later. 2 Mark the data to be synchronized. See "Save settings manually" on page 131 for - Nokia 7250i | Nokia 7250i User Guide in English - Page 144
synchronization from your PC. To synchronize contacts and calendar from your PC, use either an IR connection or a data cable. You also need the Nokia PC Suite software. Start the synchronization from your PC using Nokia PC suite. After synchronizing, the data in the phone and in the PC are the same - Nokia 7250i | Nokia 7250i User Guide in English - Page 145
an IR-equipped laptop or IR-equipped desktop PC using the IR port. For more information, see the PC/PDA connectivity guide. This document can be downloaded from the Nokia website at http://www.nokia.com. • INFRARED You can set up the phone to receive data through its IR port. To use an IR connection - Nokia 7250i | Nokia 7250i User Guide in English - Page 146
packet radio service (GPRS), high-speed circuit switched data (HSCSD), and circuit switched data (CSD). GPRS is a technology used to send and receive data using short bursts or packets over the wireless network. With GPRS, you can stay connected to the Internet and allow for faster downloads without - Nokia 7250i | Nokia 7250i User Guide in English - Page 147
to use GPRS, you must first subscribe to the network service. Contact your service provider for details. GPRS icons The following icons appear on the PC. If you use the DKU-5 data cable: 1 Connect the cable to the USB port on your computer and to the connector on your phone. 2 Start using the data - Nokia 7250i | Nokia 7250i User Guide in English - Page 148
the contents of your phone using Windows Explorer or My Computer. Refer to the Nokia PC Suite Connectivity Guide for installation and setup instructions. PC Suite software and documentation for the Nokia 7250i can be downloaded from the U.S. Mobile Phone products section of www.nokia.com. [ 137 ] - Nokia 7250i | Nokia 7250i User Guide in English - Page 149
on your phone can display WAP-based content. Note: This feature is network-dependent. Contact your service provider for mobile users. Most WAP sites are made up of text and hyperlinks. Some pages even contain low-resolution graphics, or require data input. Your service provider and others are free - Nokia 7250i | Nokia 7250i User Guide in English - Page 150
• SET UP FOR BROWSING It should not be necessary to manually configure the browser on your phone. Normally this is done by your service provider once you have subscribed to the feature. Contact your service provider if you have problems using the browser. • SIGN ON TO THE WIRELESS INTERNET Activate - Nokia 7250i | Nokia 7250i User Guide in English - Page 151
you see Check service settings, the phone may not be set up for browsing. Contact your service provider to make sure that your phone is configured properly. • NAVIGATE THE WIRELESS INTERNET Since your phone screen is much smaller than a computer screen, Internet content is displayed differently from - Nokia 7250i | Nokia 7250i User Guide in English - Page 152
to enter information. 5) Options. Select Options to go to the site menu and/or browser page. 6) Back. Select Back to return to the previous page. 7) Data entry field. Brackets [ ] that enclose dots indicate 7) when you need to enter information. In this example, you can enter your zip - Nokia 7250i | Nokia 7250i User Guide in English - Page 153
may be able to upload images and sound files from your phone to a web page. You must be connected to an xHTML page that contains embedded image upload tags. Follow the instructions on the display to upload files. For more information, contact your service provider. • DISCONNECT FROM THE INTERNET To - Nokia 7250i | Nokia 7250i User Guide in English - Page 154
options appear in the display. 2 Select one of the following options. Always online-The phone is automatically registered to a GPRS network when you turn your phone on. When you use the WAP browser, the connection between your phone and the network is created and data transfer is possible. When - Nokia 7250i | Nokia 7250i User Guide in English - Page 155
Show the list of bookmarks for downloading. Shortcuts-Open a new list of options, for example, options specific to the current page. Other options-Show a list of other options, such as appearance and security options. Reload-Reload and update the current page. Quit-Disconnect from a service. [ 144 ] - Nokia 7250i | Nokia 7250i User Guide in English - Page 156
. Using the certificate can help you to improve the security of connections between your phone and a WAP server. You can download the certificate from a WAP page if the WAP service supports the use of authority certificates. After the download, you can view the certificate, then save or delete - Nokia 7250i | Nokia 7250i User Guide in English - Page 157
. 4 To sign the text, select Sign. 5 Select the user certificate you want to use, enter the signing PIN (provided with the SIM card if the SIM card has a security module), and select OK. The digital signature icon disappears, and the service may display a confirmation of your purchase. [ 146 ] - Nokia 7250i | Nokia 7250i User Guide in English - Page 158
you access specific functions quickly. You can personalize the menu so that it lists the functions you use most frequently. See "Personal shortcuts" on page 87 for instructions on setting up the Go to menu. SIM services (Menu 16) In addition to the functions available on the phone, your SIM card may - Nokia 7250i | Nokia 7250i User Guide in English - Page 159
9 Hardware and enhancements • HARDWARE Connection ports and other tools • Charger connector (1) • Pop-PortTM connector for headsets and data cables (2) • IR (infrared) port (3) • Camera lens on the back cover of the phone (4) Antenna Your phone has a built-in antenna. As with any other radio - Nokia 7250i | Nokia 7250i User Guide in English - Page 160
the battery Your phone is powered by a rechargeable battery. To charge the battery: 1 Plug the charger transformer in to a standard ac outlet. 2 Insert the charger output plug into the round connector at the bottom end of the phone. After a few seconds, the battery indicator in the display starts - Nokia 7250i | Nokia 7250i User Guide in English - Page 161
gently pulling the top of the front cover away from the rest of the phone. INSTALL THE KEY MAT AND NEW FRONT COVER 5 Remove the key mat from the old front cover and place it into the new front cover as shown. 6 Insert the latches from the bottom of the new front cover into the matching holes at the - Nokia 7250i | Nokia 7250i User Guide in English - Page 162
cover into place. • ABOUT ENHANCEMENTS Check the model number of any charger before use with this device. This device is intended for use when supplied with power from ACP-7, ACP-8, ACP-12, LCH-9, LCH-12, DDC-1, and DT-1. Warning: Use only batteries, chargers and enhancements approved by the phone - Nokia 7250i | Nokia 7250i User Guide in English - Page 163
shorter than normal, it is time to buy a new battery. Use only batteries approved by the phone manufacturer and recharge your battery only with the chargers approved by the manufacturer. Unplug the charger when not in use. Do not leave the battery connected to a charger for longer than a week, since - Nokia 7250i | Nokia 7250i User Guide in English - Page 164
phone is fully charged. If you leave the phone connected to the charger, the battery receives an additional charge. If you switch the phone on when charging is complete, Battery full momentarily appears in the display. Note: The battery depending on network conditions, charging and phone use. [ 153 ] - Nokia 7250i | Nokia 7250i User Guide in English - Page 165
, plug it into a standard 120-Vac wall outlet, and connect the lead from the charger to the base of your phone. Calls can be made during charging, even with a fully discharged battery. The charger can also be used together with the optional Desktop stand (DCV-14). Multivoltage performance travel - Nokia 7250i | Nokia 7250i User Guide in English - Page 166
phone. Calls can be made during charging, even with a fully discharged battery. The charger can also be used together with the optional Desktop stand (DCV-14). • AUDIO Music stand (DT-1) Equipped with full-range stereo speakers, the Nokia the Nokia Music stand has an automute feature for external - Nokia 7250i | Nokia 7250i User Guide in English - Page 167
convenient handsfree solution with a remote control. Boom headset (HDB-4) New over-the-ear design concept boom headset is small, lightweight, and provides excellent audio quality. Connect the headset 1 Plug the headset plug into the Pop-PortTM connector at the bottom end of your phone. 2 Position - Nokia 7250i | Nokia 7250i User Guide in English - Page 168
the Nokia loopset, people who use a T-coil equipped hearing aid have the freedom to talk on a digital mobile phone. The loopset goes around your neck, so it can be worn comfortably and discreetly. • DATA Data cable (DKU-5) For e-mail, faxes, Internet, and data transmissions, the data cable provides - Nokia 7250i | Nokia 7250i User Guide in English - Page 169
MKU-1) • Handsfree microphone (HFM-8) • Handsfree speaker (HFS-12) • Power cable (PCU-4) • System cable (SCU-4) • Mobile holder (MBC-15S) and swivel mount (HHS-15) The car kit's ignition sense feature prevents the phone from draining the car battery when the car ignition is turned off. Note: MBC-15S - Nokia 7250i | Nokia 7250i User Guide in English - Page 170
Hardware and enhancements Mobile lighter charger (LCH-12) This multi voltage charger plugs into the cigarette lighter and is an easy and convenient way to charge the compatible phone battery in a vehicle. This lightweight ac charger can be used with all battery options. To use the charger, plug it - Nokia 7250i | Nokia 7250i User Guide in English - Page 171
, dirty areas. Its moving parts can be damaged. • Do not store the phone in hot areas. High temperatures can shorten the life of electronic devices, damage batteries, and warp or melt certain plastics. • Do not store the phone in cold areas. When it warms up (to its normal temperature), moisture can - Nokia 7250i | Nokia 7250i User Guide in English - Page 172
above suggestions apply equally to your phone, battery, charger or any enhancement. If any of them are not working properly, take them to your nearest qualified service facility. The personnel there will assist you, and if necessary, arrange for service. • IMPORTANT SAFETY INFORMATION Traffic Safety - Nokia 7250i | Nokia 7250i User Guide in English - Page 173
to consult your service provider. Other medical devices Operation of any radio transmitting equipment, including cellular phones, may interfere with you have any questions. Switch off your phone in health care facilities when any regulations posted in these areas instruct you to do so. Hospitals or - Nokia 7250i | Nokia 7250i User Guide in English - Page 174
off your phone before boarding an aircraft. The use of wireless telephones in an aircraft may be dangerous to the operation of the aircraft, disrupt the wireless telephone network, and may be illegal. Failure to observe these instructions may lead to suspension or denial of telephone services to the - Nokia 7250i | Nokia 7250i User Guide in English - Page 175
the display and ready the phone for calls. 3 Enter the emergency number (for example, 911). 4 Press the Talk key. If certain features are in use, you may first need to turn those features off before you can make an emergency call. Consult this user guide and your local cellular service provider - Nokia 7250i | Nokia 7250i User Guide in English - Page 176
all persons, regardless of age and health. The exposure standard for wireless mobile phones employs a unit of measurement known as the Specific Absorption Rate, or SAR. The SAR limit set by the FCC is 1.6W/kg.* Tests for SAR are conducted using standard operating positions accepted by the FCC with - Nokia 7250i | Nokia 7250i User Guide in English - Page 177
file with the FCC and can be found under the Display Grant section of http://www.fcc.gov/oet/fccid after searching on FCC ID PYA NHL-4JX. For body worn operation, this phone has been tested reporting requirements and the network band. For SAR information in other regions please look under product - Nokia 7250i | Nokia 7250i User Guide in English - Page 178
Troubleshooting The following table lists some common problems and their solutions. Problem Possible cause Possible solution My phone is not charging The charger and phone are not properly connected. The charger is not properly plugged into the wall. Securely connect the charger to the phone - Nokia 7250i | Nokia 7250i User Guide in English - Page 179
12 Technical information Feature Specification Dimensions Width 1.73 in (44 mm) Height 4.13 in (105 mm) Depth 0.75 in (19 mm) Weight 3.24 oz (92 gm) with BLD-3 Li-Ion Battery Wireless networks GSM 900, 1800, and 1900 networks Size (volume) 4.45 cu in (73 cu cm) GSM 900: 880-915 MHz - Nokia 7250i | Nokia 7250i User Guide in English - Page 180
Nokia one-year limited warranty Nokia Inc. ("Nokia") warrants that this cellular phone ("Product") is free 2 The limited warranty extends only to the original purchaser ("Consumer") of the Product and is the price paid by the Consumer for the Product less a reasonable amount for usage. Nokia shall - Nokia 7250i | Nokia 7250i User Guide in English - Page 181
number plate or the enhancement data code has been removed, defaced or altered. e) The defect or damage was caused by the defective function of the cellular system or by inadequate signal reception by the external antenna, or viruses or other software problems introduced into the Product. [ 170 - Nokia 7250i | Nokia 7250i User Guide in English - Page 182
Consumer shall include a return address, daytime phone number and/or fax number, complete description of the problem, proof of purchase and service agreement (if applicable). Expenses related to removing the Product from an installation are not covered under this limited warranty. d) The Consumer - Nokia 7250i | Nokia 7250i User Guide in English - Page 183
but the problem with the Product is not covered under the of the limited warranty period, Nokia's normal service policies shall apply and the Consumer with Product performance and reliability specifications. 10 ANY IMPLIED WARRANTY OF SAVINGS OR REVENUE, LOSS OF DATA, PUNITIVE DAMAGES, LOSS OF USE OF - Nokia 7250i | Nokia 7250i User Guide in English - Page 184
.: Customer Service 7725 Woodland Center Blvd., Suite. 150 Tampa, FL 33614 Telephone: 1-888-NOKIA-2U (1-888-665-4228) Facsimile: (813) 287-6612 TTY/TDD Users Only: 1-800-24-NOKIA (1-800-246-6542) 17 The limited warranty period for Nokia supplied attachments and enhancements is specifically defined - Nokia 7250i | Nokia 7250i User Guide in English - Page 185
Manufactured or sold under one or more following US Patents. Asterisk (*) indicates design patents pending. 4868846 4969192 5001372 5045973 5101175 5212834 5230091 5233634 5241284 5241583 5266782 5311151 5311179 5317283 5331638 5335362 5353328 5378935 5384782 5390223 5396657 5400949 5416435 5442521 - Nokia 7250i | Nokia 7250i User Guide in English - Page 186
from the CTIA Appendix A Message from the CTIA (Cellular Telecommunications & Internet Association) to all users of mobile phones. © 2001 Cellular Telecommunications & Internet Association. All Rights Reserved.1250 Connecticut Avenue, NW Suite 800, Washington, DC 20036. Phone: (202) 785-0081 [ 175 ] - Nokia 7250i | Nokia 7250i User Guide in English - Page 187
other drivers. It instruction manual and learn to take advantage of valuable features most phones offer, including automatic redial and memory. Also, work to memorize the phone keypad so you can use the speed dial function without taking your attention off the road. 2 When available, use a hands free - Nokia 7250i | Nokia 7250i User Guide in English - Page 188
free call on your wireless phone! 9 Use your wireless phone to help others in emergencies. Your wireless phone a call for emergency services. But you still can use your wireless phone to lend a hand. phone users of their responsibilities as safe drivers and good citizens. As we approach a new - Nokia 7250i | Nokia 7250i User Guide in English - Page 189
For more information, please call 1-888-901-SAFE. For updates: http://www.wow-com.com/consumer/issues/driving/ articles.cfm?ID=85 © 2001 Cellular Telecommunications & Internet Association. All Rights Reserved. 1250 Connecticut Avenue, NW Suite 800, Washington, DC 20036. Phone: (202) 785-0081 [ 178 ] - Nokia 7250i | Nokia 7250i User Guide in English - Page 190
Appendix B Message from the FDA Appendix B Message from the FDA (U.S. Food and Drug Administration) to all users of mobile phones. July 18, 2001 ..... For updates: http://www.fda.gov/cdrh/phones [ 179 ] - Nokia 7250i | Nokia 7250i User Guide in English - Page 191
problems are associated with using wireless phones. There is no proof, however, that wireless phones are absolutely safe. Wireless phones emit low levels of radiofrequency energy (RF) in the microwave range while being used. They also emit very low levels of RF when in the stand-by mode. Whereas - Nokia 7250i | Nokia 7250i User Guide in English - Page 192
about wireless phones. FCC also regulates the base stations that the wireless phone networks rely upon phones are the subject of this update? The term wireless phone refers here to hand-held wireless phones with built-in antennas, often called cell mobile or PCS phones. These types of wireless phones - Nokia 7250i | Nokia 7250i User Guide in English - Page 193
people actually using wireless phones would provide some of the data that are needed. Lifetime of a detailed agenda of research needs that has driven the establishment of new research programs RF exposure from wireless telephones is set at a Specific Absorption Rate (SAR) of 1.6 watts per kilogram - Nokia 7250i | Nokia 7250i User Guide in English - Page 194
the Spatial-Peak Specific Absorption Rate (SAR) in the Human Body Due to Wireless Communications Devices: Experimental Techniques, sets forth the first consistent test methodology for measuring the rate at which RF is deposited in the heads of wireless phone users. The test method uses a tissue - Nokia 7250i | Nokia 7250i User Guide in English - Page 195
health hazard exists. 11. What about wireless phone interference with medical equipment? Radiofrequency energy (RF) from wireless phones can interact with some electronic devices. For this reason, FDA helped develop a detailed test method to measure electromagnetic interference (EMI) of implanted - Nokia 7250i | Nokia 7250i User Guide in English - Page 196
74 log 71-74 restriction 36 times 73 waiting 92 caller groups 83 ID 92 calls answer 27 emergency 35, 144, 164 make 26 reject 27 camera 104 cancel call forwarding 91 car enhancements 158 care and maintenance 160 carry cases 159 cell info display 94 chargers 154-155 chat 66 clock - Nokia 7250i | Nokia 7250i User Guide in English - Page 197
dictionary 33 display brightness 98 language 93 settings 96 distribution lists 49 download applications 120 games 117 duration of calls 74 E e-mail 59 emergency calls 164 while online 144 with keypad locked 35 enhancements 151-159 audio 155-157 car 158 covers and cases 159 data 157 - Nokia 7250i | Nokia 7250i User Guide in English - Page 198
picture 57-59 read 55 reply 56 send 55, 58, 59, 64 service commands 70 settings 53-55 text 55 undelivered 50 voice 67-70 missed calls, view 72 multimedia messages 61-66 player 43 music stand 100,155 N Nokia PC Suite 137 notes calendar 112-115 to-do 116 O operator logo 97 [ 187 - Nokia 7250i | Nokia 7250i User Guide in English - Page 199
110-116 alarm clock 110 calendar 111 to-do list 116 OTA settings 87 over the air settings 87 own numbers 83 P PC Suite 137 personal shortcuts 87 phone memory 93 security 35-39 picture messages 57-59 power 153-155 predictive text 32-34 profiles 85-86 customize 85 select 85 timed 86 - Nokia 7250i | Nokia 7250i User Guide in English - Page 200
31-34 messages 55 predictive 32-34 time settings 89 timed profile 86 to-do list 116 tones 85 travel chargers 154-155 troubleshooting 167 turn off alarm clock 111 U unlock the keypad 35 V vibrating alert 85 view call duration 74 call times 73 dialed numbers 73 missed calls 72 received - Nokia 7250i | Nokia 7250i User Guide in English - Page 201
NOTES Para obtener un manual del usuario en español favor de llamar o enviar un fax al teléfono 1-888-NOKIA-2U, fax 813-249-9619. [ 190 ] 05/03
-
 1
1 -
 2
2 -
 3
3 -
 4
4 -
 5
5 -
 6
6 -
 7
7 -
8
-
9
-
10
-
11
-
12
-
13
-
14
-
15
-
16
-
17
-
18
-
19
-
20
-
21
-
22
-
23
-
24
-
25
-
26
-
27
-
28
-
29
-
30
-
31
-
32
-
33
-
34
-
35
-
36
-
37
-
38
-
39
-
40
-
41
-
42
-
43
-
44
-
45
-
46
-
47
-
48
-
49
-
50
-
51
-
52
-
53
-
54
-
55
-
56
-
57
-
58
-
59
-
60
-
61
-
62
-
63
-
64
-
65
-
66
-
67
-
68
-
69
-
70
-
71
-
72
-
73
-
74
-
75
-
76
-
77
-
78
-
79
-
80
-
81
-
82
-
83
-
84
-
85
-
86
-
87
-
88
-
89
-
90
-
91
-
92
-
93
-
94
-
95
-
96
-
97
-
98
-
99
-
100
-
101
-
102
-
103
-
104
-
105
-
106
-
107
-
108
-
109
-
110
-
111
-
112
-
113
-
114
-
115
-
116
-
117
-
118
-
119
-
120
-
121
-
122
-
123
-
124
-
125
-
126
-
127
-
128
-
129
-
130
-
131
-
132
-
133
-
134
-
135
-
136
-
137
-
138
-
139
-
140
-
141
-
142
-
143
-
144
-
145
-
146
-
147
-
148
-
149
-
150
-
151
-
152
-
153
-
154
-
155
-
156
-
157
-
158
-
159
-
160
-
161
-
162
-
163
-
164
-
165
-
166
-
167
-
168
-
169
-
170
-
171
-
172
-
173
-
174
-
175
-
176
-
177
-
178
-
179
-
180
-
181
-
182
-
183
-
184
-
185
-
186
-
187
-
188
-
189
-
190
-
191
-
192
-
193
-
194
-
195
-
196
-
197
-
198
-
199
-
200
-
201
 |
 |
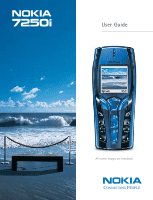
User Guide
All screen images are simulated.