NordicTrack Cxt 970 User Manual - Page 15
How To Connect Your Portable Cd Player - instruction manual
 |
View all NordicTrack Cxt 970 manuals
Add to My Manuals
Save this manual to your list of manuals |
Page 15 highlights
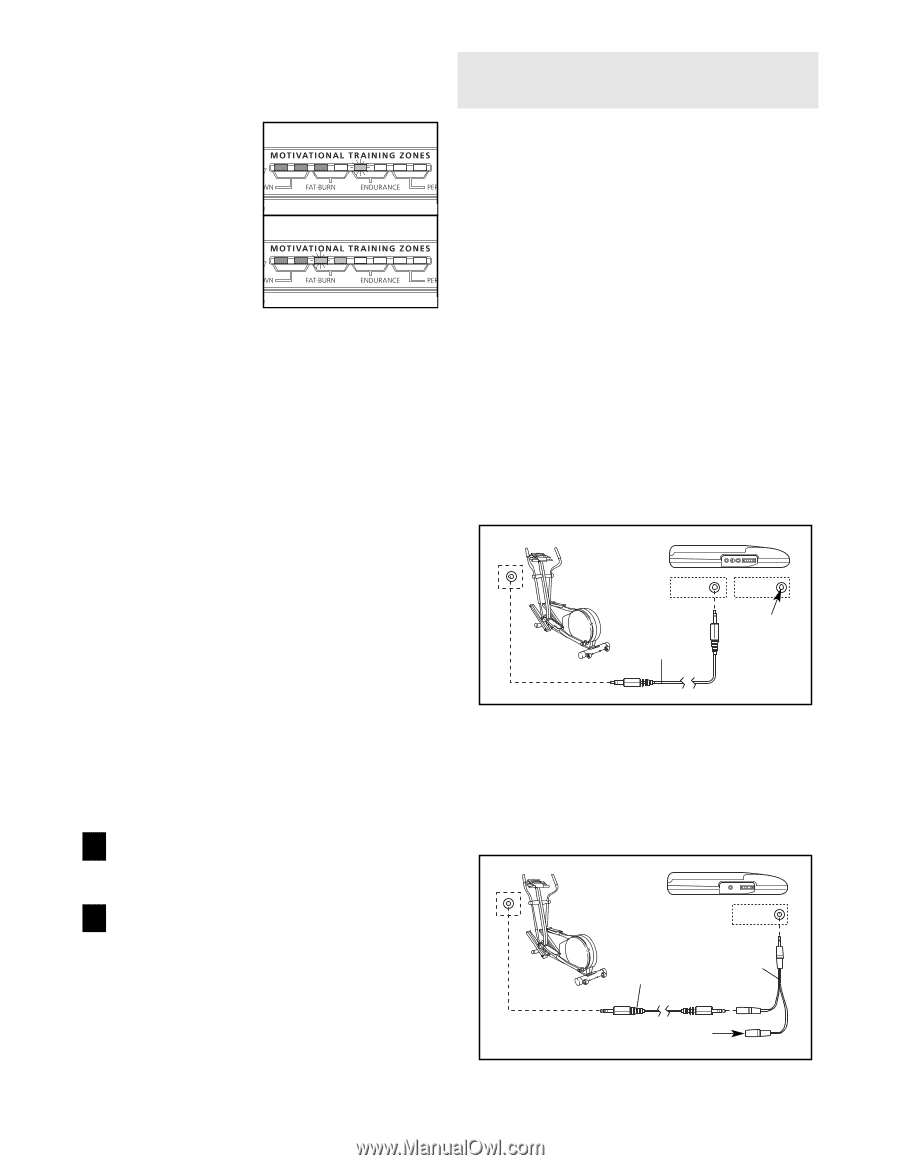
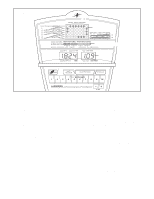
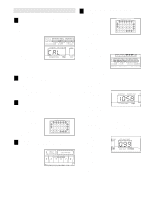
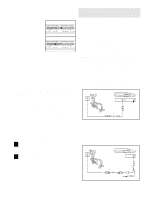
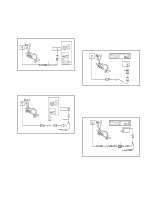
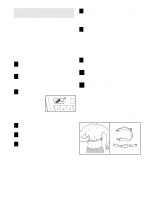
As you exercise, the Training Zone bar will help you to keep your heart rate near the heart rate setting for the current segment. The lit indicators in the bar will show your actual pace. a When you hold the handgrip pulse sensor (or wear the optional chest pulse sensor), the console will period- b ically compare your heart rate to the heart rate set- ting for the current segment; if neces- sary, an indicator in the bar will then flash to prompt you to increase or decrease your pace to bring your heart rate closer to the current heart rate setting. If an indicator to the right of the lit indicators flashes (see drawing a), increase your pace. If an indicator to the left of any lit indicator flashes (see drawing b), decrease your pace. When no indicator is flashing, your heart rate is near the current heart rate setting. Important: The heart rate settings are intended only to provide motivation. Your actual heart rate may be slower than the current heart rate setting. Make sure to exercise at a pace that is com- fortable for you. The program will continue until the resistance setting for the last segment is shown in the Current Segment column of the matrix and the left display shows that no time remains in the program. HOW TO CONNECT YOUR CD PLAYER, VCR, OR COMPUTER To use iFIT.com CDs, the elliptical crosstrainer must be connected to your portable CD player, portable stereo, home stereo, or computer with CD player. See pages 15 to 17 for connecting instructions. To use iFIT.com videocassettes, the elliptical crosstrainer must be connected to your VCR. See page 17 for connecting instructions. To use iFIT.com programs directly from our Web site, the elliptical crosstrainer must be connected to your home computer. See page 17 for connecting instructions. HOW TO CONNECT YOUR PORTABLE CD PLAYER Note: If your CD player has separate LINE OUT and PHONES jacks, see instruction A below. If your CD player has only one jack, see instruction B. A. Plug one end of the audio cable into the jack beneath the console. Plug the other end of the cable into the LINE OUT jack on your CD player. Plug your headphones into the PHONES jack. A PHONES LINE OUT LINE OUT PHONES Audio Cable Headphones Note: You can manually override the resistance setting for the current segment, if desired, with the Resistance buttons. However, when the next segment begins, the resistance will automatically adjust to the setting for the next segment. If you stop exercising for six seconds or longer, a tone will sound and the program will pause. 7 Watch your progress with the two displays. Refer to step 5 on page 11. 8 When the program is finished, the console will automatically turn off. See step 7 on page 12. B. Plug one end of the audio cable into the jack beneath the console. Plug the other end of the cable into a 1/8" Y-adapter (available at electronics stores). Plug the Y-adapter into the PHONES jack on your CD player. Plug your headphones into the other side of the Y-adapter. B PHONES PHONES Audio Cable 1/8" Y-adapter Headphones 15
-
 1
1 -
2
-
3
-
4
-
5
-
6
-
7
-
8
-
9
-
 10
10 -
 11
11 -
 12
12 -
 13
13 -
 14
14 -
 15
15 -
 16
16 -
 17
17 -
 18
18 -
 19
19 -
 20
20 -
21
-
22
-
23
-
24
 |
 |