Oki B420dn B410/B420/B430 Setup Guide (e,f,s,p) - Page 11
Macintosh - oki driver
 |
View all Oki B420dn manuals
Add to My Manuals
Save this manual to your list of manuals |
Page 11 highlights
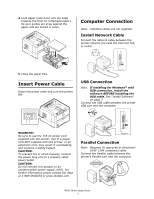
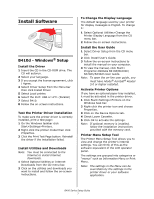
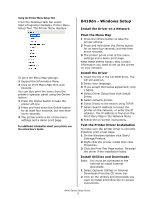
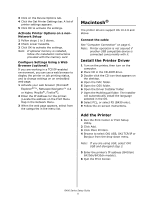
3 Click on the Device Options tab. 4 Click the Get Printer Settings bar. A list of printer settings appears. 5 Click OK to activate the settings. Activate Printer Options on a nonNetwork Setup 1 Follow steps 1 to 3 above. 2 Check Lower Cassette. 3 Click OK to activate the settings. Note: If optional memory is installed, follow the installation instructions provided with the memory card. Configure Settings Using a Web Browser (optional) If you are working in a TCP/IP-enabled environment, you can use a web browser to display the printer or job printing status, and to change settings on an embedded web page. 1 Activate your web browser (Microsoft Explorer®/™, Netscape Navigator™ 4.4 or higher, Mozilla®, Firefox®). 2 Enter the IP Address for the printer. (Locate the address on the Print Menu Map in the Network Menu. 3 When the web page appears, select from the categories in the menu list. Macintosh® The printer drivers support OS 10.2.8 and above. Connect the cable See "Computer Connection" on page 6. Note: Printer operation is not assured if another USB compatible device is connected concurrently with it. Install the Printer Driver 1 Turn on the printer, then turn on the computer. 2 Place CD in the CD-ROM drive. 3 Double-click the CD icon that appears on the desktop. 4 Open the MAC folder. 5 Open the OSX folder. 6 Open the Driver Installer folder. 7 Open the Multilingual folder. The installer will automatically install the language selected in the OS. 8 Select PCL, or select PS (B430 only). 9 Follow the on-screen instructions. Add the Printer 1 Run the Print Center or Print Setup Utility. 2 Click Add. 3 Click More Printers. 4 Browse to select OKI USB, OKI TCP/IP or Bonjour from the drop-down menu. Note: If you are using USB, select OKI USB and disregard step 3. 5 Enter the printer's IP address (B410dn/ B420dn/B430dn models). 6 Quit the Print Center. B400 Series Setup Guide 11
-
 1
1 -
2
-
3
-
4
-
5
-
 6
6 -
 7
7 -
 8
8 -
 9
9 -
 10
10 -
 11
11 -
 12
12 -
 13
13 -
 14
14 -
 15
15 -
 16
16 -
17
-
18
-
19
-
20
-
21
-
22
-
23
-
24
-
25
-
26
-
27
-
28
-
29
-
30
-
31
-
32
-
33
-
34
-
35
-
36
-
37
-
38
-
39
-
40
-
41
-
42
-
43
-
44
-
45
-
46
-
47
-
48
 |
 |