Oki B930dn B930 Setup Guide (English Fran栩s Espa?ol Portugu( - Page 5
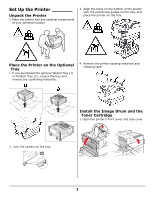
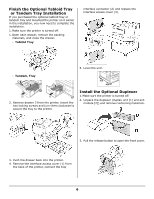
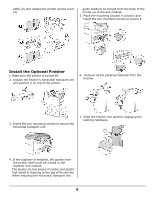
Install the Options You, Purchased
 |
View all Oki B930dn manuals
Add to My Manuals
Save this manual to your list of manuals |
Page 5 highlights
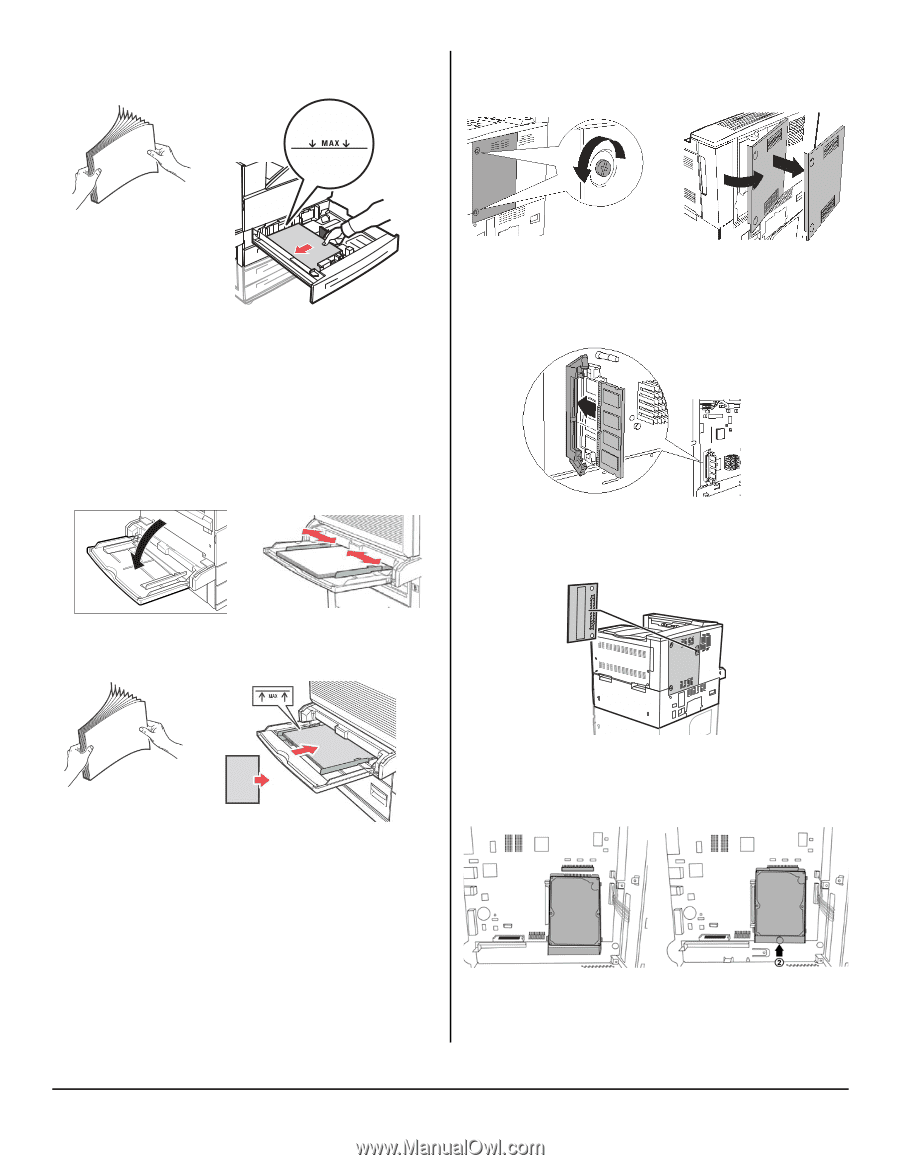
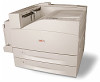
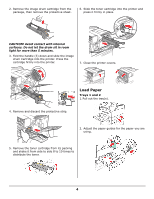
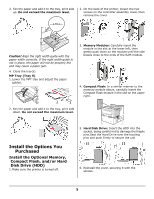
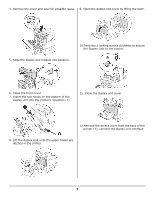
3. Fan the paper and add it to the tray, print side up. Do not exceed the maximum level. 2. On the back of the printer, loosen the two screws on the controller assembly cover, then remove the cover. Caution! Align the right width guide with the paper width correctly. If the right width guide is not in place, the paper will not be properly fed and may cause a paper jam. 4. Close the tray(s). MP Tray (Tray 5) 1. Lower the MPT tray and adjust the paper guides. 3. Memory Modules: Carefully insert the module in the slot at the lower left, then gently push down on the module until the side braces close to the ends of the RAM module. 4. Compact Flash: In a similar manner to the memory module above, carefully insert the Compact Flash module in the slot on the upper right. 2. Fan the paper and add it to the tray, print side down. Do not exceed the maximum level. Install the Options You Purchased Install the Optional Memory, Compact Flash, and/or Hard Disk Drive (HDD) 1. Make sure the printer is turned off. 5. Hard Disk Drive: Insert the HDD into the socket, being careful not to damage the fragile pins.Seat the Hard Drive over the locating pins and push firmly to secure the unit 6. Reinstall the cover, securing it with the screws. 5
-
 1
1 -
 2
2 -
 3
3 -
 4
4 -
 5
5 -
 6
6 -
 7
7 -
 8
8 -
 9
9 -
 10
10 -
 11
11 -
12
-
13
-
14
-
15
-
16
-
17
-
18
-
19
-
20
-
21
-
22
-
23
-
24
-
25
-
26
-
27
-
28
-
29
-
30
-
31
-
32
-
33
-
34
-
35
-
36
-
37
-
38
-
39
-
40
-
41
-
42
-
43
-
44
-
45
-
46
-
47
-
48
-
49
-
50
-
51
-
52
 |
 |