Oki C5400 Upgrade Kit Installation Instructions - Page 13
Step 3: Make the Network Connection
 |
View all Oki C5400 manuals
Add to My Manuals
Save this manual to your list of manuals |
Page 13 highlights
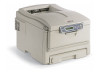
Step 3: Make the Network Connection ᮣ If you are using the USB or parallel port, skip this step. Note: No Ethernet cable is supplied. Use an Ethernet cable with two twisted wire pairs and an RJ45 plug. 1. Turn the printer off. 2. If there is a plastic plug (1) in the Ethernet port, remove it. 3. Connect your Ethernet cable to the port. 4. Connect the other end of the cable to the network port. 5. Turn on the printer and wait for it to initialize. 11
-
 1
1 -
2
-
3
-
4
-
5
-
6
-
7
-
 8
8 -
 9
9 -
 10
10 -
 11
11 -
 12
12 -
 13
13 -
 14
14 -
 15
15 -
 16
16
 |
 |

11
Step 3: Make the Network Connection
±
If you are using the USB or parallel port, skip this step.
Note:
No Ethernet cable is supplied. Use an Ethernet cable with two twisted
wire pairs and an RJ45 plug.
1. Turn the printer off.
2. If there is a plastic plug (
1
) in the Ethernet port, remove it.
3. Connect your Ethernet cable to the port.
4. Connect the other end of the cable to the network port.
5. Turn on the printer and wait for it to initialize.