Olympus FE 300 FE-300 Instruction Manual (English) - Page 13
Follow the shooting guide for setting, Recording movies, Arrow pad, button - case
 |
View all Olympus FE 300 manuals
Add to My Manuals
Save this manual to your list of manuals |
Page 13 highlights
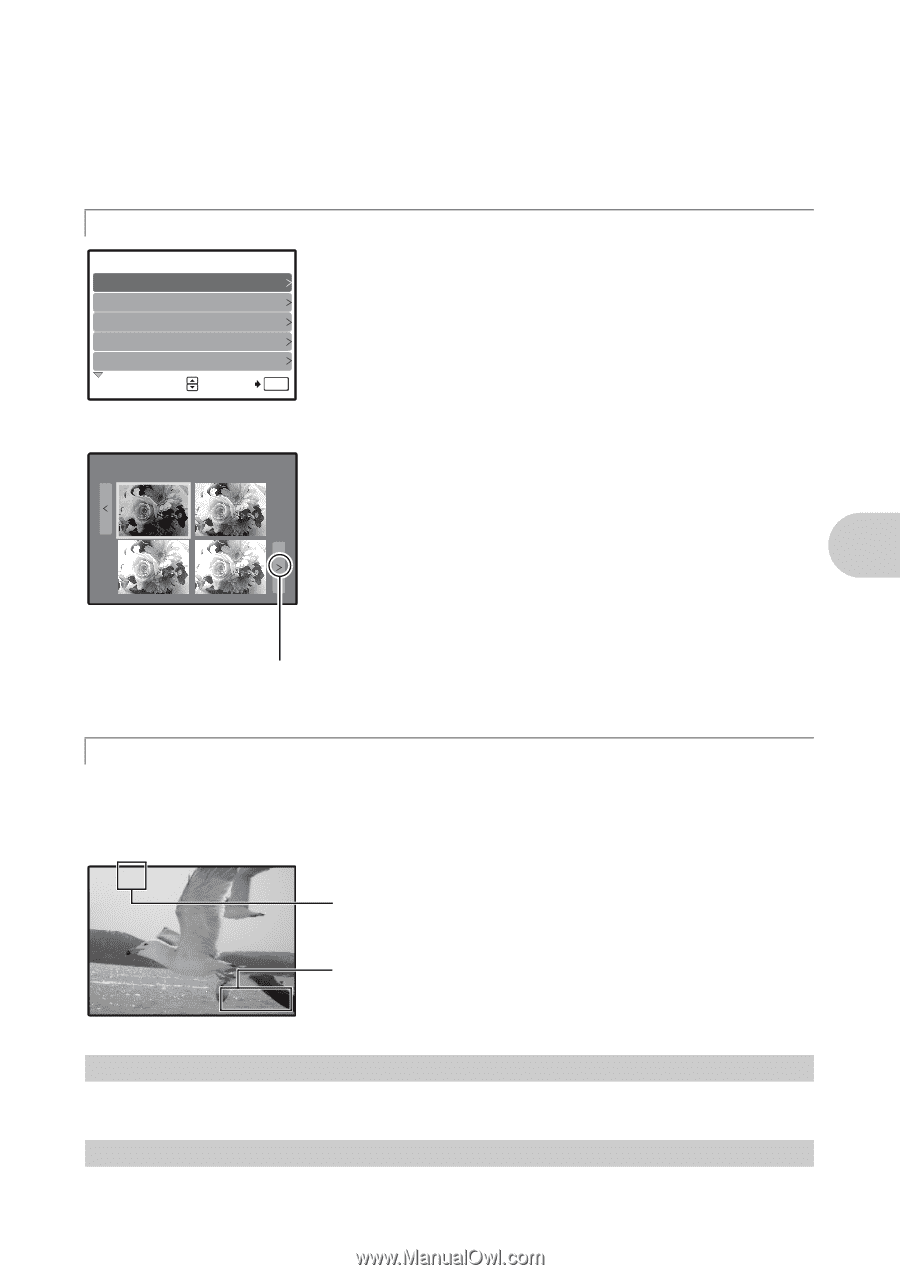
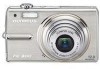
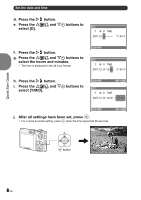
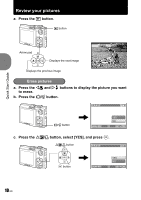
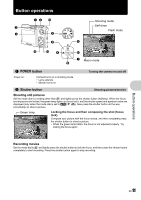
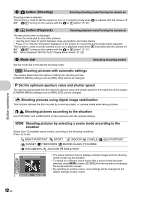
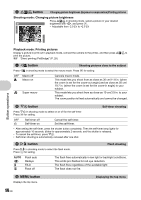
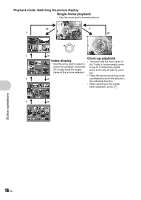
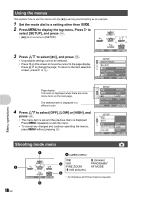
[S SMILE SHOT] • When the camera detects a smiling face in shooting standby mode, 3 frames are taken in high speed sequential shooting mode automatically. You can also shoot pictures manually by pressing the shutter button in this mode. • There may be cases in which the camera cannot detect a smiling face. • When [SMILE SHOT] is selected, the self-timer lamp lights. Shooting is not available while the self-timer lamp is blinking. R Follow the shooting guide for setting SHOOTING GUIDE 1/3 1 Shoot w/ effects preview. 2 Brightening subject. 3 Shooting into backlight. 4 Set particular lighting. 5 Blurring background. SET OK Follow the shooting guide displayed on the screen to set the target items. • Press m to display the shooting guide again. • To change the setting without using the shooting guide, set the shooting mode to another one. • The content set using the shooting guide will change to the default setting by pressing m or changing the mode using the mode dial. Shoot pictures by comparing previews of different effects Exposure effects. 0.0 + 0.7 + 0.3 + 1.0 Select one of the [1 Shoot w/ effects preview.] options from the [SHOOTING GUIDE] menu to preview a live, multi-frame window on the monitor showing four different levels of the selected shooting effect. You can use the four preview frames to compare and select your desired setting/effect. • Use the arrow pad to select the frame with the settings you want, and press . The camera automatically switches to shooting mode and allows you to shoot with the selected effect. When [Exposure effects.] is selected Use XY to change the display. n Recording movies Audio is recorded with the movie. • During audio recording, only the digital zoom can be used. To record the movie with the optical zoom, set [R] to [OFF]. g "R (movies) Recording movies with or without sound" (P. 21) A This lights red during movie recording. Button operations 00:36 The remaining recording time is displayed. When the remaining recording time reaches 0, recording stops. 6 Arrow pad (ONXY) Use the arrow pad to select scenes, playback picture, and the items on the menus. 7 button This button is used to confirm your selection. EN 13
-
 1
1 -
2
-
3
-
4
-
5
-
6
-
7
-
 8
8 -
 9
9 -
 10
10 -
 11
11 -
 12
12 -
 13
13 -
 14
14 -
 15
15 -
 16
16 -
 17
17 -
 18
18 -
19
-
20
-
21
-
22
-
23
-
24
-
25
-
26
-
27
-
28
-
29
-
30
-
31
-
32
-
33
-
34
-
35
-
36
-
37
-
38
-
39
-
40
-
41
-
42
-
43
-
44
-
45
-
46
-
47
-
48
-
49
-
50
-
51
-
52
-
53
-
54
-
55
-
56
-
57
-
58
-
59
-
60
-
61
-
62
-
63
-
64
-
65
-
66
-
67
-
68
 |
 |