Olympus FE 300 FE-300 Instruction Manual (English) - Page 28
Video Out, Power Save
 |
View all Olympus FE 300 manuals
Add to My Manuals
Save this manual to your list of manuals |
Page 28 highlights
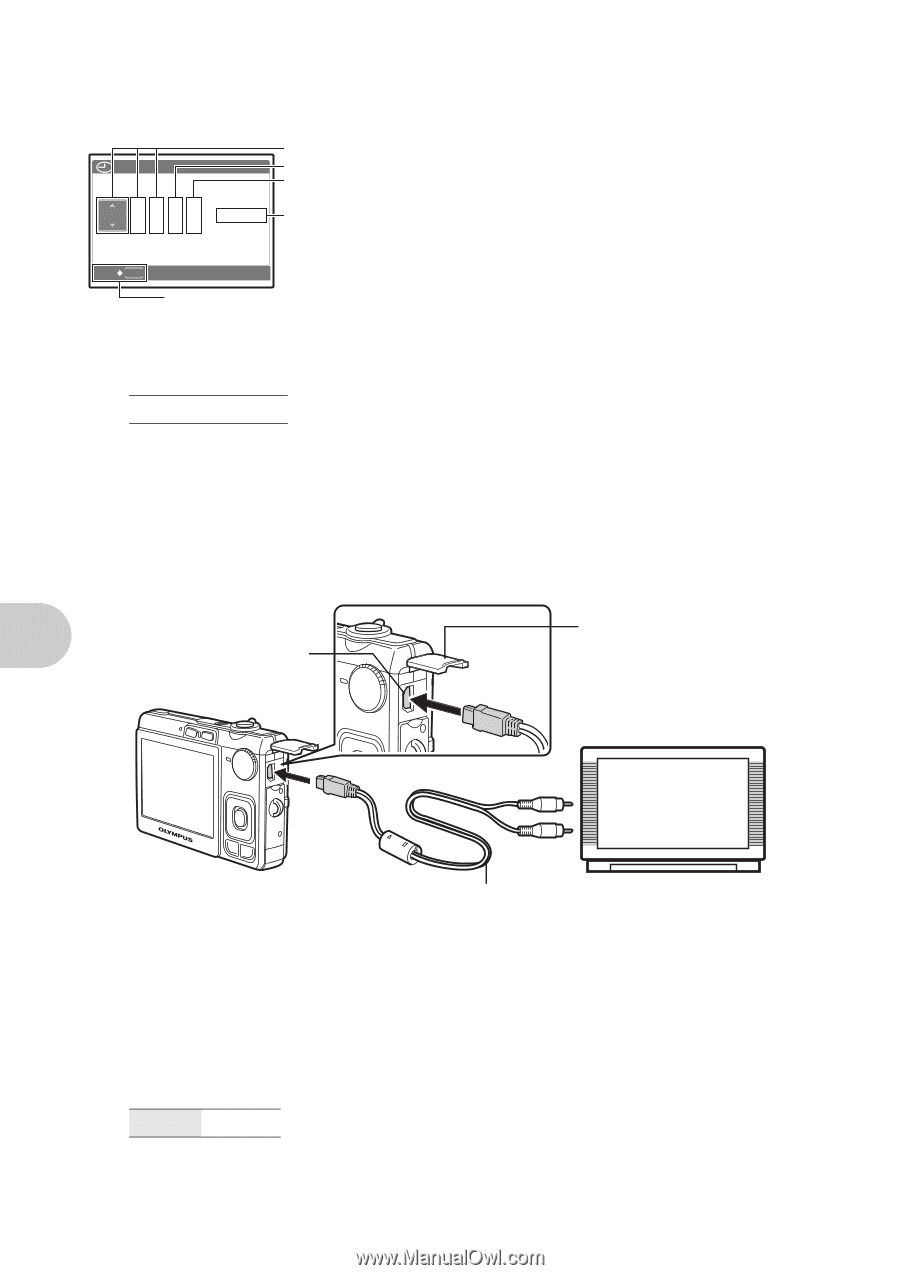
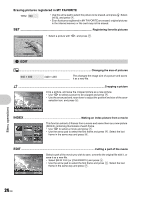
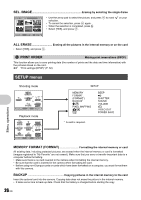
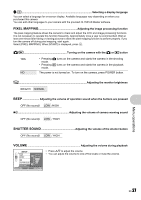
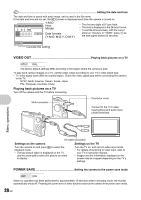
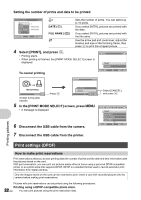
X ...Setting the date and time The date and time is saved with each image, and is used in the file name. If the date and time are not set, the [X] screen is displayed each time the camera is turned on. Y M D TIME Y / M / D Y-M-D Hour Minute Date formats (Y-M-D, M-D-Y, D-M-Y) • The first two digits of [Y] are fixed. • The time is displayed in the 24-hour format. • To set the time precisely, with the cursor either on "minutes" or "Y/M/D", press as the time signal strikes 00 seconds. CANCEL MENU Cancels the setting VIDEO OUT Playing back pictures on a TV NTSC /PAL The factory default settings differ according to the region where the camera is sold. To play back camera images on a TV, set the video output according to your TV's video signal type. • TV video signal types differ by country/region. Check the video signal type before connecting the camera to the TV. NTSC: North America, Taiwan, Korea, Japan PAL: European countries, China Playing back pictures on a TV Turn off the camera and the TV before connecting. Multi-connector Connector cover Connect to the TV's video input (yellow) and audio input (white) terminals. Menu operations AV cable (provided) Settings on the camera Turn the camera on and press q to select the playback mode. • The last picture taken is displayed on the TV. Use the arrow pad to select the picture you want to display. Settings on the TV Turn the TV on, and set it to video input mode. • For details of switching to video input, refer to your TV's instruction manual. • Images and the information displayed on the screen may be cropped depending on the TV's settings. POWER SAVE Setting the camera to the power save mode OFF /ON When no operation has been performed for approximately 10 seconds while in shooting mode, the monitor automatically shuts off. Pressing the zoom lever or other buttons restores the camera from power save mode. 28 EN
-
 1
1 -
2
-
3
-
4
-
5
-
6
-
7
-
8
-
9
-
10
-
11
-
12
-
13
-
14
-
15
-
16
-
17
-
18
-
19
-
20
-
21
-
22
-
 23
23 -
 24
24 -
 25
25 -
 26
26 -
 27
27 -
 28
28 -
 29
29 -
 30
30 -
 31
31 -
 32
32 -
 33
33 -
34
-
35
-
36
-
37
-
38
-
39
-
40
-
41
-
42
-
43
-
44
-
45
-
46
-
47
-
48
-
49
-
50
-
51
-
52
-
53
-
54
-
55
-
56
-
57
-
58
-
59
-
60
-
61
-
62
-
63
-
64
-
65
-
66
-
67
-
68
 |
 |