Panasonic EW3152W Instruction Manual - Page 12
Before, Starting, Measurements
 |
View all Panasonic EW3152W manuals
Add to My Manuals
Save this manual to your list of manuals |
Page 12 highlights
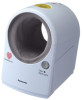
BEFORE STARTING MEASUREMENTS Open the display Press the Open button for display on the front of the main unit. M. The display will only open partially by itself. Use your hand to open the display fully for use. Setting the date and time * Please be sure to set the date and time before taking the first measurement after purchasing the blood pressure monitor or after changing the batteries. • If measurements are taken without setting the date and time, the date and time will not be stored. • Please read the "Caution when using only the AC adapter" on p. 10. 1 C7C) Press the Set button below the display. The month value will blink. A 8/ t•L'iY,3:11 Set the hour. -I- 0 Press the Set button. The hour value will blink. C) Press the Adjust button to set the correct hour. „=1„,=,, Set the month. 3/ 3 Press the Adjust button repeatedly to set the correct month. 5 Set the minute. C) Press the Set button. The minute value will blink. C) Press the Adjust button repeatedly to set the correct minute. Set the day. C) Press the Set button. The day value will blink. C) Press the Adjust button repeatedly to set the correct day. al 3 6 Press the Set button at the exact time the minute changes to finalize the date/time setting. 7 Press the On/Off Start button to switch off the power. When the date or time are blinking, the clock is stopped During leap years, 3/1 will be displayed on February 29. For this reason, reset the date to 2/29. Use the tip of a ballpoint pen or similar object to lightly press the Set and Adjust buttons. If you use a mechanical pencil, the lead may break, causing a malfunction. 12
-
 1
1 -
2
-
3
-
4
-
5
-
6
-
 7
7 -
 8
8 -
 9
9 -
 10
10 -
 11
11 -
 12
12 -
 13
13 -
 14
14 -
 15
15 -
 16
16 -
 17
17 -
18
-
19
-
20
-
21
-
22
-
23
-
24
-
25
-
26
-
27
-
28
-
29
-
30
-
31
-
32
-
33
-
34
-
35
-
36
-
37
-
38
-
39
-
40
-
41
-
42
-
43
-
44
-
45
-
46
-
47
-
48
-
49
-
50
-
51
-
52
-
53
-
54
 |
 |
