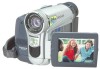
Panasonic PV GS15 Digital Video Camcorder - Page 13
DC Input Jack [DC IN] p. 15, Cassette Eject Lever [OPEN/EJECT] p. 17 - dv cable
 |
UPC - 037988977734
View all Panasonic PV GS15 manuals
Add to My Manuals
Save this manual to your list of manuals |
Page 13 highlights
Before Use 26 22 23 24 25 22 Lens Hood (p. 69) 23 Lens 24 Microphone (built-in, stereo) (pp. 27, 29) 25 Built-in LED Light (For PV-GS12/PV-GS14/PV-GS15) (p. 26) 26 Zoom Lever [W/T] (pp. 27-28, 35) 27 28 31 29 30 32 33 27 Cassette Holder 28 Cassette Compartment Cover (p. 17) 29 USB Jack [ ] (pp. 48-49, 51, 54) 30 DV Input/Output Terminal (pp. 45-46) • Connect this to the digital video equipment. 31 White Balance Sensor (p. 31) Remote Control Sensor (p. 15) 32 Audio-Video Output Jack [AV OUT] (pp. 43, 45) Headphone Jack [PHONES] • Connecting an AV Cable to this jack activates the Camcorder's built-in speaker, but connecting a headphone, etc. deactivates it. • When connecting the pin plug of the AV Cable to this jack, plug it in as far as it goes. • When using headphones, set [INITIAL] >> [AV JACK] >> [OUT/PHONES]. 33 Microphone Jack [MIC] (For PV-GS14/PV-GS15) • When connecting an external microphone or audio equipment to this jack, the built-in microphone does not operate. • A compatible plug-in powered microphone can be used. Please consult your dealer for more information. • The microphone may make noises depending on the type used. In this case, we recommend using the battery with the Camcorder to reduce noises instead of the AC Adaptor. 34 35 36 37 40 38 41 42 39 43 44 34 Viewfinder (pp. 19, 68) Due to limitations in LCD production technology, there may be some tiny bright or dark spots on the Viewfinder screen. However, this is not a malfunction and does not affect the recorded picture. 35 Eyepiece Corrector Knob (p. 19) 36 Photoshot Button [PHOTO SHOT] (pp. 25-26) 37 Cassette Eject Lever [OPEN/EJECT] (p. 17) 38 DC Input Jack [DC IN] (p. 15) 39 S-Video Output Jack [S-VIDEO OUT] (For PV-GS14/PV-GS15) (pp. 43, 45) 40 Mode Dial (p. 18) 41 Power Lamp [POWER] (p. 18) 42 Quick Start Recording Button [QUICK START] (p. 26) Quick Start Recording Lamp (p. 26) 43 Recording Start/Stop Button (p. 24) 44 Power Switch [OFF/ON] (pp. 18, 24) 45 46 47 48 49 45 Shoulder Strap Holders (p. 17) 46 Grip Belt (p. 16) 47 Battery Holder 48 Battery Eject Switch [BATTERY RELEASE] (p. 16) 49 Tripod Receptacle • Used for mounting the Camcorder on an optional tripod. 13
-
 1
1 -
2
-
3
-
4
-
5
-
6
-
7
-
 8
8 -
 9
9 -
 10
10 -
 11
11 -
 12
12 -
 13
13 -
 14
14 -
 15
15 -
 16
16 -
 17
17 -
 18
18 -
19
-
20
-
21
-
22
-
23
-
24
-
25
-
26
-
27
-
28
-
29
-
30
-
31
-
32
-
33
-
34
-
35
-
36
-
37
-
38
-
39
-
40
-
41
-
42
-
43
-
44
-
45
-
46
-
47
-
48
-
49
-
50
-
51
-
52
-
53
-
54
-
55
-
56
-
57
-
58
-
59
-
60
-
61
-
62
-
63
-
64
-
65
-
66
-
67
-
68
-
69
-
70
-
71
-
72
-
73
-
74
-
75
-
76
-
77
-
78
-
79
-
80
-
81
-
82
-
83
-
84
 |
 |
