Panasonic PVGS34PKG Digital Video Camera - Page 53
Recording with the Built-in LED Video, Fade In/Fade Out Functions
 |
View all Panasonic PVGS34PKG manuals
Add to My Manuals
Save this manual to your list of manuals |
Page 53 highlights
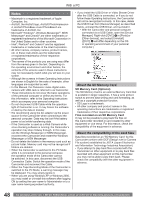
Others • Intervals between recording pictures may become longer depending on the card. We recommend using a Panasonic SD Memory Card. • When using a card formatted by other equipment or a card that was recorded and erased repeatedly, the intervals between recording pictures may become longer. If so, back up your important data on a PC, and format your card with this Camcorder. „ Recording with the Built-in LED Video Light • The subject should be within 4.9 feet (1.5 meters) of the Camcorder. • Using the LED Video Light reduces battery time. • Set the LED Video Light to off when not in use. • Do not look directly into the light. • If the LED Video light is used with a Conversion lens attached, a slight vignetting (darkening around edges) effect occurs on the screen. • Using the MagicPix Function at the same time will make conditions even brighter. • The LED video light enables simply lightening the images taken in a dimly-lit place. We also recommend using it in a bright place to obtain high quality images. „ Quick Start • During the Quick Start Standby Mode, a minute amount of electricity is consumed. • When you set [ POWER SAVE] to [5 MINUTES] and the Camcorder is left in the Recording Pause Mode for 5 minutes, it will be turned into the Quick Start Standby Mode. To turn the Camcorder on again, set the [OFF/ON] Switch to [OFF] and then set it to [ON] again. (The Quick Start Mode will be restored.) • This Function is not activated in the following case: • Neither a card nor a tape has been inserted while the Tape/Card Recording Mode is set. • When you rotate the Mode Dial or remove the battery, the Quick Start Recording Lamp is turned off and the Quick Start mode is canceled. If the Camcorder is turned on and the Tape/Card Recording Mode is set, the Lamp turns on and the quick start mode is restored. • Press and hold the [QUICK START] Button for approx 2 seconds during the Quick Start Standby Mode. The Lamp will go off and the Camcorder will be turned off. • If the standby continues for approx. 30 minutes, then the Lamp will go off and the Camcorder will be completely turned off. • When the Camcorder is Quick-Started with the White Balance on automatic, it may take some time until the White Balance is adjusted if the scene being recorded has a light source different from the scene last recorded. (When the MagicPix Function is used, however, the White Balance of the scene last recorded is retained.) • Since about half the power of normal recording is used in quick start standby, using Quick Start reduces the recordable time. • The zoom magnification may differ from when it is in the Quick Start Standby Mode and when the recording starts. „ Self-timer Recording • When [ BEEP SOUND] on the [ SETUP] Sub-Menu is set to [ON], the beep sound will be emitted along with the Recording Lamp flashing in the Self-timer Standby Mode. • By operating the [OFF/ON] Switch or Mode Dial, the Self-timer Standby Mode is canceled. „ Zoom In/Out Functions • When zooming in and taking a picture while holding the Camcorder by hand, we recommend using the image stabilizer function. • When you are zooming in on a faraway subject, a sharper focus is achieved if the recording subject is 4.3 feet (1.3 meters) or further from the Camcorder. • When the zoom speed is high, the subject may not be focused easily. „ Zoom Microphone Function • The Zoom Microphone Function may not work effectively if the surrounding noise is too loud. „ Digital Zoom Functions • The larger the digital zoom magnification, the more the image quality is degraded. • When the Card Recording mode is used, the Digital Zoom Function cannot be used. • White balance cannot be set in the Digital Zoom range. „ Image Stabilizer Function • When the MagicPix Function is used, the image stabilizer function does not work. If so, the [ ] indication flashes. • When the Gain Up mode is set to ON, the image stabilizer function does not work. If so, the [ ] indication flashes. • Under fluorescent lighting, image brightness may change or colors may not look natural. • After-images may appear. • When a tripod is used, we recommend that you turn the Image Stabilizer off. • In the following cases, the Image Stabilizer Function may not work effectively. - When the digital zoom is used - When a conversion lens is used - When recording is done in an extremely dark place - When the Camcorder is shaken greatly - When you record a moving subject while tracking it „ Fade In/Fade Out Functions • While the Fade in/Fade out function is selected, it takes several seconds to display the image when you start recording images. Besides, it also takes several seconds to pause recording. 53
-
 1
1 -
2
-
3
-
4
-
5
-
6
-
7
-
8
-
9
-
10
-
11
-
12
-
13
-
14
-
15
-
16
-
17
-
18
-
19
-
20
-
21
-
22
-
23
-
24
-
25
-
26
-
27
-
28
-
29
-
30
-
31
-
32
-
33
-
34
-
35
-
36
-
37
-
38
-
39
-
40
-
41
-
42
-
43
-
44
-
45
-
46
-
47
-
 48
48 -
 49
49 -
 50
50 -
 51
51 -
 52
52 -
 53
53 -
 54
54 -
 55
55 -
 56
56 -
 57
57 -
 58
58 -
59
-
60
-
61
-
62
-
63
-
64
-
65
-
66
-
67
-
68
-
69
-
70
-
71
-
72
 |
 |
