Panasonic SAAK600 SAAK600 User Guide - Page 7

LOCATION OF CONTROLS, Before using - phones

Page 7 highlights

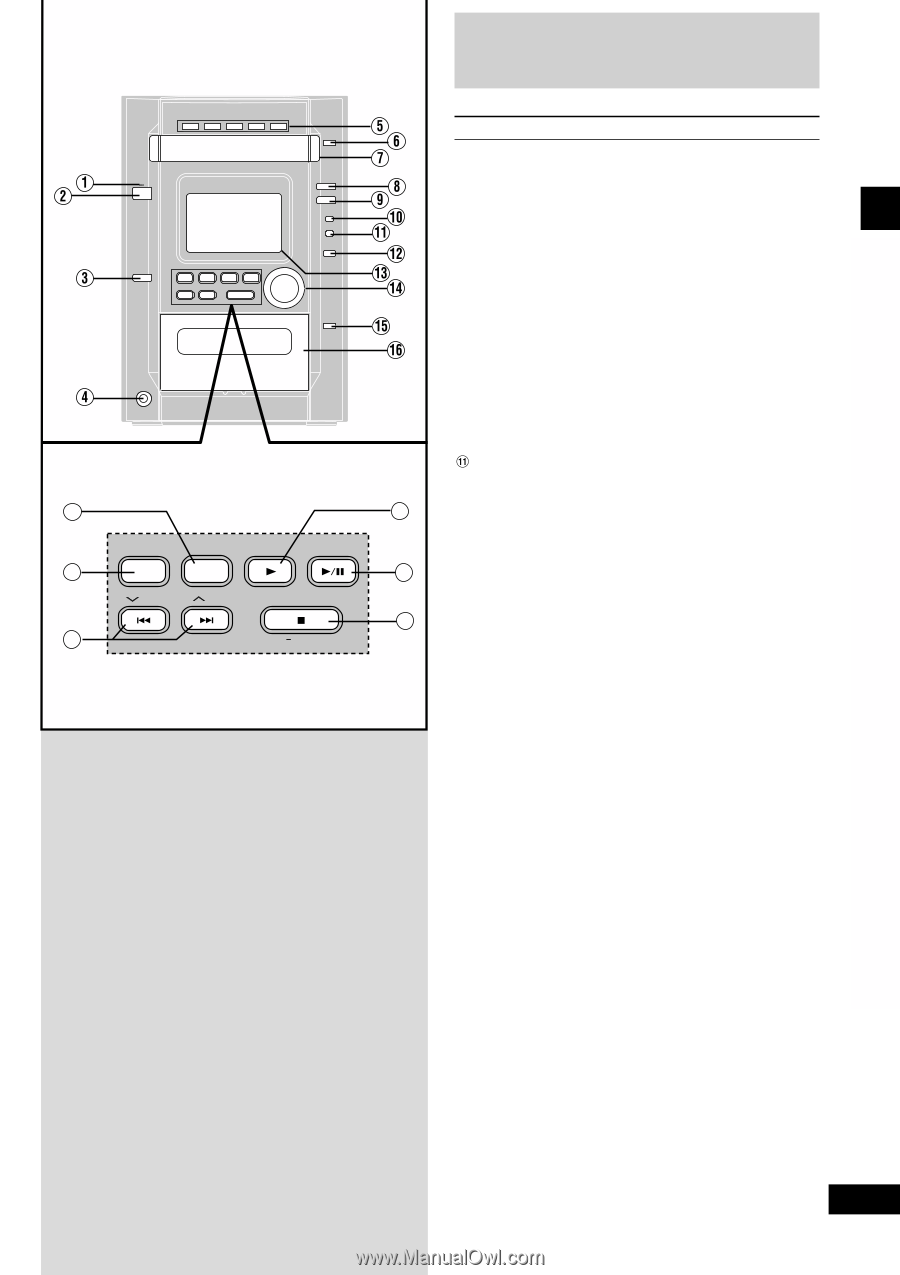
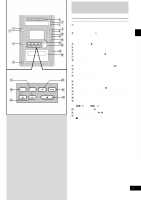
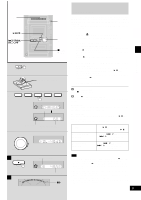
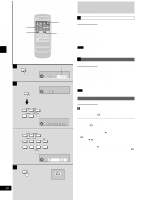
Before using 17 AUX 1/2 TUNER TAPE CD 18 BAND / REW / FF STOP 19 DEMO Location of controls No. Name Ref. page 1 AC supply indicator (AC IN) This indicator lights when the unit is connected to the AC power supply. 2 Standby/on switch (f/I, POWER) Press to switch the unit from on to standby mode or vice versa. In standby mode, the unit is still consuming a small amount of power. 3 Record button (a REC 17 4 Headphone jack (PHONES 22 5 Disc direct play buttons (CD 1 ~ CD 5 9 6 Disc tray open/close button (c OPEN/CLOSE) ........ 9 7 Disc tray 8 Digital input, PCM FIX mode select button and indicator (DIGITAL INPUT 1/2 20, 27 9 Dolby Pro Logic button and indicator (p PL) ....... 20 ! Super sound EQ button (SUPER SOUND EQ) ........ 18 Preset EQ select button (PRESET EQ 18 # Subwoofer button and indicator (SUBWOOFER 18 20 $ Display % Volume control (VOL 9 & Cassette holder open button (c OPEN 15 21 ( Cassette holder 15 ) Tuner/band select button (TUNER, BAND 13 22 ~ AUX 1/2 button (AUX 1/2 27 + CD skip/search, tape fast-forward/rewind, tune/preset channel select, time adjust buttons (g, 3/REW, f, 4/FF 9, 13-15, 23 , Tape play button ( : TAPE 15 - CD play/pause button (:/ J CD 9 . Stop/program clear and demonstration button (L STOP, -DEMO 9, 11, 15, 23 7 RQT6243

  • 1
  • 2
  • 3
  • 4
  • 5
  • 6
  • 7
  • 8
  • 9
  • 10
  • 11
  • 12
  • 13
  • 14
  • 15
  • 16
  • 17
  • 18
  • 19
  • 20
  • 21
  • 22
  • 23
  • 24
  • 25
  • 26
  • 27
  • 28
  • 29
  • 30
  • 31
  • 32

Before using
7
RQT6243
Location of controls
No.
Name
Ref. page
1
AC supply indicator (AC IN)
This indicator lights when the unit is connected to the AC power
supply.
2
Standby/on switch (
f
/I, POWER)
Press to switch the unit from on to standby mode or vice versa.
In standby mode, the unit is still consuming a small amount of
power.
3
Record button (
a
REC)
.............................................
17
4
Headphone jack (PHONES)
......................................
22
5
Disc direct play buttons (CD 1 ~ CD 5)
.....................
9
6
Disc tray open/close button (
c
OPEN/CLOSE)
........
9
7
Disc tray
8
Digital input, PCM FIX mode select button and
indicator
(DIGITAL INPUT 1/2)
..........................
20, 27
9
Dolby Pro Logic button and indicator (
p
PL)
.......
20
!
Super sound EQ button (SUPER SOUND EQ)
........
18
Preset EQ select button (PRESET EQ)
...................
18
#
Subwoofer button and indicator
(SUBWOOFER)
...........................................................
18
$
Display
%
Volume control (VOL)
.................................................
9
&
Cassette holder open button (
c
OPEN)
.................
15
(
Cassette holder
..........................................................
15
)
Tuner/band select button (TUNER, BAND)
.............
13
~
AUX 1/2 button (AUX 1/2)
..........................................
27
+
CD skip/search, tape fast-forward/rewind, tune/preset
channel select, time adjust buttons
(
g
,
3
/REW,
f
,
4
/FF)
......................
9, 13-15, 23
,
Tape play button (
:
TAPE)
.....................................
15
-
CD play/pause button (
:
/
J
CD )
...............................
9
.
Stop/program clear and demonstration button
(
L
STOP, –DEMO)
.....................................
9, 11, 15, 23
20
22
19
21
18
BAND
CD
STOP
STOP
/ REW
/ REW
TUNER
AUX 1/2
TAPE
/ FF
/ FF
DEMO
DEMO
17