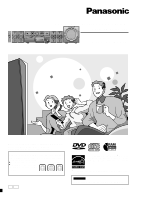
Panasonic SAHT670 SAHT670 User Guide - Page 6
SIMPLE SETUP, STEP 1 POSITIONING, STEP 2 SPEAKERS, Speakers, Positioning - surround sound systems
 |
View all Panasonic SAHT670 manuals
Add to My Manuals
Save this manual to your list of manuals |
Page 6 highlights
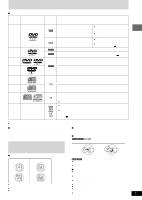
Simple setup CENTER 5 Simple setup 1 STEP Positioning FRONT FRONT SURROUND SURROUND (L) (R) (L) (R) CENTER SUBWOOFER Setup example Main unit ¡ The front and surround speakers are the same. Use those you have connected the short cords to as front speakers and those you have connected the long cords to as surround speakers. ¡ Place the front, center, and surround speakers at approximately the same distance from the seating position. The angles in the diagram are approximate. ¡ Use only supplied speakers Using other speakers can damage the unit and sound quality will be negatively affected. ¡ Set the speakers up on an even surface to prevent them from falling. Take proper precautions to prevent the speakers from falling if you cannot set them up on an even surface. Positioning for best effect How you set up your speakers can affect the bass and the sound field. Note the following points. ¡ Place speakers on flat secure bases. ¡ Placing speakers too close to floors, walls, and corners can result in excessive bass. Cover walls and windows with thick curtain. Main unit Note Keep your speakers at least 10 mm (13/32˝) away from the system for proper ventilation. Center speaker ¡ You can also put this speaker directly under the television. ¡ Vibration caused by the center speaker can disrupt the picture if it is placed directly on the television. Put the center speaker on a rack or shelf. Subwoofer Place to the right or left of the television, on the floor or a sturdy shelf so that it won't cause vibration. Leave 10 cm (4˝) at the rear for ventilation. 2 STEP Speakers RQT7534 6 Speaker cables ¡ 3x4-m (13- foot) cables (For front and center speakers) ¡ 2x10-m (33foot) cables (For surround speakers) Sheet of speaker-cable stickers Red 13 5 CENTER Red 2 LL SUBWOOFER FRONT ed R L SURROUND CENTER Copper Silver Attach the speaker-cable stickers to make connections easier. Black 5 CENTER Black e Red d Black CENTER 5 CENTER Speaker-cable SURROUND Lch 3 sticker SURROUND (L) SURROUND Lch 3 Note SURROUND Rch 4 SURROUND Rch 4 SURROUND (R) ¡ Never short-circuit positive (+) and negative (-) speaker wires. FRONT Rch 2 FRONT Lch 1 FRONT Rch 2 FRONT Lch 1 FRONT (L) FRONT (R) ¡ Be sure to connect only positive (copper or red) wires to positive (+) terminals and negative (silver or black) wires to negative (-) terminals. Incorrect connection can SUB WOOFER 6 SUBWOOFER 6 SUBWOOFER damage the speakers.
-
 1
1 -
 2
2 -
 3
3 -
 4
4 -
 5
5 -
 6
6 -
 7
7 -
 8
8 -
 9
9 -
 10
10 -
 11
11 -
 12
12 -
13
-
14
-
15
-
16
-
17
-
18
-
19
-
20
-
21
-
22
-
23
-
24
-
25
-
26
-
27
-
28
-
29
-
30
-
31
-
32
-
33
-
34
-
35
-
36
 |
 |
