Pfaff 1540 Owner's Manual - Page 60
Decorative, sewing, embroidety techniques
 |
View all Pfaff 1540 manuals
Add to My Manuals
Save this manual to your list of manuals |
Page 60 highlights
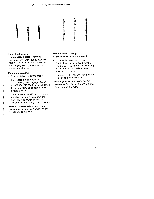
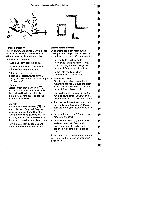
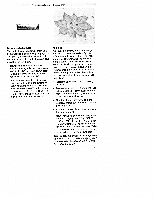
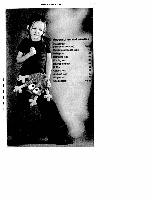
Decorative sewing and embroidety techniques Floral embroidery Embroidering corners For this flower arrangement, only a dense By changing the stitch width during zigzag stitch was used in combination sewing of dense zigzag stitches you can with the variable stitch width and the embroider corners with 45 degree angles. various needle positions. • Place stabilizer under the fabric. • Set needle thread tension to F "buttonhole", zigzag stitch G (1540), • Draw the contures of a flower motif with a self-erasing textile pen. E (1530/1520), set stitch length to "buttonhole" and stitch width 5 mm. F • Set needle thread tension to "buttonhole", select zigzag stitch G • Select right needle position and embroider a straight line. F (1540), E (1530/1520), set stitch length • Embroider corner: F to "buttonhole". After the needle has penetrated the • Flowers: Select center needle position cZZ material to the right, reduce the stitch width using the width dial (27) by 0.5 F and embroider individual petals. Adjust mm to 4.5 mm. Sew a stitch. I the stitch width with the width dial • Reduce the width once again by 0.5 (34) during sewing according to the contures of the flower. mm and sew a stitch. Continue in this manner until the stitch width is 0.5 mm. I • Leaves: Select right needle position and embroider half of the leaf. 5ary the stitch width using the width dial (27). • Turn the handwheel towards you until the needle penetrates the material. Turn the material 90 degrees and sew a stitch. I I Turn the handwheel towards you after • Increase the width by 0.5 mm to 1.0 E finishing the first half of the leaf until mm. Sew one stitch. the needle is positioned in the material. • Increase the width by 0.5 mm again • Turn the material 180 degrees and embroider the other half of the leaf and sew one stitch. Continue in this manner until the initial width is achieved. Now embroider a straight E line. E If the corner is to continue in the opposite direction, use the outermost left noodle position . I
-
 1
1 -
2
-
3
-
4
-
5
-
6
-
7
-
8
-
9
-
10
-
11
-
12
-
13
-
14
-
15
-
16
-
17
-
18
-
19
-
20
-
21
-
22
-
23
-
24
-
25
-
26
-
27
-
28
-
29
-
30
-
31
-
32
-
33
-
34
-
35
-
36
-
37
-
38
-
39
-
40
-
41
-
42
-
43
-
44
-
45
-
46
-
47
-
48
-
49
-
50
-
51
-
52
-
53
-
54
-
 55
55 -
 56
56 -
 57
57 -
 58
58 -
 59
59 -
 60
60 -
 61
61 -
 62
62 -
 63
63 -
 64
64 -
 65
65 -
66
-
67
-
68
-
69
-
70
-
71
-
72
-
73
-
74
-
75
-
76
-
77
-
78
-
79
-
80
-
81
-
82
 |
 |
