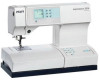
Pfaff expression 2014 Owner's Manual - Page 73
Pfaff expression 2014 Manual
 |
View all Pfaff expression 2014 manuals
Add to My Manuals
Save this manual to your list of manuals |
Page 73 highlights
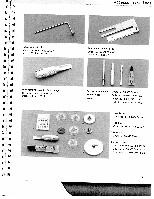
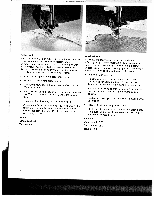
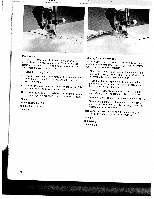
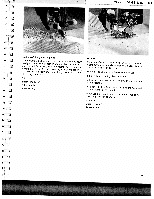
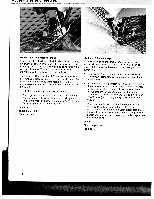
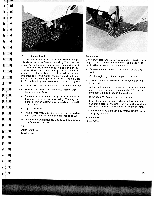
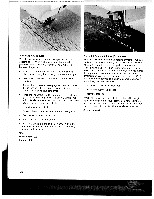
eul ts aria neec , Pintuck foot This classic heirloom sewing technique can be easily duplicated on many types of fabric such as light cotton and linens. Undergarments and children's clothes are given a nostalgic touch by pintucking. • Attach the pintuck foot • Insert a twin needle on your machine (e.g. 130/705 H-ZWI; 1.6 or 2.0 mm needle spacing; size 80). • Thread the two needles (see page 29). • Using a water-soluble marker, draw a placement line for your first pintuck. • Increase the bobbin thread tension by turning the adjusting screw of the bobbin case slightly to the right (see chapter on "Bobbin thread tension"). This will help form well-defined pintucks. • Sew your first pintuck. When you start on the second ipninthtueckfo, oatl.loTwhisthweilflirpsrtopdiuntcueckevteonrluynsppaarcaelldelpiinntaucgkrso.ove Stitch: 1 Stitch length: 2.5 Tension: 5 Tip: If you would like to emphasise the pintuck effect, you can attach front edge a pin tuck blade (special accessory) on the of the needle plate. The pintuck blade pre shapes the fabric prior better-defined pintuck. to sewing and produces a For the foot thin materials use the pintuck foot with 7 grooves small pintuck blade, for heavier materials use the with 5 grooves and the large pintuck blade. and pintuck Inserting a making the gimp thread creates a similar optical pintuck appear even more raised. effect by A in cording tongue your pintucks. is not used when inserting a gimp thread • Remove the needle plate. • Thread the gimp thread from the center front of the needle below plate. through the hole at • Replace the needle plate. The notch between plate and the sewingmachine provides space the needle for the gimp thread while sewing. Feed the gimp thread under the work support so that it does not become knotted during sewing. • Gently pull the fabric taut while sewing the pintucks. 71
-
 1
1 -
2
-
3
-
4
-
5
-
6
-
7
-
8
-
9
-
10
-
11
-
12
-
13
-
14
-
15
-
16
-
17
-
18
-
19
-
20
-
21
-
22
-
23
-
24
-
25
-
26
-
27
-
28
-
29
-
30
-
31
-
32
-
33
-
34
-
35
-
36
-
37
-
38
-
39
-
40
-
41
-
42
-
43
-
44
-
45
-
46
-
47
-
48
-
49
-
50
-
51
-
52
-
53
-
54
-
55
-
56
-
57
-
58
-
59
-
60
-
61
-
62
-
63
-
64
-
65
-
66
-
67
-
 68
68 -
 69
69 -
 70
70 -
 71
71 -
 72
72 -
 73
73 -
 74
74 -
 75
75 -
 76
76 -
 77
77 -
 78
78 -
79
-
80
-
81
-
82
-
83
-
84
-
85
-
86
-
87
-
88
-
89
-
90
-
91
-
92
-
93
-
94
-
95
-
96
-
97
-
98
-
99
-
100
-
101
-
102
-
103
-
104
-
105
 |
 |
