Pfaff expression 2014 Owner's Manual - Page 92
Satin, stitch, mitered, corners, Decorative, buttonhole
 |
View all Pfaff expression 2014 manuals
Add to My Manuals
Save this manual to your list of manuals |
Page 92 highlights
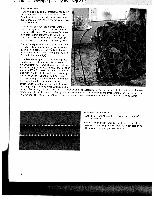
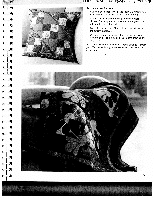
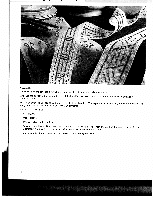
Satin stitch mitered corners Mitered corners (with an angle of 45°) can be achieved by altering the width of the satin stitch zigzag while sewing. • Select zigzag stitch 12 (right needle position). • Set stitch width to 6 mm, stitch length to 0.2-0.3 mm. • Set the needle thread tension to 3. • Satin stitch a single straight line. • To miter the corner, lower the needle into the fabric on the right side of the stitch, reduce the stitch width using the -1+ button A (1) by 0.5 mm. Sew one stitch. • Reduce the width again by 0.5 mm and sew one stitch. Continue until the stitch width is reduced to 0.5 mm. • Turn the handwheel towards yourself until the needle pierces the fabric in the right-hand position. Turn the fabric 90° and sew one stitch. • Increase the width by 0.5 mm to 1 mm. Sew one stitch. • Increase the width by 0.5 mm again and sew one stitch. Continue until the starting width is reached. • Continue embroidering a straight line at the 6.0 mm width. If the corner is to run in the opposite direction, work with the left-hand needle position (stitch 12 and 'Pattern mirror button (30)). Decorative buttonhole This buttonhole is an attractive variation of the classic linen buttonhole. Since you determine the seam width yourself the buttonhole can be up to 12mm wide. • Set stitch No. 3, stitch width 3 mm, stitch length 0.2 mm. • Set needle thread tension at 3. • Sew two seams 1 mm apart the length of desired buttonhole. • Select stitch No. 12 and stitch over the two ends with a triangle. • Using -1+ button A (1). alter the stitch width gradually from 0 mm to 3 mm and back to 0 mm during sewing. The tip of the triangle should meet in the middle of the two seams. 90
-
 1
1 -
2
-
3
-
4
-
5
-
6
-
7
-
8
-
9
-
10
-
11
-
12
-
13
-
14
-
15
-
16
-
17
-
18
-
19
-
20
-
21
-
22
-
23
-
24
-
25
-
26
-
27
-
28
-
29
-
30
-
31
-
32
-
33
-
34
-
35
-
36
-
37
-
38
-
39
-
40
-
41
-
42
-
43
-
44
-
45
-
46
-
47
-
48
-
49
-
50
-
51
-
52
-
53
-
54
-
55
-
56
-
57
-
58
-
59
-
60
-
61
-
62
-
63
-
64
-
65
-
66
-
67
-
68
-
69
-
70
-
71
-
72
-
73
-
74
-
75
-
76
-
77
-
78
-
79
-
80
-
81
-
82
-
83
-
84
-
85
-
86
-
 87
87 -
 88
88 -
 89
89 -
 90
90 -
 91
91 -
 92
92 -
 93
93 -
 94
94 -
 95
95 -
 96
96 -
 97
97 -
98
-
99
-
100
-
101
-
102
-
103
-
104
-
105
 |
 |
