Pfaff hobby 1142 Owner's Manual - Page 33
Attach the quilting guide - zipper foot
 |
View all Pfaff hobby 1142 manuals
Add to My Manuals
Save this manual to your list of manuals |
Page 33 highlights
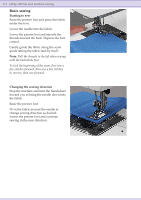
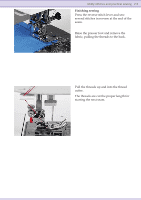
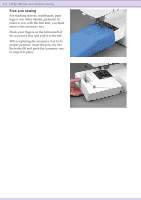
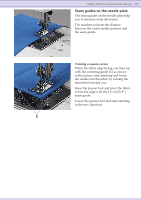
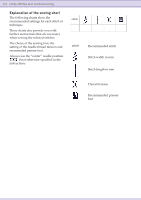
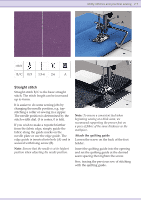
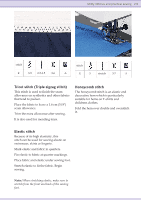
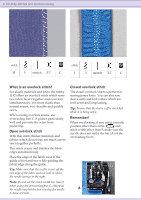
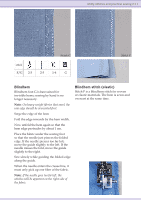
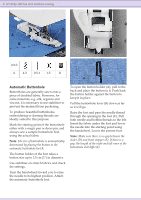
Utility stitches and practical sewing 2:7 B A stitch B/C 0/5 1.5-4 2-6 A Straight stitch Straight stitch B/C is the basic straight stitch. The stitch length can be increased up to 4 mm. It is easier to do some sewing jobs by changing the needle position, e.g. topstitching a collar or sewing in a zipper. The needle position is determined by the stitch width dial. (5 is center, 0 is left). If you wish to make a topstitch farther from the fabric edge, simply guide the fabric along the guide marks on the needle plate or use the edge guide. The edge guide is inserted into hole (A) and is secured with Àxing screw (B). Note: Ensure that the needle is at its highest position when adjusting the needle position. Note: To ensure a consistent feed when beginning sewing at a thick seam, we recommend supporting the presser foot on a piece of fabric of the same thickness as the workpiece. Attach the quilting guide Loosen the screw on the back of the foot holder. Insert the quilting guide into the opening and set the quilting guide at the desired seam spacing then tighten the screw. Sew, tracing the previous row of stitching with the quilting guide.
-
 1
1 -
2
-
3
-
4
-
5
-
6
-
7
-
8
-
9
-
10
-
11
-
12
-
13
-
14
-
15
-
16
-
17
-
18
-
19
-
20
-
21
-
22
-
23
-
24
-
25
-
26
-
27
-
 28
28 -
 29
29 -
 30
30 -
 31
31 -
 32
32 -
 33
33 -
 34
34 -
 35
35 -
 36
36 -
 37
37 -
 38
38 -
39
-
40
-
41
-
42
-
43
-
44
-
45
-
46
-
47
-
48
-
49
-
50
-
51
-
52
-
53
-
54
-
55
-
56
 |
 |
