Pfaff hobby 1142 Owner's Manual - Page 40
Attach the buttonhole foot B. - instruction manual
 |
View all Pfaff hobby 1142 manuals
Add to My Manuals
Save this manual to your list of manuals |
Page 40 highlights
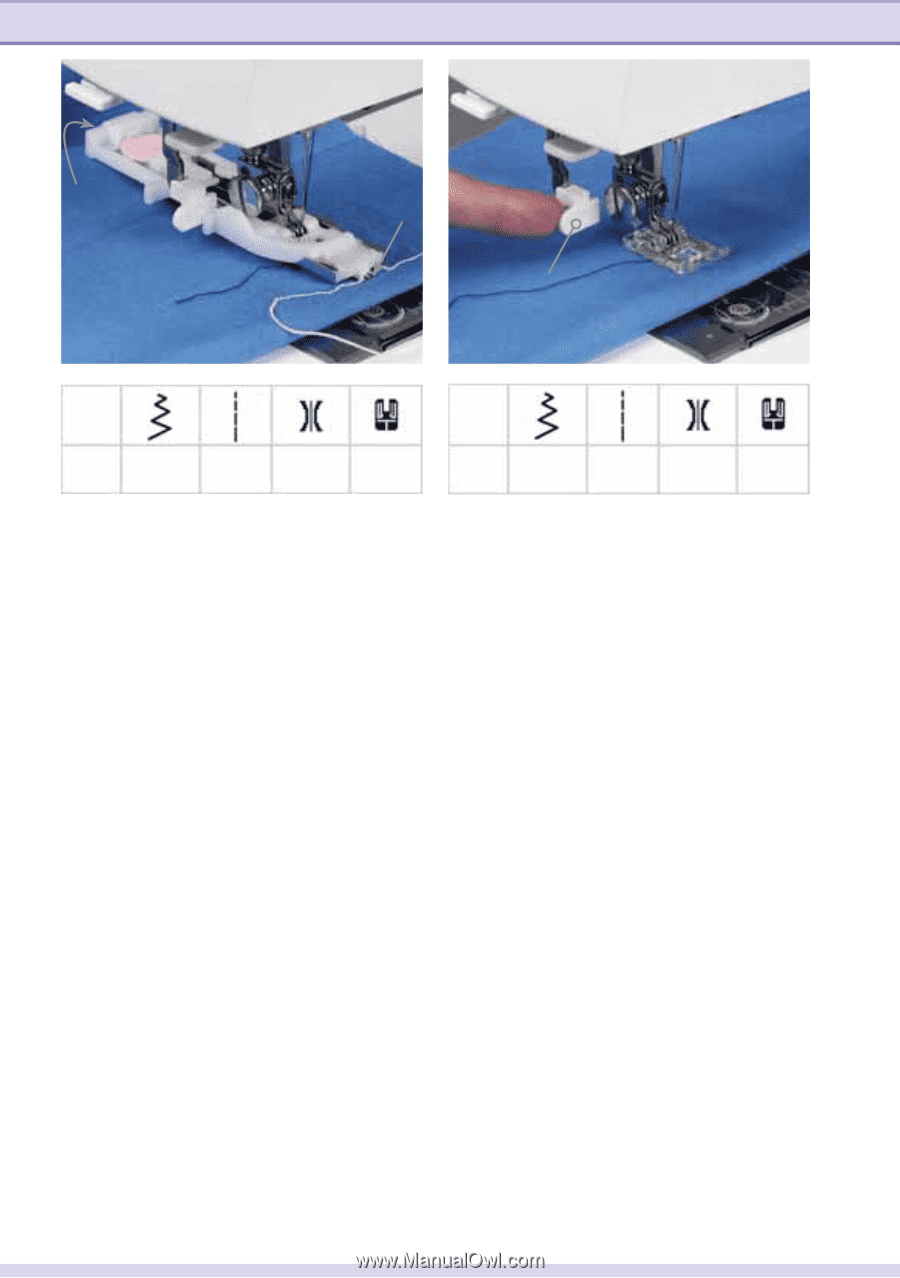
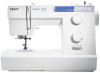
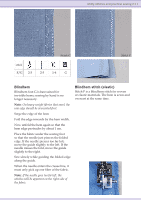
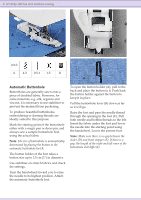
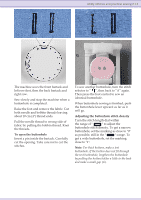
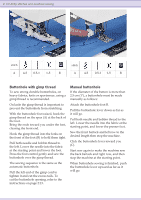
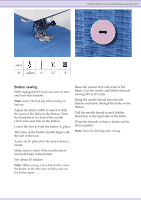
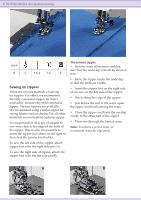
2:14 Utility stitches and practical sewing A B C stitch A 4-5 0.5-1 1-5 R stitch A 4-5 0.5-1 1-5 B Buttonhole with gimp thread To sew strong durable buttonholes, on heavy fabrics, knits or sportswear, using a gimp thread is recommended. On knits the gimp thread is important to prevent the buttonhole from stretching. With the buttonhole foot raised, hook the gimp thread on the spur (A) at the back of the foot. Bring the ends toward you under the foot, clearing the front end. Hook the gimp thread into the forks on the front of the foot (B) to hold them tight. Pull both needle and bobbin thread to the left. Lower the needle into the fabric at the starting point and lower the foot. Press the foot control gently and sew the buttonhole over the gimp thread. The sewing sequence is the same as the automatic buttonhole. Pull the left end of the gimp cord to tighten it and cut the excess tails. To cut the buttonhole opening, refer to the instructions on page 2:13. Manual buttonhole If the diameter of the button is more than 2.5 cm (1"), a buttonhole must be made manually as follows: Attach the buttonhole foot B. Pull the buttonhole lever down as far as it will go. Pull both needle and bobbin thread to the left. Lower the needle into the fabric at the starting point, and lower the presser foot. Sew the front bartack and left row to the desired length then stop the machine. Click the buttonhole lever toward you (C). Start sew again to make the machine sew the back bartack and right row, and then stop the machine at the starting point. When buttonhole sewing is Ànished, push the buttonhole lever upward as far as it will go.
-
 1
1 -
2
-
3
-
4
-
5
-
6
-
7
-
8
-
9
-
10
-
11
-
12
-
13
-
14
-
15
-
16
-
17
-
18
-
19
-
20
-
21
-
22
-
23
-
24
-
25
-
26
-
27
-
28
-
29
-
30
-
31
-
32
-
33
-
34
-
 35
35 -
 36
36 -
 37
37 -
 38
38 -
 39
39 -
 40
40 -
 41
41 -
 42
42 -
 43
43 -
 44
44 -
 45
45 -
46
-
47
-
48
-
49
-
50
-
51
-
52
-
53
-
54
-
55
-
56
 |
 |