Pfaff hobby 1142 Owner's Manual - Page 38
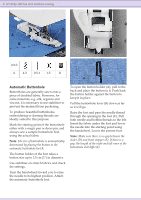
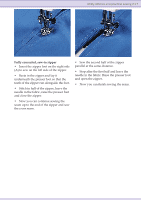
To open the button holder A, pull to - automatic buttonhole
 |
View all Pfaff hobby 1142 manuals
Add to My Manuals
Save this manual to your list of manuals |
Page 38 highlights
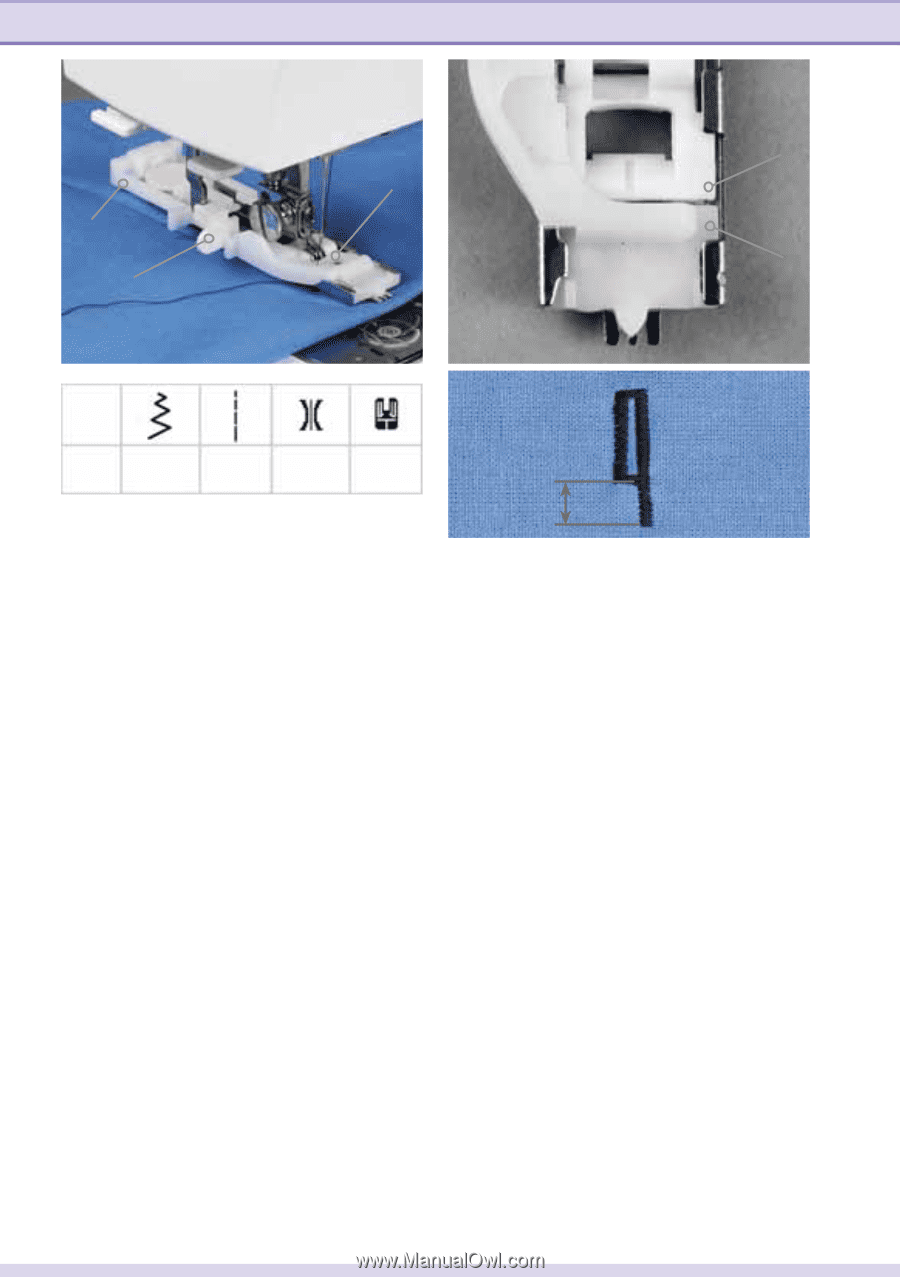
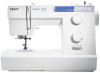
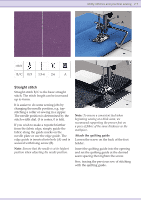
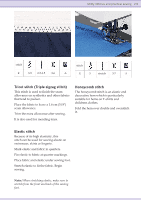
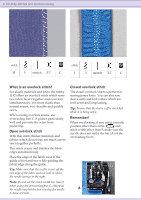
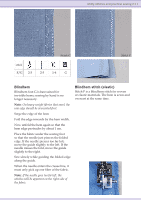
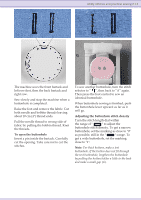
2:12 Utility stitches and practical sewing D C A E B stitch A 4-5 0.5-1 1-5 R F Automatic Buttonhole Buttonholes are generally sewn onto a piece of doubled fabric. However, for some materials, e.g. silk, organza and viscose, it is necessary to use stabilizer to prevent the material from puckering. To produce beautiful buttonholes, embroidering or darning threads are ideally suited to this purpose. Mark the starting point of the buttonhole either with a magic pen or dress pin, and always sew a sample buttonhole Àrst, using the actual fabric Note: The size of buttonhole is automatically determined by placing the button in the automatic buttonhole foot R. The button holder of the foot takes a button size up to 2.5 cm (1") in diameter. Use stabilizer on stretch fabrics and check the settings. Turn the handwheel toward you to raise the needle to its highest position. Attach the automatic buttonhole foot. To open the button holder (A), pull to the back and place the button in it. Push back the button holder against the button to keep it in place. Pull the buttonhole lever (B) down as far as it will go. Raise the foot and pass the needle thread through the opening in the foot (C). Pull both needle and bobbin threads to the left. Insert the fabric under the foot and lower the needle into the starting point using the handwheel. Lower the presser foot. Note: Make sure there is no gap between the slider (D) and front stopper (E). If there is a gap, the length of the right and left rows of the buttonhole will differ(F).
-
 1
1 -
2
-
3
-
4
-
5
-
6
-
7
-
8
-
9
-
10
-
11
-
12
-
13
-
14
-
15
-
16
-
17
-
18
-
19
-
20
-
21
-
22
-
23
-
24
-
25
-
26
-
27
-
28
-
29
-
30
-
31
-
32
-
 33
33 -
 34
34 -
 35
35 -
 36
36 -
 37
37 -
 38
38 -
 39
39 -
 40
40 -
 41
41 -
 42
42 -
 43
43 -
44
-
45
-
46
-
47
-
48
-
49
-
50
-
51
-
52
-
53
-
54
-
55
-
56
 |
 |