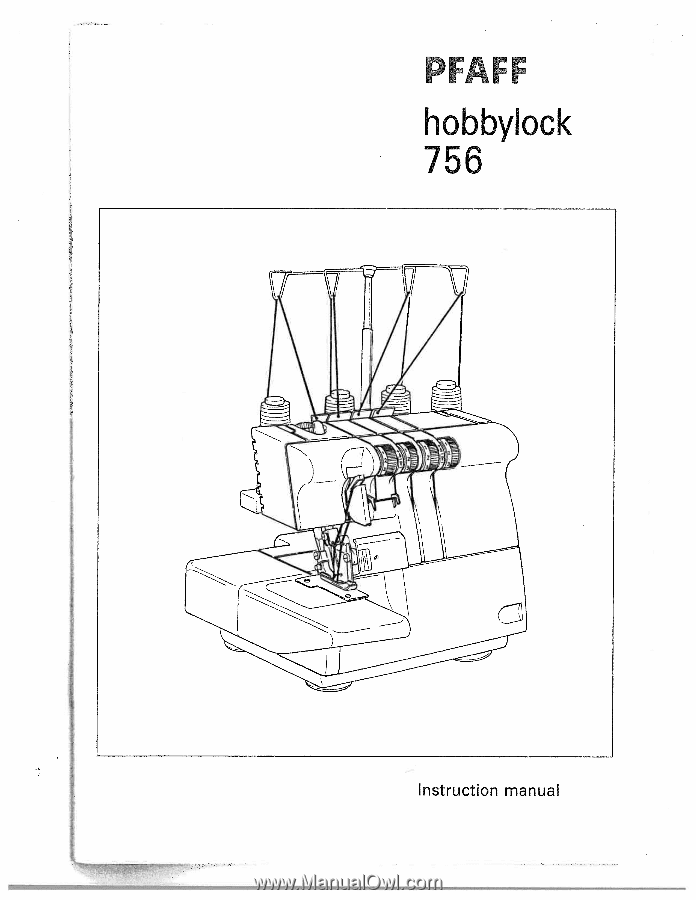
Pfaff hobbylock 756 Owner's Manual
Pfaff hobbylock 756 Manual
 |
View all Pfaff hobbylock 756 manuals
Add to My Manuals
Save this manual to your list of manuals |
Pfaff hobbylock 756 manual content summary:
- Pfaff hobbylock 756 | Owner's Manual - Page 1
Cl) C Cs' C C) C, 0 D C-) 3 a) D C Ca) C) - Pfaff hobbylock 756 | Owner's Manual - Page 2
that provides unique advantages. Your new hobbylock 756 can take any material in its stride and will sew, trim and neaten up for you in one ope ion. Your PFAFF hobbylock features the very latest in design and technology, and it is just as easy to use as this instruction manual is to follow. If you - Pfaff hobbylock 756 | Owner's Manual - Page 3
in the needle area such as threading needle, changing needle, threading bobbin, or changing presser foot, etc. 16. Always unplug sewing machine from the electric outlet when removing covers, lubricating, or when making any other user servicing adjustments mentioned in the instruction manual : 17 - Pfaff hobbylock 756 | Owner's Manual - Page 4
avoid the risk of electric shock, do not open the machine. There are no parts in side the machine which the user can re pair. This the exclusive responsibility of our qualified service staff. 11. Be sure to use only original PFAFF parts. Please Note! Never use insecticides or chemical products such - Pfaff hobbylock 756 | Owner's Manual - Page 5
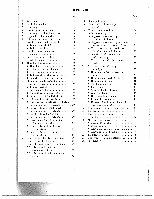
Page 1 Accessories 4 2. Needle information 4 3. Principal parts 5 4. How to open looper cover 6 5. Principal parts behind looper cover 6 6. Preparation prior to sewing 6 7. Setting up the thread guide holder 7 8. How to remove and insert needle 8 • To remove needle (s) 8 • To - Pfaff hobbylock 756 | Owner's Manual - Page 6
1 I See page 44 for optional accessories. fl - 0 U J LV 2. NEEDLE INFORMATION * This that overlock uses a eliminates the flat shank possibility industrial needle of inserting the needle backwards. * Do not attempt to use sewing machine needle of a standard any size or household - Pfaff hobbylock 756 | Owner's Manual - Page 7
3. PRINCIPAL PARTS Thread guides and holder © Handle Pressure regulating screw Left needle thread tension dial (blue) ® Right needle thread tension dial (green) © Upper looper thread tension dial (orange) © Lower looper thread tension dial (yellow) ® Throat plate ® Cylinder cover Cloth plate © - Pfaff hobbylock 756 | Owner's Manual - Page 8
. 5. PRINCIPAL PARTS BEHIND LOOPER COVER () Upper looper () Movable upper knife ® Presser foot ® Stationary lower knife ® Lower looper 6. PREPARATION PRIOR TO SEWING * Connect the controller/electric plug tD to the machine receptacle (). * Plug power line © into electric outlet ®. * Power switch - Pfaff hobbylock 756 | Owner's Manual - Page 9
, ilpirtyessoefr feet or starting * Befor&cleaning your machine, disconnect the powerline plug from the electric outlet. 7. SETTING UP THE THREAD GUIDE HOLDER * This machine is shipped with the thread guide holder in the lowered position. * Fully extend the thread guide holder - Pfaff hobbylock 756 | Owner's Manual - Page 10
clamp as far as it will go. Note: The left needle ® will be slightly higher than the right needle ®. * Securely tighten the needle set screw. Note: * This page machine uses 4 for additional #2054 needles. needle information. Refer to * Remove if you the find cloth plate it difficult - Pfaff hobbylock 756 | Owner's Manual - Page 11
upward. * To replace, guide latch on cloth plate into hole in cylinder cover and push cloth plate to the right as far as it will go. :10. HOWTO REMOVEAND REPLACE CYLINDER COVER * Removing the cylinder cover exposes the lower looper for easy threading and cleaning of the machine. * Cylinder cover can - Pfaff hobbylock 756 | Owner's Manual - Page 12
Left needle thread - Blue ® * Right needle thread - Green * Upper looper thread Orange ® * Lower looper thread - Yellow © • STITCH DIAGRAM * Upper looper thread - Orange * Lower looper thread - Yellow © * Right needle thread - Green * Left needle thread Blue - Topside • TO THREAD THE MACHINE - Pfaff hobbylock 756 | Owner's Manual - Page 13
in between the tension discs. I * Thread the looper area of the machine following I the orange color coded thread guides. (®- ®) * Thread the hole in the upper looper from front to back ®. Note: Use the tweezers provided in the accessory set to aid in threading the looper. * Pull about 5 cm - Pfaff hobbylock 756 | Owner's Manual - Page 14
lower looper as indicated D * Pass thread from back to the front through the thread guide * Pass thread through hole J from front to back, then to the front through right slot as shown. * While holding thread with finger, pass it between the tension discs and pull thread down to make certain it is - Pfaff hobbylock 756 | Owner's Manual - Page 15
the far left. I * Pull 7.5 10 cm (3 4 inches) of thread through j thread guide (ij. * Insert the thread through the left end of the lower looper.® * Drop the thread. Note: Use the tweezers that are in the accessory set to aid in threading the looper. * Turn the hand wheel toward you until - Pfaff hobbylock 756 | Owner's Manual - Page 16
the Right Needle (Green) I * Thread the right needle as indicated (iJ--®. . 1- • - \ L_-4 -- - * Pass thread from back to the front through the thread guide D * Pass thread through hole ® from front to back, then to the front through right slot as shown. * While holding thread with finger - Pfaff hobbylock 756 | Owner's Manual - Page 17
Be sure to thread path pass of the the thread through thread guide(). upper * Thread the eye of the right needle ®. * TuophpepeBerearntsieuknerngdeilfpeetoosimesintaigdoyainsg.eebn(egskeaneegifaepesdaiegbraeenf2odto3re)p.ltsahecrweeidandgi.nwthheen the non - * Place the thread to the back - Pfaff hobbylock 756 | Owner's Manual - Page 18
the Left Needle (Blue) I * Thread the left needle as indicated * Pass thread from back to the front through the thread guide * Pass thread through hole from front to back, then to the front through right slot as shown. °Tfl * While holding thread with finger, pass it between the tension - Pfaff hobbylock 756 | Owner's Manual - Page 19
position (see page 17). - Be sure to engage knife before sewing. * Place the thread to the back, under the presser foot. • IMPORTANT THREADiNG INFORMATION * Always thread the needle(s) last to prevent mis I threading the lower looper. * If the lower looper should come unthreaded. 1) Unthread - Pfaff hobbylock 756 | Owner's Manual - Page 20
Note: Do not pull on the fabric while sewing as this may deflect the needle, causing it to break. * At the end of the sample, continue to run the machine with the presser foot down until the chain reaches 5 7.5 cm (2 3 inches) in length. * Clip the thread chain. Note: Anytime you have rethreaded the - Pfaff hobbylock 756 | Owner's Manual - Page 21
13. BASIC STITCH TYPES • 4 THREAD OVERLOCK MOCK SAFETY STITCH * This machine is a four-thread overlock that uses two needles and two loopers to create a 5.7mm (7/32 inch) wide four-thread mock safety stitch. • WIDE 3 THREAD OVER LOCK STITCH * When the right needle is removed a wide 5.7mm (7/32 inch) - Pfaff hobbylock 756 | Owner's Manual - Page 22
• SUGGESTED TENSION SETTINGS FOR 4 THREAD OVERLOCK MOCK SAFETY STITCH Note: * These are suggested tension settings only. * Tension settings are effected by 1) Type and thickness of fabric 2) Needle size 3) Size, type and fiber content of thread • CORRECT BALANCE OF THE 4 THREAD OVER LOCK MOCK SAFETY - Pfaff hobbylock 756 | Owner's Manual - Page 23
size Size, type and fiber content of thread. Left Needle/Wide 3 Thread Overlock Stitch Fabric Tension Dial Blue Green Orange Yellow Light weight 3 Medium weight Heavy weight 5 1 2 :1 2 1.5 2.5 Right Needle/Narrow 3 Thread Overlock Stitch Fabric Tension Dial Blue Green Orange - Pfaff hobbylock 756 | Owner's Manual - Page 24
TO CHANGE THREADS/TIE ON METHOD * To change thread type or color, clip thread near the spool. * Place new thread on stand. * Tie new thread and old thread ends together. * Clip thread tails to 2 3 cm (1 inch) length. If clipped too short, threads may come untied. * Firmly pull both thread to test - Pfaff hobbylock 756 | Owner's Manual - Page 25
* Pull the threads through the machine one at a time. 1' * If threads do thread guides not pull easily, check for tangles or looping under thread stand. on * When when pulling the knot thread through is in front of the the needle, needle. STOP * Cut the thread, and insert it through the - Pfaff hobbylock 756 | Owner's Manual - Page 26
the operating position. Caution: Always close looper cover before operating machine. 18. SEAM GUIDE LINES * When the left needle is inserted, the thick line on the left of the looper cover is 16.0mm (5/8 inch). * When sewing with the right needle, the thick line on the left of the looper cover is - Pfaff hobbylock 756 | Owner's Manual - Page 27
9. HOW TO ADJUST THE OVEREDGE SEAM WIDTH * The and machine is set to three-thread left sew the four-thread stitch needle position stitch at a width of 5.7mm (7/32 inch). * The machine is needle position set to sew the three-thread stitch at a width of 3.5mm right (9/64 inch). * T7se. - Pfaff hobbylock 756 | Owner's Manual - Page 28
. * Turn the hand wheel toward you until the needle is at its highest position. * Unscrew the throat plate 3crew. 1F * Install careful the not rolled hemming throat plate being to catch the threads between the plate and the machine. * Replace throat plate screw. * Open looper cover (page - Pfaff hobbylock 756 | Owner's Manual - Page 29
that are difficult to roll. 1 Always sew a test sample, and if neccessary, adjust tension balance as instructed below. For a beautiful rolled hem thread the upper looper with wooly nylon and the needle and I lower loopet with lightweight regular thread. i • HOW TO BALANCE THE UPPER LOOPER - Pfaff hobbylock 756 | Owner's Manual - Page 30
INFORMATION ABOUT * ROLLED HEMMING Hold keep the thread chain when it from curling into the you begin seam. sewing to * Place a slight direction and atefnisnieornseoanmthfeinmishatecrainalbien the sewing obtained. * Tomsehbmtetabi(men1leoi/dn1wi6mf3oui.rn5mcmrhom)lolvesed(inr9ech - Pfaff hobbylock 756 | Owner's Manual - Page 31
the three-thread overlock stitch, sewing the seam and pulling the fabric apart to flatten the seam. * The flatlock stitch can be used as a construction and decorative stitch or for ornamentation only. (1) MachineSetUp * Remove the left or right needle. * Begin with the machine threaded and tension - Pfaff hobbylock 756 | Owner's Manual - Page 32
the fabric so the seam is sewn with part of the stitch extending off the fabric. * needle. * For a ladder stitch, sew seam with right sides together. The needle thread will be the prominent thread that creates the ladder (A). Note: An optional Edge Guide is available (page 44) to aid in sewing - Pfaff hobbylock 756 | Owner's Manual - Page 33
blind hem foot (ULTR HEM FOOT) is available (page 45) • HOW TO SEW PIN TUCKS I Sew decorative pin tucks on the fabric before cutting out the garment * Remove the left needle and adjust machine for a narrow three-thread overlock stitch. Note The rolled hem stitch can also be used for this technique - Pfaff hobbylock 756 | Owner's Manual - Page 34
(51/64 inch) from the corner, in line with the overedge seam edge. * Sew one stitch beyond point (A) and stop. * Raise needle and presser foot. * Pull the fabric to the rear of the machine just enough to release the thread caught on the finger of the throat plate. Note: Presser foot has been removed - Pfaff hobbylock 756 | Owner's Manual - Page 35
the cut ting action of the knives. Caution: Sewing over pins will damage and/or de stroy the cutting edge of the knives. • SECURING THE THREAD CHAIN * Thread a large eye, hand sewing needle (such as a tapestry needle) with the thread chain. I * Insert the needle into the end of the seam to secure - Pfaff hobbylock 756 | Owner's Manual - Page 36
of throat plate. * Elastic should be sewn using the three-thread overlock stitch or the four-thread overlock mock safety stitch. * After securing with 2 3 stitches, continue sewing, allowing the fabric to feed through the machine while gently stretching elastic (a quarter at a time) with the right - Pfaff hobbylock 756 | Owner's Manual - Page 37
the seam. * Insert the tape through the hole in the front of the foot. * Position the tape under the foot to the back of the machine and sew the garment seam. * The tape is attached as the seam is sewn. • BRAIDiNG BY CHAINING OFF * Place the movable upper knife in nonoperating position - Pfaff hobbylock 756 | Owner's Manual - Page 38
DIFFERENTIAL FEED (with differential feed machine only) * Differential feed is a system which "stretches" or "gathers" the fabric, when amount of feed of front feed dog in relation to the rear feed - Pfaff hobbylock 756 | Owner's Manual - Page 39
mark, as required, to stretch, and tighten the thumb screw. * To sew a seam, apply gentle tension to the fabric by holding the seam lightly the fabric being sewn, the fabric is apt to shift away from the needle resulting in improperly sewn overedge seam. In such case, reset differential feed - Pfaff hobbylock 756 | Owner's Manual - Page 40
pressure. Pressure regulating thumb screw Less pressure ore pressure 23. FREE ARM SEWING (tubular work) r * This machine becomes a free arm machine simply by removing the cloth plate and is especially suited for sewing hard to reach garment areas such as armholes and overcasting trouser cuffs - Pfaff hobbylock 756 | Owner's Manual - Page 41
24. RELATIONSHIP BETWEEN CLOTH, THREAD AND NEEDLE Type of Fabric Light Weight Lawn, Organdy Voil, Crepe, etc. Type of Thread Cotton Silk Spun Tetron No. 100 No. 100 No. 80 - 90 No. 80 - 100 Medium Weight Muslin, Sheersucker Satin, Gabardine, Broadcloth, etc. Cotton Silk Spun - Pfaff hobbylock 756 | Owner's Manual - Page 42
is produced due to the cutting action of the knives. 2) An overlock runs at a very high speed and needs to be oiled frequently to lubricate the internal working parts. . CLEANING THE MACHINE Danger: Before cleaning your machine, disconnect power line plug from the wall receptacle. * Clean the lint - Pfaff hobbylock 756 | Owner's Manual - Page 43
HOW TO REPLACE THE STATiONARY KNIFE Danger: Before replacing the stationary knife, dis connect power line plug from the wall receptacle. * The stationary knife should be changed when it becomes dull. * The stationary knife can be replaced according to the directions provided, however if there - Pfaff hobbylock 756 | Owner's Manual - Page 44
old bulb to the shop and ask for same bulb. * If voltage indicated on the electrical rating plate of your machine is 110 - l27V, ask for light bulb conforming to following specification. Bayonet type ll0- 127V 15W • Glass shape T-20 • Lamp cap BA 15D/19 • Overall length 48mm * Remove light - Pfaff hobbylock 756 | Owner's Manual - Page 45
F move 26. TROUBLESHOOTING CHART Problem Fabric does not feed well Needle breaks Thread breaks Stitches skip Irregular stitches Fabric puckers Irregular trimming Fabric jams Machine does not operate Solution Lengthen stitch length - - Increase presser foot pressure for heavy weight fabric - Pfaff hobbylock 756 | Owner's Manual - Page 46
with an Overlock-From The Sewing Reference Library, published by Cy Decosse Incorporated. (2) Edge Guide * Attaches to the looper cover to aid in seaming and decorative sewing such as flatlocking and pin tucking. (3) Spool Cap (S) * Adapts a regular thread spool for use on the over lock machine - Pfaff hobbylock 756 | Owner's Manual - Page 47
page 36 for gather stitching). 28. SPECIFICATION Item Sewing speed Stitch length (feed amount) Differential feed ratio Overedge stitch width Needle bar stroke Presser foot rise Needle Number of threads Machine dimensions Weight hobbylock 756 Specification 1,300 spm maximum 1-5 mm (Standard: Rolled - Pfaff hobbylock 756 | Owner's Manual - Page 48
PFAFF G. M. Pfaff Akt i en g esel Isch aft Werk Karisruhe-Durlach GritznerstraIe 11 76227 Karlsruhe Gedruckt n Deutschland Druckerel Geblenc GmbH 76356 Weingarten, Stettiner StraSe 17 Technische Anderungen vorbehalten. Nr.: 29-62999558/OOO DG englisch . 4/95 . 4/96
-
 1
1 -
 2
2 -
 3
3 -
 4
4 -
 5
5 -
 6
6 -
 7
7 -
8
-
9
-
10
-
11
-
12
-
13
-
14
-
15
-
16
-
17
-
18
-
19
-
20
-
21
-
22
-
23
-
24
-
25
-
26
-
27
-
28
-
29
-
30
-
31
-
32
-
33
-
34
-
35
-
36
-
37
-
38
-
39
-
40
-
41
-
42
-
43
-
44
-
45
-
46
-
47
-
48
 |
 |
Cl)
C
C)
0
D
3
a)
D
C
a)
Cs’
C,
C
C-)
C
C)