Philips 32PFL3403D User manual - Page 31
Troubleshooting
 |
UPC - 609585162440
View all Philips 32PFL3403D manuals
Add to My Manuals
Save this manual to your list of manuals |
Page 31 highlights
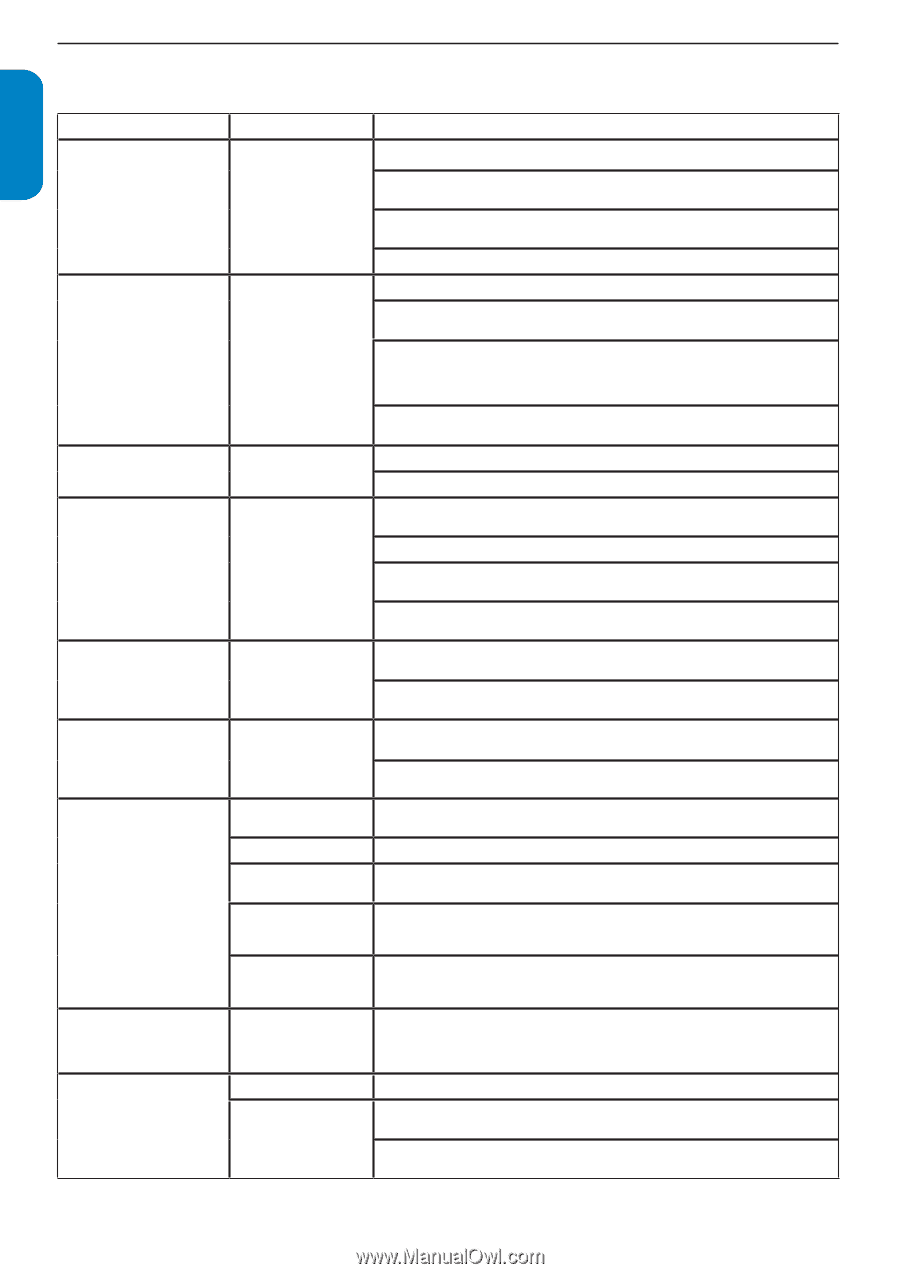
ENGLISH FRANÇAISE ESPAÑOL 11. Troubleshooting Symptoms No power or indicator light. Error message on the screen with HDMI connection. No sound is detected from the PC. TV does not respond to the remote control. The picture is distorted. It is stretched out, has short, fat, black bars on the side or top. The picture is mostly red and green, or the picture is missing red when the TV is connected to an accessory device via component cables. No sound on the TV loudspeaker. Bad picture quality with a coaxial connection. No picture or sound. Possible cause The TV is not connected to the power. HDCP authentication fail. Audio cable is not connected. Batteries are installed incorrectly, or low battery power. Broadcast video format. Insecure/incorrect connection. Volume level is set to zero. Sound is muted. Headphones are connected. Audio cable is not connected. Accessory device audio output setting is incorrect. Standard definition channels are not as clear as high definition channels. Incorrect channel Incomplete channel installation. What should you do 1. Press POWER at the side of the TV, or press . on the remote control. 2. Ensure the AC power cord is connected tightly to the TV power connector and to the power socket outlet. 3. Remove the AC power cord from the power socket outlet, wait 60 seconds and reconnect the AC power cord. 4. Connect the TV to a different power socket outlet. 1. Ensure that your HDMI cable is certified. 2. Press SOURCE button on the remote control to switch to another source and then switch back to the HDMI source. 3. Reset the accessory device and the TV. Turn on the TV Select the HDMI channel Turn on the accessory device 4.While the TV and the accessory device are powered on, unplug either end of the HDMI cable and then reinsert the cable. 1. Connect an audio cable to the SIDE AV AUDIO L/R port on the TV. 2. Press SOURCE button on the remote control and select the correct source. 1. Ensure the indicator light on the TV blinks when the remote control buttons are pressed. 2. Ensure that you are using the remote control supplied with the TV. 3. Ensure that the batteries of the remote control are inserted according to the illustration on the remote control and that the batteries do not need to be replaced. 4. Remove the AC power cord from the power socket outlet, wait 60 seconds and reconnect the AC power cord. 1. Press the FORMAT button on the remote control to select the best picture format. 2. For some accessory devices, the picture format has to be set in the accessory device. 1. Ensure all the connections are made according to the color code. 2. Push the component cables all the way into the YPbPr sockets on the TV. 1. Increase the volume. 2. Press MUTE button on the remote control. 3. Ensure the headphones are not plugged into the TV. 4. For AV connection, ensure that the Audio L/R cable is connected as described in Connect devices section. If you are using a component cable, ensure that you have not crossed the red audio cable with the red video cable. 5. For HDMI connections, some accessory devices have an HDMI audio output setting that must be turned on for HDMI to HDMI connections. 1. Connect the devices via component or HDMI cables. 1. Ensure you have selected the correct channel. 1. If the TV receives channels via an AV connection, set the TV to the correct source input. 2. If the TV is connected directly to the wall via a coaxial connection, perform the autoprogram again. EN-30
-
 1
1 -
2
-
3
-
4
-
5
-
6
-
7
-
8
-
9
-
10
-
11
-
12
-
13
-
14
-
15
-
16
-
17
-
18
-
19
-
20
-
21
-
22
-
23
-
24
-
25
-
 26
26 -
 27
27 -
 28
28 -
 29
29 -
 30
30 -
 31
31 -
 32
32 -
 33
33 -
 34
34 -
 35
35
 |
 |