Pioneer 917V-K Owner's Manual - Page 56
SIRIUS SHIFT+AM, SIRIUS, Antenna Error, Check Sirius Tuner, CATEGORY, ENTER, RETURN
 |
View all Pioneer 917V-K manuals
Add to My Manuals
Save this manual to your list of manuals |
Page 56 highlights
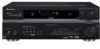
10 Other connections This receiver DIGITAL OUT IN OPT IN OPT 2 (TV/ SAT) IN OPT 1 (CD) OUT ASSIGNABLE DIGITAL IN IN ASSIGNABLE DIGITAL IN XM IN IN COAX 2 (DVR / VCR) IN COAX 1 (DVD/LD) OUT R AUDIO AUX FM UNBAL 75 Ω CD DVR / VCR TV / SAT AM LOOP ANTENNA VIDEO IN DVD / LD IN FRONT PLAY CD-R D V D 5.1CH INPUT IN / TAPE / MD REC L CEN- SUB TER WOOFER SIRIUS IN MONITOR OUT OUT CONTROL IN Y R SURROUND L DVD 5.1CH INPUT OUT IN 3 PB PR ASSIGN OUT MONITOR OUT SUB WOOFER PREOUT DVR / VCR IN TV / SAT IN DVD / LD IN S-VIDEO SR P E AA K E R S FRONT MONITOR OUT COMPONEN LR SURROUND SIRIUS ★ Antenna SIRIUS ★ Listening to SIRIUS Radio After connecting, you will be able to use this receiver to select channels and navigate categories using the on-screen display.2 The information displayed is as follows: SIRIUS Decades The '50s A A0 SR005 Chuck Berry Johnny B. Good Preset class Signal strength Category Preset number Channel number Artist name Song name Channel name Selecting channels and browsing by genre From the SIRIUS Channel Guide, you can browse SIRIUS Radio channels in the order that they appear, or you can narrow your channel search by genre. SiriusConnect™ HOME tuner AC adapter 1 Connect a SIRIUS Connect tuner to the SIRIUS Radio jack on the rear of this receiver. You will also need to connect the antenna and AC adapter to the Sirius Connect tuner. 2 Press SIRIUS (SHIFT+AM) to switch to the SIRIUS input. For best reception, you may need to move the SIRIUS Connect tuner antenna near a window (the southernmost window should produce the best results). • If after pressing SIRIUS the display shows Antenna Error, try disconnecting the antenna and reconnecting.1 If the display shows Check Sirius Tuner, check the connection of the AC adapter and this receiver to the Sirius Connect tuner. SIRIUS Decades The '50s A A0 SR005 Chuck Berry Johnny B. Good SIRIUS CH Guide Next [ 007 The '70s [ 006 The '60s [ 005 The '50s [ 004 Easy Listening [ 003 Love Songs [ 002 Lite Pop [ 001 Top 40 Hits [ 000 Sirius ID ENTER Previous A Exit • Press / to enter the SIRIUS Channel Guide, then navigate through the channels one at time with the / buttons or switch through pages with the / buttons, then press ENTER to listen to the SIRIUS radio broadcast. • To browse by genre, first press CATEGORY, use / / / to select a genre then press ENTER.3 • To cancel and exit any time, press RETURN. Note 1 You can check the strength of reception in Using the SIRIUS Menu on page 57. 2 It's easiest if you have your TV switched on to take advantage of the OSDs. You can, however, use just the front panel display to do everything if you prefer. 3 Select SR000 (SIRIUS ID) from the on-screen display to check the Radio ID of the SIRIUS Connect tuner. 56 En
-
 1
1 -
2
-
3
-
4
-
5
-
6
-
7
-
8
-
9
-
10
-
11
-
12
-
13
-
14
-
15
-
16
-
17
-
18
-
19
-
20
-
21
-
22
-
23
-
24
-
25
-
26
-
27
-
28
-
29
-
30
-
31
-
32
-
33
-
34
-
35
-
36
-
37
-
38
-
39
-
40
-
41
-
42
-
43
-
44
-
45
-
46
-
47
-
48
-
49
-
50
-
 51
51 -
 52
52 -
 53
53 -
 54
54 -
 55
55 -
 56
56 -
 57
57 -
 58
58 -
 59
59 -
 60
60 -
 61
61 -
62
-
63
-
64
-
65
-
66
-
67
-
68
-
69
-
70
-
71
-
72
-
73
-
74
 |
 |
