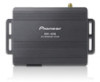
Pioneer AVIC-U250 Owner's Manual
Pioneer AVIC-U250 Manual
 |
View all Pioneer AVIC-U250 manuals
Add to My Manuals
Save this manual to your list of manuals |
Pioneer AVIC-U250 manual content summary:
- Pioneer AVIC-U250 | Owner's Manual - Page 1
Owner's Manual ADD-ON NAVIGATION SYSTEM AVIC-U250 For details on software updates, visit www.naviextras.com. English - Pioneer AVIC-U250 | Owner's Manual - Page 2
LEVEL: 5 BE SURE TO OBSERVE THE FOLLOWING GUIDELINES: 5 Introduction License agreement 6 - PIONEER AVIC-U250 - for U.S.A. 6 - PIONEER AVIC-U250 - for Canada 8 - END USER LICENSE AGREEMENT 10 About the data for the map database 12 Important safety information 12 - Fuel cost management 14 - Traffic - Pioneer AVIC-U250 | Owner's Manual - Page 3
point 51 Using traffic information Checking historical traffic information 52 Receiving real-time traffic information (TMC) 52 - Checking the traffic incidents on the map 53 Customizing preferences Displaying the settings screen 54 Setting the volume and the guidance voice for navigation system 54 - Pioneer AVIC-U250 | Owner's Manual - Page 4
this product 64 To prevent damage 64 Precautions before installation 65 Connecting the system 66 Installing with the hook and loop fastener 67 Appendix Positioning technology 68 - Positioning by GPS 68 Handling large errors 68 - When positioning by GPS is impossible 68 - Conditions likely to cause - Pioneer AVIC-U250 | Owner's Manual - Page 5
installation. This equipment generates, uses and can radiate radio frequency energy and, if not installed and used in accordance with the instructions : - Reorient or relocate the receiving antenna. - Increase the separation between the equip- ment and receiver. - Connect the equipment into an - Pioneer AVIC-U250 | Owner's Manual - Page 6
AVIC-U250 - for U.S.A. THIS IS A LEGAL AGREEMENT BETWEEN YOU, AS THE END USER, AND PIONEER ELECTRONICS (USA) INC. ("PIONEER"). PLEASE READ THE TERMS AND CONDITIONS OF THIS AGREEMENT CAREFULLY BEFORE USING THE SOFTWARE INSTALLED ON THE PIONEER PRODUCTS. BY USING THE SOFTWARE INSTALLED ON THE PIONEER - Pioneer AVIC-U250 | Owner's Manual - Page 7
States, you agree that you will not re-export the Software nor any other technical data received from Pioneer, nor the direct product thereof, except as permitted by the laws and regulations of the United States and the laws and regulations of the jurisdiction in which you obtained the Software - Pioneer AVIC-U250 | Owner's Manual - Page 8
PIONEER AVIC-U250 - for Canada THIS IS A LEGAL AGREEMENT BETWEEN YOU, AS THE END USER, AND PIONEER ELECTRONICS OF CANADA, INC. ("PIONEER"). PLEASE READ THE TERMS AND CONDITIONS OF THIS AGREEMENT CAREFULLY BEFORE USING THE SOFTWARE INSTALLED ON THE PIONEER PRODUCTS. BY USING THE SOFTWARE INSTALLED - Pioneer AVIC-U250 | Owner's Manual - Page 9
SALES OR BUSINESS, EXPENDITURES, INVESTMENTS, OR COMMITMENTS IN CONNECTION WITH ANY BUSINESS, LOSS OF ANY GOODWILL, OR DAMAGES) RESULTING FROM THE USE OF OR INABILITY TO USE THE SOFTWARE, EVEN IF PIONEER the Software nor any other technical data received from Pioneer, nor the direct product thereof, - Pioneer AVIC-U250 | Owner's Manual - Page 10
Chapter 02 Introduction END USER LICENSE AGREEMENT 10 En - Pioneer AVIC-U250 | Owner's Manual - Page 11
Introduction Chapter 02 Introduction En 11 - Pioneer AVIC-U250 | Owner's Manual - Page 12
to safe place and turn the ignition switch off (ACC OFF) immediately and consult your dealer or the nearest authorized Pioneer Service Station. Do not use the navigation system in this condition because doing so may result in a fire, electric shock, or other failure. ! If you notice smoke, a strange - Pioneer AVIC-U250 | Owner's Manual - Page 13
and regulations regarding the use, installation and operation of your navigation system. ! Do not operate this navigation system (or the rear manual handy as a reference for operating procedures and safety information. ! Pay close attention to all warnings in this manual and follow the instructions - Pioneer AVIC-U250 | Owner's Manual - Page 14
based on the map database. The speed limit in the database may not match the actual speed limit of the current road. This is not a definite value. Be sure to drive according to the actual speed limit. Additional safety information Parking brake interlock This navigation system receives the status - Pioneer AVIC-U250 | Owner's Manual - Page 15
and other entities described in this product are the registered trademarks or trademarks of their respective firms. Notes before using the system In case of trouble Should the navigation system fail to operate properly, contact your dealer or nearest authorized Pioneer Service Station. En 15 - Pioneer AVIC-U250 | Owner's Manual - Page 16
conditions: ! Prior to using this product for the first time after installation. ! If the product fails to operate properly. ! When adding/removing additional pro- ducts that connect to the navigation system. ! If your vehicle position is shown on the map with a significant positioning error - Pioneer AVIC-U250 | Owner's Manual - Page 17
On first-time startup When you use the navigation system for the first time, an initial setup process starts automatically. Follow the steps below. 1 Start the engine to boot up the system. 2 Wait approximately 10 seconds, and then press the MODE button of the AV receiver. After a short pause, the - Pioneer AVIC-U250 | Owner's Manual - Page 18
complete. After touching [Finish], the "Navigation Menu" screen appears and you can start using the navigation system. Regular startup 1 Start the engine to boot up the system. 2 Press the MODE button of the AV receiver. After a short pause, the navigation screen appears. p The display will turn - Pioneer AVIC-U250 | Owner's Manual - Page 19
How to use the navigation menu screens Screen switching overview Navigation screen Chapter 04 How to use the navigation menu screens Press the MODE button of the AV receiver. AV receiver screen (e.g. AVH-X5500BHS) En 19 - Pioneer AVIC-U250 | Owner's Manual - Page 20
include useful functions to support your navigation. 5 "My Route" menu You can display your route information on the map. You can also perform route-related actions such as editing or canceling your route on this menu. 6 "More..." menu You can customize the way the navigation system works, to - Pioneer AVIC-U250 | Owner's Manual - Page 21
] returns to the map screen. 4 More GPS reception quality icon shows the current accuracy of the position information. Indicator : : : : Meaning GPS navigation possible Insufficient GPS navigation GPS navigation not possible No connection to GPS receiver Chapter 04 En 21 How to use the navigation - Pioneer AVIC-U250 | Owner's Manual - Page 22
Chapter 05 How to use the map Most of the information provided by your navigation system can be seen on the map. You need to become familiar with how information appears on the map. How to read the map screen 1 2 b a 3 4 9 5 6 7 8 p Information with an asterisk (*) appears only when the - Pioneer AVIC-U250 | Owner's Manual - Page 23
How to use the map Chapter 05 How to use the map Touching this field displays route information Icon during navigation. By default, only Bear right. Turn sharp left. Seeing the current position on the map 1 Display the "Navigation Menu" screen. = For details of the operations, refer to Screen - Pioneer AVIC-U250 | Owner's Manual - Page 24
in WGS84 format) ! Altitude (elevation information coming from the GPS receiver - often inaccurate) ! House number on the left ! House number on the right ! Position information (current or last known)/time left since it was last updated ! Address details of the current position (when available - Pioneer AVIC-U250 | Owner's Manual - Page 25
How to use the map Chapter 05 Browsing the data field The data fields are different when you are navigating the current route and when you lane to be in to easily maneuver the next guidance. Lane information How to use the map ! When the route is not set: Current speed, speed limit of the current - Pioneer AVIC-U250 | Owner's Manual - Page 26
switches to 2D view mode. = For details, refer to Switching the map between 2D and 3D on the next page. 4 Touch [Back] to move the map back to follow the current GPS position. Smart Zoom Your navigation system features "Smart Zoom" that works in two ways: ! When the route is set: When approaching - Pioneer AVIC-U250 | Owner's Manual - Page 27
to use the map Chapter 05 How to use the map p The map orientation is fixed at "Heading up" when the 3D map screen is displayed. 1 Display the map screen. = For details of the operations, refer to Screen switching overview on page 19. 2 Touch anywhere on the map during navigation. The map stops - Pioneer AVIC-U250 | Owner's Manual - Page 28
use the map Scrolling the map to the position you want to see 1 Display the map screen. = For details of the operations, refer to Screen switching overview on page 19. 2 Touch and drag the map Touch [Back] to move the map back to follow the current GPS position. Viewing information about a specified - Pioneer AVIC-U250 | Owner's Manual - Page 29
navigation system proposes the country and state where you are. If no changes are required, used function is "Find Address", in which the address is specified and the location is searched. p Depending on the search results, some steps may be skipped. 1 Touch [Menu] on the map screen. The "Navigation - Pioneer AVIC-U250 | Owner's Manual - Page 30
Searching for a location by entering the city center You can search for a location by entering the city center. 1 Touch [Menu] on the map screen. The "Navigation Menu" screen appears. = For details of the operations, refer to Screen switching overview on page 19. 2 Touch [Find], then [Find Address - Pioneer AVIC-U250 | Owner's Manual - Page 31
know the ZIP code of the location that you want to find, you can use it to find the location. p Depending on the search results, some steps may be skipped. 1 Touch [Menu] on the map screen. The "Navigation Menu" screen appears. = For details of the operations, refer to Screen switching overview on - Pioneer AVIC-U250 | Owner's Manual - Page 32
. 4 After entering a few letters, touch [Results]. Searching for POIs using preset categories The preset search allows you to quickly find the most frequently selected types of POIs. 1 Touch [Menu] on the map screen. The "Navigation Menu" screen appears. = For details of the operations, refer to - Pioneer AVIC-U250 | Owner's Manual - Page 33
When the current position is not available (no GPS signal) and any of the above search categories and subcategories. 1 Touch [Menu] on the map screen. The "Navigation Menu" screen appears. = For details of and not around a given point. This is useful when you search for a later stopover that results - Pioneer AVIC-U250 | Owner's Manual - Page 34
39. Searching for a POI directly from the name of the facilities You can search for POIs by their names. 1 Touch [Menu] on the map screen. The "Navigation Menu" screen appears. = For details of the operations, refer to Screen switching overview on page 19. 2 Touch [Find], then [Find Places]. 3 Touch - Pioneer AVIC-U250 | Owner's Manual - Page 35
in. 7 Touch [Find by Name] if you have not done it before. 8 Using the keyboard, start entering the name of the place. Searching for and selecting a location 10 Touch the POI you want. The searched location appears on the map screen. = For the subsequent operations, refer to Setting a route to - Pioneer AVIC-U250 | Owner's Manual - Page 36
Around Here: Car repair and roadside assistance services ! Health Around Here: Medical and emergency services ! Police Around Here: Police stations on page 42. Selecting a location by using "Find on Map" 1 Touch [Menu] on the map screen. The "Navigation Menu" screen appears. = For details of - Pioneer AVIC-U250 | Owner's Manual - Page 37
" destination. Smart History Two of the most recently set destinations are shown in the "History" field for easier access. 1 Touch [Menu] on the map screen. The "Navigation Menu" screen appears. = For details of the operations, refer to Screen switching overview on page 19. 2 Touch [Find] on the - Pioneer AVIC-U250 | Owner's Manual - Page 38
the location. 1 Touch [Menu] on the map screen. The "Navigation Menu" screen appears. = For details of the map screen. = For the subsequent operations, refer to Setting a route to your destination on the next page. p You can also select a map location as the destination using the "Find on Map - Pioneer AVIC-U250 | Owner's Manual - Page 39
a route using a searched location 1 Search for a location. = For details, refer to Searching for and selecting a location on page 29. The map screen appears route is already set on page 46. 3 Touch [Go!]. Your navigation system starts the route guidance. # Touch [More] to modify route parameters. - Pioneer AVIC-U250 | Owner's Manual - Page 40
GPS position, is displayed. 4 Touch . The previous screen returns. The navigation system calculates the route. The orange line now shows the new recommended route. Setting a route using the "My Route" menu 1 Touch [Menu] on the map screen. The "Navigation To add more destinations, touch where you - Pioneer AVIC-U250 | Owner's Manual - Page 41
[Go] to confirm the destination. After a short summary of the route parameters, the map appears showing the entire route. The route is automatically calculated. p If you have already Chapter 07 After the location is decided 7 Touch [Go!]. Your navigation system starts the route guidance. En 41 - Pioneer AVIC-U250 | Owner's Manual - Page 42
key to add or remove destinations or change their sequence. You can also set a route start point other than your current location. This can be useful to plan and save a future map. ! Overview: Touch this key to display the entire route on the map. ! Avoidances: Touch this key to bypass a part of - Pioneer AVIC-U250 | Owner's Manual - Page 43
are used only if access for taxis is allowed. Private roads, resident-only roads and walkways are excluded from routes. This system calculates the parameters of the vehicle profile. 1 Touch [Menu] on the map screen. The "Navigation Menu" screen appears. = For details of the operations, refer to - Pioneer AVIC-U250 | Owner's Manual - Page 44
[More...], then [Settings]. 3 Touch [Route Settings]. 4 Touch the setting item. ! Navigation Mode: On-road navigation creates a turn by turn itinerary using the road network on the map. Switch to off-road navigation to navigate between destinations in a straight line. ! Route Planning Method: 44 En - Pioneer AVIC-U250 | Owner's Manual - Page 45
] on the map screen. The "Navigation Menu" screen use charge. The navigation system includes toll roads by default. ! Ferries: Set whether to include ferries. The navigation system includes ferries by default. ! Carpool/HOV: Sets whether to include the carpool or HOV lanes. The navigation system - Pioneer AVIC-U250 | Owner's Manual - Page 46
navigation system will ask you whether to start a new route, add decide where a waypoint to appear, use the "Edit Route" menu. ! GPS receiver. Then you can set the starting point of the route to a different location than the current GPS position. 1 Touch [Menu] on the map screen. The "Navigation - Pioneer AVIC-U250 | Owner's Manual - Page 47
the new start point is set. The map screen returns with a transparent arrow mark (showing that there is no GPS reception). If the current route already existed You can add or remove destinations, modify the start position or reorder the list. 1 Touch [Menu] on the map screen. The "Navigation Menu" - Pioneer AVIC-U250 | Owner's Manual - Page 48
add a new destination. !: Touch this key to delete a destination. !: Touch this key to modify the start point of the route. ! More: Touch this key to reorder the list. You can do it manually or you can let this system [Back]. The map screen returns. The navigation system recalculates the route. The - Pioneer AVIC-U250 | Owner's Manual - Page 49
overview on page 19. 2 Touch [My Route] on the "Navigation Menu" screen. 3 Touch [More]. p During simulation, you can use the following control keys (they disappear after a few seconds but you can open them again by touching the map). !: Jumps to the previous guidance point (maneuver). !: Pauses - Pioneer AVIC-U250 | Owner's Manual - Page 50
touch [More]. 3 Touch [Add to Favorites]. To change the name, use the keyboard. Touch to enter numbers or symbols. 4 Touch [Done]. The location is saved as a new "Favorites" destination. Saving a location as an alert point Alert points are preloaded in your navigation system. You can also download - Pioneer AVIC-U250 | Owner's Manual - Page 51
that this feature is legal in the country where you intend to use it. Editing an alert point You can edit a previously saved alert point (a speed camera or a railway crossing, for example). 1 Scroll the map and select the alert point to edit. The cursor appears around the alert point. - Pioneer AVIC-U250 | Owner's Manual - Page 52
Using traffic information Checking historical traffic information When this feature is enabled on the "Traffic" settings menu, the navigation system can take the traffic information into account when planning a route. For settings, follow the steps below. 1 Touch [Menu] on the map . Receiving real - Pioneer AVIC-U250 | Owner's Manual - Page 53
map, and small symbols above the road show the nature of the incident. p A special icon appears to show you whether traffic incidents are received. The icon shows the status of the traffic receiver the map. If there are traffic incidents on the recommended route that this system has not bypassed, the - Pioneer AVIC-U250 | Owner's Manual - Page 54
1 Touch [Menu] on the map screen. The "Navigation Menu" screen appears. = For details of the operations, refer to Screen switching overview on page 19. 2 Touch [More...]. 3 Touch [Settings]. 4 Touch the setting item. Setting the volume and the guidance voice for navigation system You can adjust the - Pioneer AVIC-U250 | Owner's Manual - Page 55
used for this warning. This system alerts you if you exceed the preset value even if the legal speed limit is higher. This setting lets you decide whether you wish to receive point, its distance and the related speed limit appear on the map screen while you are approaching one of these cameras. For - Pioneer AVIC-U250 | Owner's Manual - Page 56
to search for nearby emergency or roadside assistance services. ! Create Route/Edit Route: Displays the Navigation: Displays the map screen and starts simulating the active route. ! GPS Info: Displays the GPS receiver is enabled. ! Detour: This setting determines how this system uses the received - Pioneer AVIC-U250 | Owner's Manual - Page 57
. Setting the user profiles If more drivers use this navigation system, their settings can be remembered by using one of the user profiles. 1 Display event (maneuver) is far. When you get close to the event, the normal map view returns. ! Colors: Switch between daytime and night color modes or let - Pioneer AVIC-U250 | Owner's Manual - Page 58
visual guidance Adjust how this system helps you navigate with different kinds of route related information on the map screen. 1 Display the or service stations. Touch any of them to display it on the map and add it as a waypoint to your route if needed. ! Facility Types: Select the service types - Pioneer AVIC-U250 | Owner's Manual - Page 59
a straight line on the left side of the map. The blue arrow represents your current position and in a traffic congestion so this system offers you a detour using the next exit. The message list in case you want to bypass them with the help of this system. Customizing the display settings Display - Pioneer AVIC-U250 | Owner's Manual - Page 60
You can also set other country specific units used to display different values in this system. ! Time Zone: By default, time zone is taken from the map information and adjusted by your current location. Here you can set time zone and daylight saving time manually. Setting the Trip Monitor Trip logs - Pioneer AVIC-U250 | Owner's Manual - Page 61
that you want to use for voice guidance messages, then touch [Next]. p Later you can change it in "Sound and Warnings" settings. = For details, refer to Setting the volume and the guidance voice for navigation system on page 54. 4 If needed, modify the time format and unit settings, then touch [Next - Pioneer AVIC-U250 | Owner's Manual - Page 62
or off warnings, or restart the configuration wizard, etc. ! Updates and Extras: Visit www.naviextras.com to get additional content, such as new maps or 3D landmarks and useful applications. ! Unit Converter: Access travel applications: the unit converter helps you convert between various different - Pioneer AVIC-U250 | Owner's Manual - Page 63
Chapter 13 Installation Important safeguards WARNING Pioneer does not recommend that you install your navigation system yourself. This product is designed for professional installation only. We recommend that only authorized Pioneer service personnel, who have special training and experience - Pioneer AVIC-U250 | Owner's Manual - Page 64
Chapter 13 Installation Before installing this product ! Use this unit with a 12-volt battery and negative grounding only. Failure to do so may result in a fire or malfunction. ! To avoid shorts in the electrical system, be sure to disconnect the (-) battery cable before installation. To prevent - Pioneer AVIC-U250 | Owner's Manual - Page 65
other than supplied or compatible ones are used, they may damage internal parts of this product or they may work loose and the product may become detached. ! It is extremely dangerous to allow cables to become wound around the steering column or shift lever. Be sure to install this product, its - Pioneer AVIC-U250 | Owner's Manual - Page 66
the AV receiver using an 11 mm (.4 in) screw (supplied). GPS antenna (supplied) Affix the double-sided tape (supplied) on the surface as level as possible where the GPS antenna faces the window. Place the GPS antenna on the double-sided tape. Fuse (3 A, 250 V) FUSE The navigation unit Power cord - Pioneer AVIC-U250 | Owner's Manual - Page 67
attach the hook and loop fastener. Navigation unit Protective sheet 3 Decide on the installation position. 4 Peel off the other protective sheet and install the navigation unit on the surface of the glove compartment or similar location. Navigation unit Protective sheet Surface of the glove - Pioneer AVIC-U250 | Owner's Manual - Page 68
technology Positioning by GPS The Global Positioning System (GPS) uses a network of antenna clear. p If a GPS signal has not been received for a long time, your vehicle's actual position and the current position mark on the map may diverge considerably or may not be updated. In such case, once GPS - Pioneer AVIC-U250 | Owner's Manual - Page 69
nearby, such as in the case of an elevated freeway. ! If you take a ferry. ! If you take a recently opened road that is not on the map. ! If you are driving on a long, straight road or a gently curving road. ! If you drive in zigzags. ! If you are on a steep mountain road with - Pioneer AVIC-U250 | Owner's Manual - Page 70
after starting the engine. Route setting information Route search specifications Your navigation system sets a route to your destination by applying certain built-in rules to the map data. This section provides some useful information about how a route is set. CAUTION When a route is calculated - Pioneer AVIC-U250 | Owner's Manual - Page 71
some cases, the route may require you to travel in the opposite direction to your current heading. In such cases, you are instructed to turn around, so , the system will re-calculate the route from that point so that you remain on track to the destination. ! This function may not work under certain - Pioneer AVIC-U250 | Owner's Manual - Page 72
and Warnings Customize Quick Menu Traffic Route Settings User Profiles Map Settings Visual Guidance Settings Display Regional Trip Monitor Start Configuration 60 60 60 61 More... Updates and Extras Unit Converter Clothing Calculator Fuel Consumption Sunrise & Sunset Trip Monitor Country Information Help - Pioneer AVIC-U250 | Owner's Manual - Page 73
can register to allow easy routing. GPS Global Positioning System. A network of satellites that provides navigation signals for a variety of purposes. marked out by the system to your destination. It is highlighted in bright color on the map. Track log Your navigation system logs routes that you - Pioneer AVIC-U250 | Owner's Manual - Page 74
140 g (0.31 lbs) GPS receiver System L1, C/Acode GPS Reception system 32 tracking/32 acquisition- channel system Reception frequency 1 575.42 MHz Sensitivity 157.5 dBm (typ) Position update frequency Approx. once per second GPS antenna Antenna Micro strip flat antenna/ right-handed helical - Pioneer AVIC-U250 | Owner's Manual - Page 75
En 75 - Pioneer AVIC-U250 | Owner's Manual - Page 76
Box 1540, Long Beach, California 90801-1540, U.S.A. TEL: (800) 421-1404 PIONEER ELECTRONICS OF CANADA, INC. 340 Ferrier Street, Unit 2, Markham, Ontario L3R 2Z5, Canada TEL: 1-877-283-5901 TEL: 905-479-4411 PIONEER EUROPE NV Haven 1087, Keetberglaan 1, B-9120 Melsele, Belgium/Belgique TEL: (0) 3/570
-
 1
1 -
 2
2 -
 3
3 -
 4
4 -
 5
5 -
 6
6 -
 7
7 -
8
-
9
-
10
-
11
-
12
-
13
-
14
-
15
-
16
-
17
-
18
-
19
-
20
-
21
-
22
-
23
-
24
-
25
-
26
-
27
-
28
-
29
-
30
-
31
-
32
-
33
-
34
-
35
-
36
-
37
-
38
-
39
-
40
-
41
-
42
-
43
-
44
-
45
-
46
-
47
-
48
-
49
-
50
-
51
-
52
-
53
-
54
-
55
-
56
-
57
-
58
-
59
-
60
-
61
-
62
-
63
-
64
-
65
-
66
-
67
-
68
-
69
-
70
-
71
-
72
-
73
-
74
-
75
-
76
 |
 |

Owner
’
s Manual
ADD-ON NAVIGATION SYSTEM
AVIC-U250
For details on software updates,
visit www.naviextras.com.
English