Pioneer AVIC-U250 Owner's Manual - Page 40
After the location is decided - add on navigation
 |
View all Pioneer AVIC-U250 manuals
Add to My Manuals
Save this manual to your list of manuals |
Page 40 highlights
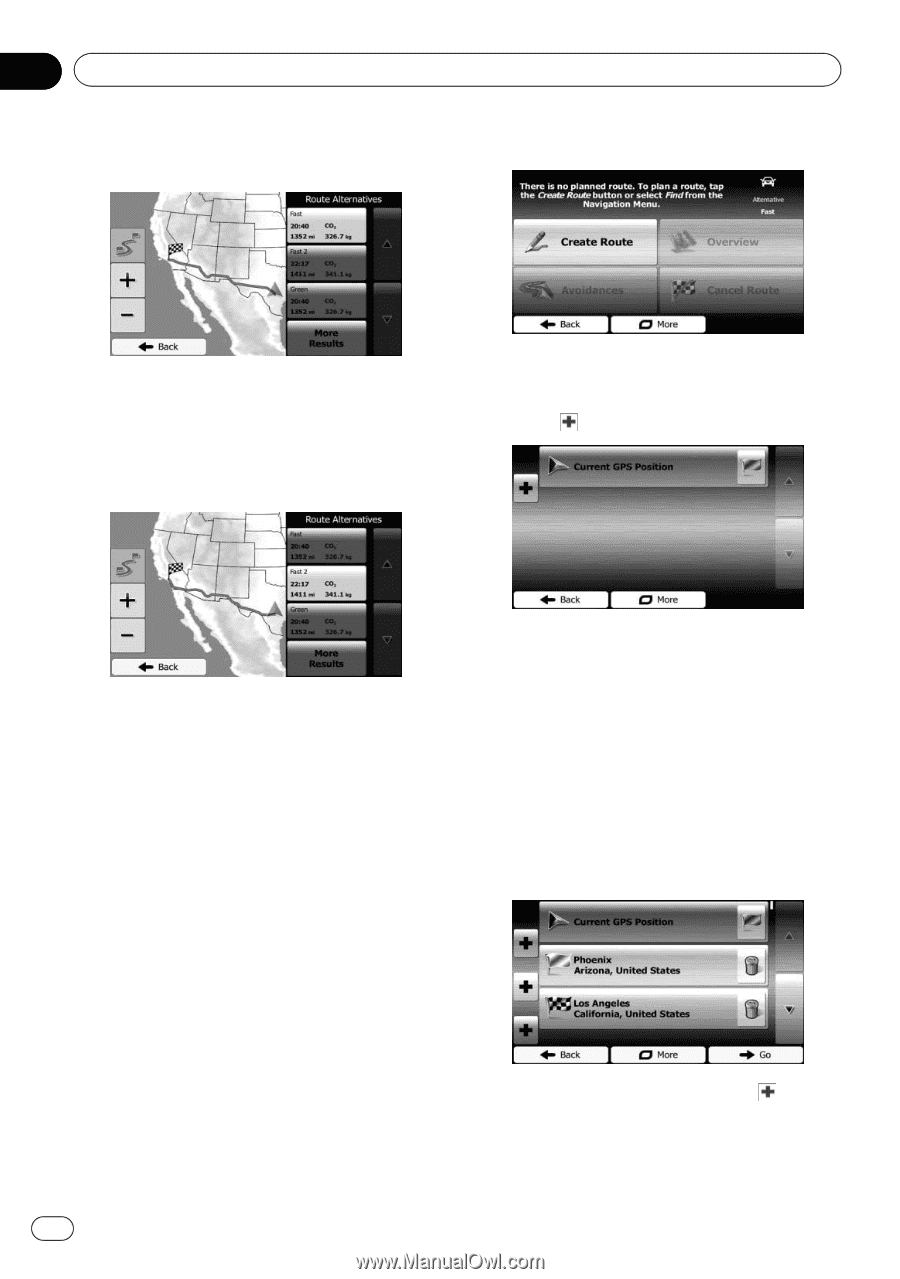
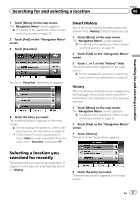
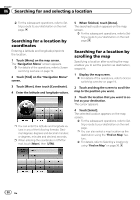
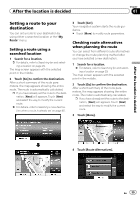
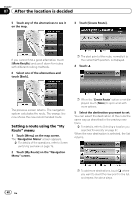
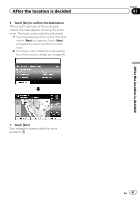
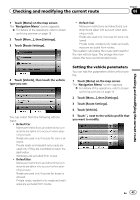
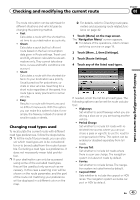
Chapter 07 After the location is decided 5 Touch any of the alternatives to see it on the map. 3 Touch [Create Route]. If you cannot find a good alternative, touch [More Results] and scroll down for routes with different routing methods. 6 Select one of the alternatives and touch [Back]. p The start point of the route, normally it is the current GPS position, is displayed. 4 Touch . The previous screen returns. The navigation system calculates the route. The orange line now shows the new recommended route. Setting a route using the "My Route" menu 1 Touch [Menu] on the map screen. The "Navigation Menu" screen appears. = For details of the operations, refer to Screen switching overview on page 19. 2 Touch [My Route] on the "Navigation Menu" screen. p When the "Create Route" option is not displayed, touch [More] to open a list with more options. 5 Select the destination you want to set. You can select the destination of the route the same way as described in the previous sections. = For details, refer to Selecting a location you searched for recently on page 37. When the new destination is selected, the list returns. p To add more destinations, touch where you want to insert the new point in the list, and repeat the above steps. 40 En
-
 1
1 -
2
-
3
-
4
-
5
-
6
-
7
-
8
-
9
-
10
-
11
-
12
-
13
-
14
-
15
-
16
-
17
-
18
-
19
-
20
-
21
-
22
-
23
-
24
-
25
-
26
-
27
-
28
-
29
-
30
-
31
-
32
-
33
-
34
-
 35
35 -
 36
36 -
 37
37 -
 38
38 -
 39
39 -
 40
40 -
 41
41 -
 42
42 -
 43
43 -
 44
44 -
 45
45 -
46
-
47
-
48
-
49
-
50
-
51
-
52
-
53
-
54
-
55
-
56
-
57
-
58
-
59
-
60
-
61
-
62
-
63
-
64
-
65
-
66
-
67
-
68
-
69
-
70
-
71
-
72
-
73
-
74
-
75
-
76
 |
 |