Pioneer DEX-P9 Owner's Manual - Page 4

Audio Adjustment, Other Functions, CD Player and Care, Connecting the Units, Installation, - deq p9

Page 4 highlights

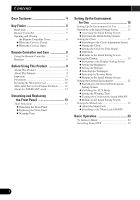
Contents Audio Adjustment 61 Switching to the Audio Adjustment Screen .... 61 - Fader/Balance Adjustment - Bass/Treble Adjustment - Source Level Adjustment Other Functions 64 Using the AUX Source 64 - Selecting the AUX Source - AUX Title Input Cellular Telephone Muting 64 Turn OFF the Display Indication 65 CD Player and Care 66 Precaution 66 Built-in CD Player's Error Message 67 Connecting the Units 69 Setting Examples 70 Connecting without Audio Unit (DEQ-P9 71 Connecting with Audio Unit (DEQ-P9 73 Installation 75 DIN Front/Rear-mount 75 DIN Front-mount 75 - Installation with the rubber bush - Installation without the rubber bush - Removing the Unit DIN Rear-mount 77 - Installation using the screw holes on the side of the unit About the fixing screws for the front panel .... 78 Installing the Remote Control Unit ...... 79 Fitting the Remote Control Unit 79 - Fitting horizontally - Fitting vertically Installation Using Only the Mounting Base .... 79 Installation Using the Mounting Base and the Bracket 80 - Method A - Method B Specifications 83 3

  • 1
  • 2
  • 3
  • 4
  • 5
  • 6
  • 7
  • 8
  • 9
  • 10
  • 11
  • 12
  • 13
  • 14
  • 15
  • 16
  • 17
  • 18
  • 19
  • 20
  • 21
  • 22
  • 23
  • 24
  • 25
  • 26
  • 27
  • 28
  • 29
  • 30
  • 31
  • 32
  • 33
  • 34
  • 35
  • 36
  • 37
  • 38
  • 39
  • 40
  • 41
  • 42
  • 43
  • 44
  • 45
  • 46
  • 47
  • 48
  • 49
  • 50
  • 51
  • 52
  • 53
  • 54
  • 55
  • 56
  • 57
  • 58
  • 59
  • 60
  • 61
  • 62
  • 63
  • 64
  • 65
  • 66
  • 67
  • 68
  • 69
  • 70
  • 71
  • 72
  • 73
  • 74
  • 75
  • 76
  • 77
  • 78
  • 79
  • 80
  • 81
  • 82
  • 83
  • 84
  • 85
  • 86
  • 87
  • 88

Contents
3
Audio Adjustment
....................................
61
Switching to the Audio Adjustment Screen
....
61
-
Fader/Balance Adjustment
-
Bass/Treble Adjustment
-
Source Level Adjustment
Other Functions
........................................
64
Using the AUX Source
....................................
64
-
Selecting the AUX Source
-
AUX Title Input
Cellular Telephone Muting
..............................
64
Turn OFF the Display Indication
....................
65
CD Player and Care
..................................
66
Precaution
........................................................
66
Built-in CD Player’s Error Message
..............
67
Connecting the Units
..............................
69
Setting Examples
............................................
70
Connecting without
Audio Unit (DEQ-P9)
..............................
71
Connecting with
Audio Unit (DEQ-P9)
..............................
73
Installation
................................................
75
DIN Front/Rear-mount
....................................
75
DIN Front-mount
............................................
75
-
Installation with the rubber bush
-
Installation without the rubber bush
-
Removing the Unit
DIN Rear-mount
..............................................
77
-
Installation using the screw holes
on the side of the unit
About the fixing screws for the front panel
....
78
Installing the Remote Control Unit
......
79
Fitting the Remote Control Unit
......................
79
-
Fitting horizontally
-
Fitting vertically
Installation Using Only the Mounting Base
....
79
Installation Using the Mounting Base
and the Bracket
........................................
80
-
Method A
-
Method B
Specifications
..........................................
83