ProForm 10.5qm Treadmill Uk Manual
ProForm 10.5qm Treadmill Manual
 |
View all ProForm 10.5qm Treadmill manuals
Add to My Manuals
Save this manual to your list of manuals |
ProForm 10.5qm Treadmill manual content summary:
- ProForm 10.5qm Treadmill | Uk Manual - Page 1
, Ltd. Customer Service Department Unit 4 Revie Road Industrial Estate Revie Road, Beeston Leeds, LS118JG UK email: [email protected] CAUTION Read all precautions and instructions in this manual before using this equipment. Save this manual for future reference. USER'S MANUAL Visit our website - ProForm 10.5qm Treadmill | Uk Manual - Page 2
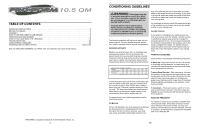
AND MOVE THE TREADMILL 19 TROUBLESHOOTING 20 CONDITIONING GUIDELINES 23 ORDERING REPLACEMENT the centre of this manual. PROFORM is a registered by using your heart rate as a guide. The chart below shows recommended heart will help prevent post-exercise problems. EXERCISE FREQUENCY To maintain or - ProForm 10.5qm Treadmill | Uk Manual - Page 3
PROBLEM: The heart rate monitor does not function properly SOLUTION: a. If the heart rate monitor does not function properly, refer to CHEST PULSE SENSOR TROUBLESHOOTING clothes that could become caught in the treadmill. Athletic support clothes are recommended for both men and women. Always wear - ProForm 10.5qm Treadmill | Uk Manual - Page 4
manual. Never remove the motor hood unless instructed to do so by an authorised service representative. Servicing other than the procedures in this manual should be performed by an authorised service for a correct speed reading. Top View PROBLEM: The walking belt slows when walked on SOLUTION - ProForm 10.5qm Treadmill | Uk Manual - Page 5
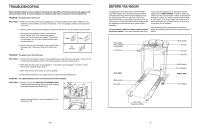
TROUBLESHOOTING Most treadmill problems can be solved by following the steps below. Find the symptom that applies, and follow the steps listed. If further assistance is needed, please call our Customer Service Department. PROBLEM: The power does not turn on SOLUTION: a. Make sure that the power - ProForm 10.5qm Treadmill | Uk Manual - Page 6
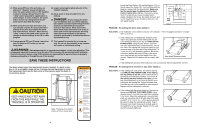
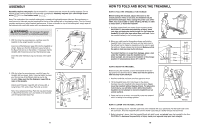
ASSEMBLY Assembly requires two people. Set the treadmill in a cleared area and remove all packing materials. Do not dispose of the packing materials until assembly is completed. Assembly requires your own Phillips screw- driver and rubber mallet . Note: The underside of the treadmill walking - ProForm 10.5qm Treadmill | Uk Manual - Page 7
the displays and various indicators on the console remain lit after the key is removed, the console is in the "demo" mode. Refer to the instructions at the right and turn off the demo mode. When you are finished using the treadmill, move the on/off switch near the power cord - ProForm 10.5qm Treadmill | Uk Manual - Page 8
are CHEST PULSE SENSOR TROUBLESHOOTING The instructions on the following it is suspected that this is a problem, try relocating the treadmill. • The an internet connection and an internet service provider. A list of specific . When the key is inserted, the manual mode will be selected. To use a - ProForm 10.5qm Treadmill | Uk Manual - Page 9
is pressed, your personal trainer will begin guiding you through your workout. Simply follow your personal trainer's instructions. Note: If the Time/Incline display speed or incline settings are too high or too low, you can manually override the settings at any time by pressing the Speed or Incline - ProForm 10.5qm Treadmill | Uk Manual - Page 10
of PROFORM treadmills. Some instructions may not apply to this treadmill. 1 Insert the key fully into the console. When the key is inserted, the four displays and various indicators on the console will light. 2 Press the Mode button. When the key is inserted, the manual mode will be selected - ProForm 10.5qm Treadmill | Uk Manual - Page 11
console can display speed and distance in either miles or kilometres (see Speed Display on page 12). For simplicity, all instructions in this manual refer to miles. HOW TO USE THE MANUAL MODE 1 Insert the key fully into the console. When the key is inserted, the four displays and various indicators - ProForm 10.5qm Treadmill | Uk Manual - Page 12
TO CONNECT YOUR PORTABLE STEREO Note: If your stereo has an RCA-type AUDIO OUT jack, see instruction A below. If your stereo has a 3.5mm LINE OUT jack, see instruction B. If your stereo has only a PHONES jack, see instruction C. A. Plug one end of the audio cable into the jack on the front of the - ProForm 10.5qm Treadmill | Uk Manual - Page 13
Board 72 4 Isolator # 1 8" Green Wire, F/R 28 1 Plastic Stand-Off 73 2 Belt Guide # 1 4" Black Wire, 2F 29 1 Power Board Bracket 74 4 Belt Guide Screw # 1 4" Red Wire, M/F 30 1 Key/Clip 75 4 Platform Screw # 1 User's Manual 31 1 Left Foam Grip 76 1 Foot Pad (Right) # 1 14" Blue Wire, 2F - ProForm 10.5qm Treadmill | Uk Manual - Page 14
EXPLODED DRAWING-Model No. PETL61021 R0603A 37 1 37 36 90 89 79 104 99 98 33 72 73 75 74 82 82 82 105 26 25 82 82 30 24 50 39 111 24 2 18 21 22 20 23 27 33 35 29 8 3 4 16 17 15 2 14 86 3 54 12 54 10 5* 70 75 33 72 6 7 101 78 77 11 3 8 76 28 35 31 85 34 35 46 32
-
 1
1 -
 2
2 -
 3
3 -
 4
4 -
 5
5 -
 6
6 -
 7
7 -
8
-
9
-
10
-
11
-
12
-
13
-
14
 |
 |
USER'S MANUAL
www.iconeurope.com
Visit our website at
Part No. 196734 R0603A
Printed in Canada © 2003 ICON Health & Fitness, Inc.
Serial
Number
Decal
Model No. PETL61021
Serial No.
CAUTION
Read all precautions and instruc-
tions in this manual before using
this equipment. Save this manual
for future reference.
QUESTIONS?
As a manufacturer, we are com-
mitted to providing complete
customer satisfaction. If you
have questions, or if there are
missing or damaged parts,
please call:
Or write:
ICON Health & Fitness, Ltd.
Customer Service Department
Unit 4
Revie Road Industrial Estate
Revie Road, Beeston
Leeds, LS118JG
UK
email: [email protected]
08457 089 009
ORDERING REPLACEMENT PARTS
To order replacement parts, contact the ICON Health & Fitness, Ltd. office, or write:
ICON Health & Fitness, Ltd.
Unit 4
Revie Road Industrial Estate
Revie Road, Beeston
Leeds, LS11 8JG
UK
Tel:
Fax: 0 (044) 113 387 7125
When ordering parts, please be prepared to give the following information:
•
The MODEL NUMBER of the product (PETL61021)
•
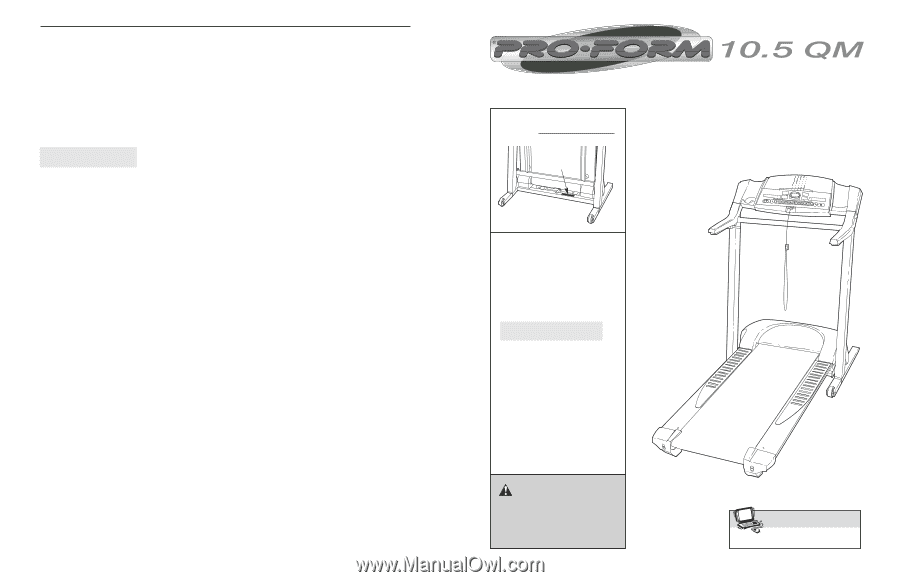
The NAME of the product (PROFORM
®
10.5 QM treadmill)
•
The SERIAL NUMBER of the product (see the front cover of this manual)
•
The KEY NUMBER and the DESCRIPTION of the part(s) (see the PART LIST and the EXPLODED DRAWING
attached in the centre of this manual)
08457 089 009