RCA BRC11082 BRC11082 Product Manual - Page 9
Connections - dvd player
 |
View all RCA BRC11082 manuals
Add to My Manuals
Save this manual to your list of manuals |
Page 9 highlights
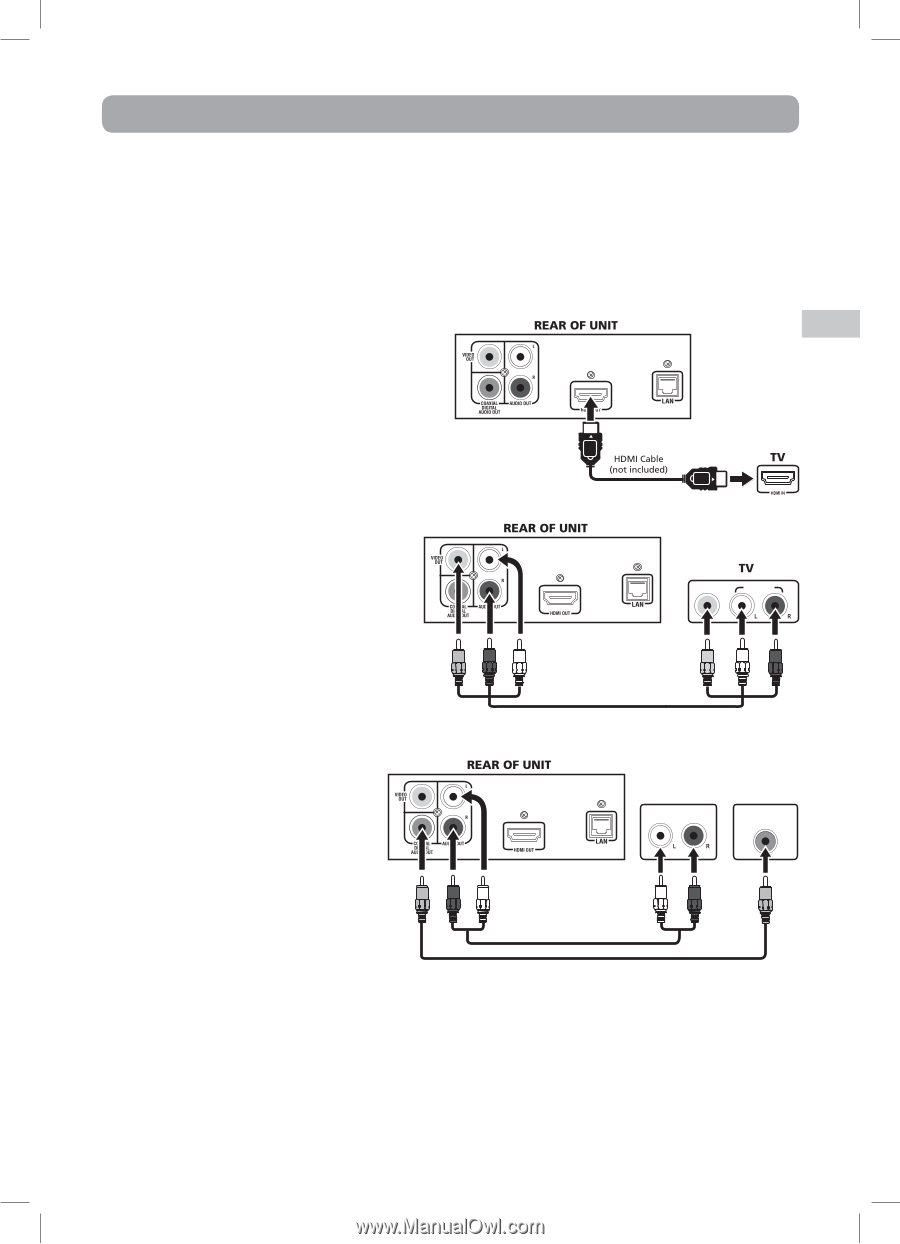
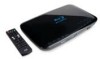
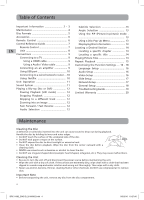
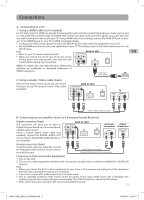
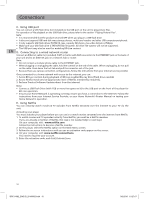
Connections A. Connecting to a TV 1. Using a HDMI cable (not included) For TVs that support it, HDMI can provide the best quality audio and video output (depending on media source), and so is the preferred connection type. The HDMI cable incorporates both audio and video signals, so you will have just one cable running from the unit to your TV. Using a HDMI cable (not included), connect the HDMI OUT jack on your unit to the HDMI IN jack on your TV or HDMI-compatible display. • Configure the Video Setup options (found in the SETUP menu) to best match the capabilities of your TV. • Set the HDMI resolution to match the capabilities of your TV. This setting is also in the Video Setup section of the SETUP menu. Note: • Refer to your TV owner's manual as well. • When you connect the unit to your TV, be sure to turn off the power and unplug both units from the wall outlet before making any connections. HDMI, the HDMI logo and High-Definition Multimedia Interface are trademarks or registered trademarks of HDMI licensing LLC. EN 2. Using a Audio / Video cable (basic) If your TV has Audio / Video inputs, you can connect the player to your TV using the Audio / Video cable (included). VIDEO IN AUDIO IN AUDIO / VIDEO CABLE (included) B. Connecting an an amplifier (such as a Surround Sound Receiver) Digital connection (best) This connection will allow you to listen to Digital Surround Sound on a Surround Soundcapable audio receiver. Using a Coaxial Digital Audio cable (not supplied), connect the DIGITAL AUDIO OUT on your Unit to the DIGITAL AUDIO IN jack on your amplifier. Analogue Digital Connection Connection AUDIO IN COAXIAL DIGITAL AUDIO IN Analog connection (basic) Using the Audio cable (not supplied), connect the left/right AUDIO OUT jack on your Unit to the AUDIO IN jack. AUDIO CABLE (not included) COAXIAL DIGITAL AUDIO CABLE (not included) Listening on External Audio Equipment 1. Turn on the Unit. 2. Turn on your audio equipment and follow the instructions included with it to select the AUDIO IN or DIGITAL IN function. Note: • When you connect the Unit to other equipment, be sure to turn off the power and unplug all of the equipment from the wall outlet before making any connection. • If you have a stereo VCR, make sure you set it in stereo mode. • Due to copyright protection, DVD movies cannot be copied. If you copy a DVD movie onto a videotape, the resulting copy will be unclear, with poor sound quality. This is NOT caused by a defective DVD system. • Refer to the instruction manual of the connected equipment as well. 9 BRC11082_ENG IB_20100902.indd 9 9/3/2010 10:27:07
-
 1
1 -
2
-
3
-
 4
4 -
 5
5 -
 6
6 -
 7
7 -
 8
8 -
 9
9 -
 10
10 -
 11
11 -
 12
12 -
 13
13 -
 14
14 -
15
-
16
-
17
-
18
-
19
-
20
-
21
-
22
-
23
-
24
-
25
-
26
-
27
-
28
-
29
-
30
-
31
-
32
-
33
-
34
-
35
-
36
-
37
-
38
-
39
-
40
 |
 |