Ricoh Aficio SP C320DN Manuals
Ricoh Aficio SP C320DN Manual
 |
View all Ricoh Aficio SP C320DN manuals
Add to My Manuals
Save this manual to your list of manuals |
Ricoh Aficio SP C320DN manual content summary:
- Ricoh Aficio SP C320DN | Manuals - Page 1
Operating Instructions Hardware Guide 1 Guide to the Printer 2 Setting Up the Printer 3 Installing Options 4 Connecting the Printer 5 Configuration 6 Loading Paper 7 Maintaining the Printer 8 Adjusting the Printer 9 Troubleshooting 10 Removing Misfed Paper 11 Appendix Read this manual carefully - Ricoh Aficio SP C320DN | Manuals - Page 2
manual contains detailed instructions and notes on the operation and use of this machine. For your safety and benefit, read this manual carefully before using the machine. Keep this manual drafts, checks, passports, driver's licenses. The preceding list is meant as a guide only and is not inclusive - Ricoh Aficio SP C320DN | Manuals - Page 3
...10 List of Options...11 Operating Instructions...12 Reading the HTML Manuals on the CD-ROMs 12 Reading the HTML Manuals That You Install on the Computer 12 1. Guide to the Printer Exterior: Front View...15 Exterior: Rear View...17 Interior...19 Control Panel...21 Display Panel...23 2. Setting - Ricoh Aficio SP C320DN | Manuals - Page 4
LAN...93 Setting a WEP Key...93 Setting WPA...94 Configuring IEEE 802.1X...98 Installing a Site Certificate...98 Installing Device Certificate...98 Enabling SSL...99 Setting Items of IEEE 802.1X for Ethernet 100 Setting Items of IEEE 802.1X for Wireless LAN 102 6. Loading Paper Supported Paper for - Ricoh Aficio SP C320DN | Manuals - Page 5
...106 Bypass Tray...107 Supported Paper Types...108 Plain Paper...108 Color Paper...112 Recycled Paper...113 Cardstock...113 Bond Paper...113 Envelopes...114 Storing Paper...115 Non-Recommended Paper Types Types 145 Registering Names to Paper Types...145 Setting User Paper Types to Trays...145 3 - Ricoh Aficio SP C320DN | Manuals - Page 6
Printing Using Registered Paper Types...146 7. Maintaining the Printer Replacing the Print Cartridge...147 Replacing the Waste Toner Bottle...154 Replacing the Intermediate Transfer Unit...161 Replacing the Maintenance Kit...172 Cautions When Cleaning...179 Cleaning the Toner Density Sensor...180 - Ricoh Aficio SP C320DN | Manuals - Page 7
Message (Z)...235 11. Appendix Moving and Transporting the Printer...237 Moving the Printer in a Short Distance...238 Consumables...239 Print Cartridge...239 Waste Toner Bottle...240 Intermediate Transfer Unit...240 Maintenance Kit...241 Specifications...242 Mainframe...242 Options...245 Trademarks - Ricoh Aficio SP C320DN | Manuals - Page 8
How to Read This Manual Symbols This manual uses the following symbols: Indicates points to pay to read these explanations. Indicates supplementary explanations of the machine's functions, and instructions on resolving user errors. This symbol is located at the end of sections. It indicates where - Ricoh Aficio SP C320DN | Manuals - Page 9
, -27 • 220-240V (mainly North America) If the label contains the following, your machine is a region B model: • CODE XXXX -17, -51 • 120 V • Dimensions in this manual are given in two units of measure: metric and inch. If your machine is a Region A model, refer to the metric - Ricoh Aficio SP C320DN | Manuals - Page 10
labels for WARNING and CAUTION at the positions shown below. For safety, please follow the instructions and handle the machine as indicated. CBK002 CBK003 Do not incinerate spilled toner or used toner. Toner dust is flammable and might ignite when exposed to an open flame. Disposal should take place - Ricoh Aficio SP C320DN | Manuals - Page 11
containers yourself, dispose of them according to local regulations. Keep toner (used or unused) and toner containers out of reach of children. CBK010 The printer weighs approximately 29 kg (64.0 lb.). When moving the printer, use the inset grips on both sides, and lift slowly in pairs. Power Switch - Ricoh Aficio SP C320DN | Manuals - Page 12
to error messages, and resolving jams. Driver Installation Guide Contains procedures for installing the printer driver. This manual is included on the driver CD-ROM. Software Guide Contains information about using this printer, its software, and its security functions. Security Guide This manual is - Ricoh Aficio SP C320DN | Manuals - Page 13
a list of options for this printer, and how they are referred to as in this manual. Option List Paper Feed Unit TK1010 Hard Disk Drive Option Type C320 Memory Unit Type G 256 MB Memory Unit Type I 512 MB Gigabit Ethernet Board Type A Referred to as Paper feed unit Hard disk SDRAM module SDRAM - Ricoh Aficio SP C320DN | Manuals - Page 14
Operating Instructions This section explains how to use HTML format manuals. Reading the HTML Manuals on the CD-ROMs This section describes how to read the HTML manuals on the supplied manual CD-ROMs. 1. Insert the CD-ROM into the CD-ROM drive of your computer. 2. Select a language and a product, - Ricoh Aficio SP C320DN | Manuals - Page 15
want to read. • You need administrator permissions to install the manuals. Log in as an Administrators group member. • The system requirements for installing the manuals are as follows: • Operating system: Windows 2000/XP/Vista/7, Windows Server 2003/2003 R2/2008/2008 R2 • Minimum display resolution - Ricoh Aficio SP C320DN | Manuals - Page 16
14 - Ricoh Aficio SP C320DN | Manuals - Page 17
Tray Output is stacked here with the print side down. 2. Control Panel Contains keys for printer control and a display that shows the printer status. 3. Front Cover Open this cover to when replacing the waste toner bottle etc. or removing jammed paper. Pull the right side lever to open the front - Ricoh Aficio SP C320DN | Manuals - Page 18
Use this to support sheets that come out curled after they are printed. Flip open the extension by pushing down on the end that is toward the rear of the printer. • For details about the messages which appear on the screen to prompt you to replace the units, see "Error and Status Messages - Ricoh Aficio SP C320DN | Manuals - Page 19
SD cards here. Install the data overwrite security unit, NetWare card or camera direct print card in the upper slot. Install the VM card or HDD encryption unit in the lower slot. 9. USB Port B Use a USB cable to connect the printer to a computer. 10. Ethernet Port Use a network interface cable to - Ricoh Aficio SP C320DN | Manuals - Page 20
1. Guide to the Printer • For details about the messages which appear on the screen to prompt you to replace the units, see "Error and Status Messages Appear on the Control Panel". 1 • p.201 "Error and Status Messages Appear on the Control Panel" 18 - Ricoh Aficio SP C320DN | Manuals - Page 21
the transcription roller, which is included with the fusing unit: • "Replacmnt Rqrd:Fusing Unit" 4. Paper Transfer Unit Remove this unit when replacing the waste toner bottle, intermediate transfer unit. 5. Waste Toner Bottle Collects toner that is wasted during printing. If the message which - Ricoh Aficio SP C320DN | Manuals - Page 22
1. Guide to the Printer • "Replacemnt Requird:IntTrans" • For details about the messages which appear on the screen to prompt you to replace the units, see 1 "Error and Status Messages Appears on the Control Panel". • p.201 "Error and Status Messages Appear on the Control Panel" 20 - Ricoh Aficio SP C320DN | Manuals - Page 23
1 4 13 12 11 10 9 8 7 65 CBK015 1. [Job Reset] Key When the printer is online, press this key printer status and error messages. Entering energy saver mode turns off the back light. For details about energy saver mode, see Software Guide. 4. [Escape] Key Press this key to cancel an operation - Ricoh Aficio SP C320DN | Manuals - Page 24
1. Guide to the Printer Example: When this manual instructs you to press [Option], press the selection key on the left below the initial screen. 9. [Menu] Key 1 Press this key to configure and check the current printer settings. 10. Data In Indicator Flashes when the printer is receiving data - Ricoh Aficio SP C320DN | Manuals - Page 25
hard disk is installed in the printer. • By default, the remaining amount of toner is displayed. To not display the remaining amount of toner, press the [Menu] key, and then select [Maintenance] on the display. Select [General Settings], then [Display Supply Info], and then select [Off]. • Adjust - Ricoh Aficio SP C320DN | Manuals - Page 26
1. Guide to the Printer 1 24 - Ricoh Aficio SP C320DN | Manuals - Page 27
a test page. For details, see p.43 "Test Printing" 7. Connect the printer to your network. For details, see p.69 "Connecting the Printer" 8. Configure the printer's network settings. For details, see p.79 "Configuration" 9. Install the printer driver. For details, see Driver Installation Guide. 25 - Ricoh Aficio SP C320DN | Manuals - Page 28
2. Setting Up the Printer Place to Install The printer's location should be carefully chosen because the power cable's plug with anything metallic constitutes a fire and electric shock hazard. • The supplied power cord is for use with this machine only. Do not use it with other appliances - Ricoh Aficio SP C320DN | Manuals - Page 29
Place to Install • If the power cord is damaged and its inner wires are exposed or broken, contact your service representative for a replacement. Use of damaged power cords could result in fire or electric shock. • Be sure to locate the machine as close as possible - Ricoh Aficio SP C320DN | Manuals - Page 30
2. Setting Up the Printer 2 CBK018 Optimum Environmental Conditions Permissible and recommended temperature and humidity ranges are as follows: CBK019 • White area: Permissible Range • Blue area: Recommended Range • The printer must be level within 3 mm, 0.2" from both front to rear and left to - Ricoh Aficio SP C320DN | Manuals - Page 31
Place to Install • Dusty areas • Areas with corrosive gases • Areas that are excessively cold, hot, or humid • Areas directly exposed to currents of hot, cold, or room-temperature air from air conditioners • Areas directly exposed to radiant heat from heaters • Locations near air conditioners, - Ricoh Aficio SP C320DN | Manuals - Page 32
2. Setting Up the Printer Unpacking To protect it from shock and vibration during transit, this printer comes packaged in cushioning foam and accidental ingestion. • Keep toner (used or unused) and toner containers out of reach of children. • If toner or used toner is inhaled, gargle with plenty - Ricoh Aficio SP C320DN | Manuals - Page 33
away from direct sunlight. • When you use this printer for the first time, use the four print cartridges supplied with the printer. • Print cartridge (consumables) are not covered by warranty. However, if there is problem, contact the store where they were purchased. 1. Remove the plastic - Ricoh Aficio SP C320DN | Manuals - Page 34
2. Setting Up the Printer 4. Pull up top cover open lever to open the top cover. 2 CBK200 5. Remove the adhesive tape. 2 1 CBK029 2 1 CBK238 6. Take each print cartridge out. Gripping its center, carefully pull the print cartridge upward and out. 32 - Ricoh Aficio SP C320DN | Manuals - Page 35
Unpacking C M Y K 2 CBK204 When taking out the black print cartridge, be sure to place it on at a flat surface, and then remove the protection sheet also. CBK031 Do not touch the print cartridge's photo conductor unit. CBK026 Do not touch a metal part. 33 - Ricoh Aficio SP C320DN | Manuals - Page 36
2. Setting Up the Printer 2 CBK250 7. Hold the print cartridge and shake it from side to side five or six times. CBK032 8. Check the toner color and location correspond, and then carefully insert the print cartridge vertically. CBK033 34 - Ricoh Aficio SP C320DN | Manuals - Page 37
Unpacking 9. Close the top cover with both hands carefully. Be careful not to trap your fingers. 2 CBK034 35 - Ricoh Aficio SP C320DN | Manuals - Page 38
2. Setting Up the Printer Turning the Printer's Power On and Off This section explains the procedures for turning the printer's power on and off. 2 • It is dangerous to handle the power cord plug with wet hands. Doing so could result in electric shock. • Do not - Ricoh Aficio SP C320DN | Manuals - Page 39
2. Plug in the power cable. Turning the Printer's Power On and Off 2 CBK046 3. Insert the plug of the power cord into the panel lights up. CBK048 • Wait until "Ready" appears on the display panel. • The printer may make a noise while initializing. This noise does not indicate a malfunction. 37 - Ricoh Aficio SP C320DN | Manuals - Page 40
2. Setting Up the Printer Turning off the Power Use this procedure to turn off the printer's power. 1. Press the [Menu] key. 2 CBK049 2. Press the [ ] or [ ] key to select [Shutdown], and then press the [OK] key. 3. Press [Yes]. 4. Wait until a screen prompting - Ricoh Aficio SP C320DN | Manuals - Page 41
Night Sensor This printer can detect the brightness of ambient light and automatically power down if the level it detects is below a specified minimum. Use the following procedure to configure the settings, the default setting is inactive. • This feature will not work if a print error or paper jam - Ricoh Aficio SP C320DN | Manuals - Page 42
wait before it powers down. 7. Under [Brightness Sensor Level], select the minimum level of ambient light that the printer must detect in order to stay powered. You can set the light sensor to one of five sensitivity thresholds. "Level 5 (Dim)" is the highest sensitivity threshold. Selecting this - Ricoh Aficio SP C320DN | Manuals - Page 43
Turning the Printer's Power On and Off • Turn on the main power switch to restart the printer whose main power has been turned off by ECO Night Sensor function. 2 41 - Ricoh Aficio SP C320DN | Manuals - Page 44
2. Setting Up the Printer Selecting the Display Language Select a language using the procedure described here. The message in the selected language will the preferred language, and then press the [OK] key. 4. Press the [Menu] key to return to the initial screen. • The default setting is English. 42 - Ricoh Aficio SP C320DN | Manuals - Page 45
. Page], and then press the [OK] key. The configuration page will be printed. 4. Press the [Menu] key to return to the initial screen. • If printing is not normal, check to see if an error message appears on the display. If there is an error message, see "Troubleshooting". • p.201 "Troubleshooting - Ricoh Aficio SP C320DN | Manuals - Page 46
2. Setting Up the Printer 2 44 - Ricoh Aficio SP C320DN | Manuals - Page 47
the paper feed unit to the bottom of the printer. You can attach up to one paper feed unit. Up to 1100 sheets of paper can be loaded in total. 2. Install the SDRAM module. There are two types of memory units, 256 MB and 512 MB. 3. Install the hard disk. 4. Install the optional interface board - Ricoh Aficio SP C320DN | Manuals - Page 48
to 500 sheets of paper. Up to one paper feed unit can be installed on the printer. Installed tray unit is identified as "Tray 2". For details about attaching the paper feed unit, see "Attaching the Paper Feed Unit". Internal options 3 4 3 2 1 CBK052 1. Optional interface boards • Wireless LAN - Ricoh Aficio SP C320DN | Manuals - Page 49
• p.65 "Installing the SD Memory Card Options" • p.242 "Specifications" Available Options 3 47 - Ricoh Aficio SP C320DN | Manuals - Page 50
people. • After a new paper feed unit has been installed, the driver settings might need to be reconfigured. For details, see "Making Option Settings for the Printer", Driver Installation Guide. • Tray 1 is required to print using the optional paper feed unit. Without Tray 1, paper jams will occur - Ricoh Aficio SP C320DN | Manuals - Page 51
's power cord from the wall outlet. 3. Remove the adhesive tape from the optional paper feed unit. CBK055 4. Lift the printer using the inset grips on both sides of the printer. CBK027 When moving the printer, do not hold on the following parts as doing so could cause a malfunction: • The handle - Ricoh Aficio SP C320DN | Manuals - Page 52
with the holes on the underside of the printer, and then carefully lower the printer. 3 CBK056 6. After installing the option, print the configuration page to confirm the installation. • When moving the printer, remove the paper feed unit. • After finishing the installation, you can check whether - Ricoh Aficio SP C320DN | Manuals - Page 53
. This can be expanded to a maximum of 768 MB. • After a new memory unit has been installed, the driver settings might need to be reconfigured. For details, see "Making Option Settings for the Printer", Driver Installation Guide. 1. Turn off the power, and then unplug the power cable. 2. Remove the - Ricoh Aficio SP C320DN | Manuals - Page 54
3. Installing Options 3. Loosen the screw securing the inner cover by using a coin. 3 CBK058 4. Push the levers on both ends of the slot outward ( ), and then remove the default module ( ). 1 2 1 CBK243 Install a new SDRAM module. 5. Be sure to install the memory unit as shown. 52 CBK059 - Ricoh Aficio SP C320DN | Manuals - Page 55
Installing the Memory Expansion Units 6. To install the recommended memory, align the notch of the recommended memory 8. Attach the inner cover, and then fasten the screw. CBK062 9. Attach the memory cover. 10. After installing the option, print the configuration page to confirm the installation. 53 - Ricoh Aficio SP C320DN | Manuals - Page 56
with the SDRAM module, the SDRAM module may be damaged. • After a new hard disk has been installed, the driver settings might need to be reconfigured. For details, see "Making Option Settings for the Printer", Driver Installation Guide. 1. Turn off the power, and then unplug the power cable. 54 - Ricoh Aficio SP C320DN | Manuals - Page 57
cover. Installing the Memory Expansion Units 3 CBK057 3. Loosen the screw securing the inner cover by using a coin. CBK058 4. Be sure to install the hard disk as shown. CBK247 5. Align the connector of the hard disk ( ) with the connector on the board of the printer ( ), and then carefully push - Ricoh Aficio SP C320DN | Manuals - Page 58
3. Installing Options 1 2 3 CBK201 Be sure to set the hard disk parallel with the printer. • After finishing installation, you can check the hard disk is properly installed: Print the configuration page from the [List/Test Print] menu. If it is installed properly, you will see "Hard Disk" for " - Ricoh Aficio SP C320DN | Manuals - Page 59
Installing the Gigabit Ethernet Board Installing the Interface Units • The printer's Ethernet and USB ports are not available when the Gigabit Ethernet board is installed in to the printer. Use the Ethernet and USB ports on the Gigabit Ethernet board. • Before beginning work, ground yourself - Ricoh Aficio SP C320DN | Manuals - Page 60
3. Installing Options 3. Remove the cable cover. 3 CBK233 4. Disconnect the cables from the Ethernet port and the USB port of the printer, and cover each port with its protective cap. CBK072 5. Remove the two screws and remove the cover of the slot in which the Gigabit Ethernet - Ricoh Aficio SP C320DN | Manuals - Page 61
insert the Gigabit Ethernet board. Installing the Interface Units 3 CBK074 7. Tighten the two screws to secure service representative. • For details about printing the configuration page, see "Test Printing". • Before using the Gigabit Ethernet board, you must configure settings from the printer - Ricoh Aficio SP C320DN | Manuals - Page 62
Board • Before beginning work, ground yourself by touching something metal to discharge any static electricity. Static electricity can damage the unit. • Do not subject the unit to physical shocks. 1. Check the contents of the package. 3 BFL301S 2. Turn off the power, and then unplug the power cord - Ricoh Aficio SP C320DN | Manuals - Page 63
Installing the Interface Units CBK255 3 5. Fully insert the Wireless LAN interface board. CBK078 6. Tighten the two screws to secure the interface board. Check the Wireless LAN interface board is connected firmly to the interface board slot. CBK079 61 - Ricoh Aficio SP C320DN | Manuals - Page 64
even after reattempting installation, contact your sales or service representative. • For details about printing the configuration page, see "Test Printing". • Before using the Wireless LAN interface board, you must configure settings from the printer control panel. For details, see "Wireless LAN - Ricoh Aficio SP C320DN | Manuals - Page 65
1. Check the contents of the package. Installing the Interface Units 3 BFL302S 2. Turn off the power, and then unplug the power cord. 3. Remove the cable cover. CBK233 4. Remove the two screws and remove the cover of - Ricoh Aficio SP C320DN | Manuals - Page 66
the board was not installed properly, repeat the procedure from step 4. If it cannot be installed correctly even after reattempting installation, contact your sales or service representative. • For details about printing the configuration page, see "Test Printing". • p.43 "Test Printing" 64 - Ricoh Aficio SP C320DN | Manuals - Page 67
the SD Memory Card Options This section explains how to install the following SD memory cards: the camera direct print card, data overwrite security unit, HDD encryption unit, NetWare card, and VM card. • Keep SD memory cards out of reach of children. If a child swallows an SD memory card, consult - Ricoh Aficio SP C320DN | Manuals - Page 68
into place. CBK085 Insert the SD card in the appropriate slot as follows: • Upper slot: Camera direct print card, Data overwrite security unit, NetWare card • Lower slot: HDD encryption unit, VM card 6. Reattach the cover over the SD card. Fasten the one screw to secure the cover. 2 1 CBK086 66 - Ricoh Aficio SP C320DN | Manuals - Page 69
• Do not touch the card while the printer is in use. It may come loose, unit: Set [Auto Erase Memory Setting] under [Security Options] to [On], and then check [Memory Erase Status]. • HDD encryption unit sales or service representative. • For details about printing the configuration page, see "Test - Ricoh Aficio SP C320DN | Manuals - Page 70
3. Installing Options 3 68 - Ricoh Aficio SP C320DN | Manuals - Page 71
10BASE-T or 100BASE-TX cable to the printer's Ethernet port. For 1000BASE-T, the optional Gigabit Ethernet board is required. • A network interface cable with a ferrite core must be used for RF interference suppression. 4 • For users outside the United States of America: properly shielded and - Ricoh Aficio SP C320DN | Manuals - Page 72
4. Connecting the Printer Connecting to the standard Ethernet port 1. Remove the cable cover. 4 CBK233 2. Connect the Ethernet cable to board 1. Attach the ferrite core to the Ethernet cable. Attach the other ferrite core about 10 cm (4 inches) ( ) from this core making a loop as shown. 70 - Ricoh Aficio SP C320DN | Manuals - Page 73
example using a hub. • For details about configuring the network environment, see "Ethernet Configuration". • For details about installing the Gigabit Ethernet board, see "Installing the Interface Units". • p.57 "Installing the Interface Units" • p.79 "Ethernet Configuration" 71 - Ricoh Aficio SP C320DN | Manuals - Page 74
is connected to a 10BASE-T Ethernet, the green indicator will be lit. This indicator will be unlit if the printer is connected to a 100BASE-TX Ethernet. 2. Yellow indicator If the printer is connected to a 100BASE-TX Ethernet, the yellow indicator will be lit. This indicator will be unlit if the - Ricoh Aficio SP C320DN | Manuals - Page 75
or peripheral) in order to meet emission limits. • For users in the United States of America: properly shielded and grounded cables and connectors must Windows 2000/XP/Vista/7, Windows Server 2003/2003 R2/2008/2008 R2, and Mac OS X 10.3.3 or later. • A USB cable is not supplied with this printer. - Ricoh Aficio SP C320DN | Manuals - Page 76
. The Plug and Play screen appears on the computer display. For details, see "Installing the Printer Driver Using USB", Driver Installation Guide. Digital Camera Connection This printer supports direct printing, which allows you to print images taken with a digital camera by connecting the camera - Ricoh Aficio SP C320DN | Manuals - Page 77
function requires the camera direct print card. 4 • Use the USB cable bundled with your digital camera. • Make sure your digital camera supports PictBridge. 1. Confirm that the printer is turned on. 2. Remove the cable cover. CBK233 3. Connect the USB cable to the standard USB port A on the - Ricoh Aficio SP C320DN | Manuals - Page 78
4. Connecting the Printer 5. Attach the cable cover. CBK237 4 • For details about the printing method, see "PictBridge Printing", Software Guide. • For details about installing the camera direct print card, see "Installing the SD Memory Card Options". • p.65 "Installing the SD Memory Card Options" - Ricoh Aficio SP C320DN | Manuals - Page 79
type of cable required varies depending on the computer you are using. Make sure to use the interface cable compliant with your computer. • For users outside the United Unshielded cables create electromagnetic interference. 1. Turn off the printer and computer. 2. Remove the cable cover. CBK233 77 - Ricoh Aficio SP C320DN | Manuals - Page 80
the cable. The printer is now connected to the computer. Install the printer driver. For details, see "Installing the Printer Driver Using Parallel Cable", Driver Installation Guide. • For details about installing the 1284 interface board, see "Installing the Interface Units". • p.57 "Installing - Ricoh Aficio SP C320DN | Manuals - Page 81
interface you are using. • Configure the printer for the network using the control panel. • The following table shows the control panel settings and their default values. These items appear in the [Network] under [Host Interface] menu. Setting Name Default 5 • Auto-Obtain (DHCP): On Machine - Ricoh Aficio SP C320DN | Manuals - Page 82
setting as necessary. See Software Guide for details. Specifying an IP Address (No DHCP) Follow this procedure to assign a specific IP address to the printer. This is only necessary when you will use the printer on a network without DHCP, or want to prevent the printer's IP address from changing - Ricoh Aficio SP C320DN | Manuals - Page 83
you need to set in the same way. • Select [Inactive] for unused protocols. • Enable IPv4 to use the pure IPv4 environment of NetWare5/5.1, NetWare 6/6.5. 7. Press the [Escape] key until the screen returns to the [Network] menu. 8. If you use IPv4, assign the IPv4 address to the printer. Press the - Ricoh Aficio SP C320DN | Manuals - Page 84
page, see "Test Printing". • p.43 "Test Printing" Receiving an IP Address Automatically (DHCP) Follow this procedure to set the printer to receive an IP address automatically using DHCP. The DHCP feature is active by default, so this procedure is only required if you have changed the default - Ricoh Aficio SP C320DN | Manuals - Page 85
IPv4 Address], and then press the [OK] key. 5. Press the [ ] or [ ] key to select [Auto-Obtain (DHCP)], and then press the [OK] key. The printer will automatically receive an IP address. To check the detected addresses, press the followings: • [IP Add.]: IP address • [Subnet M]: Subnet Mask 83 - Ricoh Aficio SP C320DN | Manuals - Page 86
page, see "Test Printing". • p.43 "Test Printing" Configuring Network Settings When Using NetWare To use NetWare, select the appropriate NetWare frame type from the following. 5 • Auto Select • Ethernet II • Ethernet 802.2 • Ethernet 802.3 • Ethernet SNAP • Usually, you can use the default - Ricoh Aficio SP C320DN | Manuals - Page 87
about printing the configuration page, see "Test Printing". • p.43 "Test Printing" Setting the Ethernet Speed You can set the speed that the printer will use for Ethernet communications. In most cases, this should be left on the default setting, [Auto Select]. This setting allows two interfaces to - Ricoh Aficio SP C320DN | Manuals - Page 88
5. Configuration Router/HUB [10Mbps Half [10Mbps Full Duplex] Duplex] Printer [100Mbps Half Duplex] [100Mbps Full Duplex] [Auto Select] 10 Mbps half duplex - - - 10 Mbps full duplex - - - - 100 Mbps half duplex - - - 100 Mbps full duplex - - - - 5 auto- negotiation (auto - Ricoh Aficio SP C320DN | Manuals - Page 89
[ ] or [ ] key to select the Ethernet speed, and then press the [OK] key. 6. Press the [Menu] key to return to the initial screen. 7. Print a configuration page to confirm the settings. • For details about printing the configuration page, see "Test Printing". • p.43 "Test Printing" 87 - Ricoh Aficio SP C320DN | Manuals - Page 90
Type (NW), and active protocol as explained in "Ethernet Configuration". • The following table shows the control panel settings and their defaults. These items appear in the [Wireless LAN] under [Host Interface] menu. 5 Setting Name Communication Mode Default Infrastructure Mode SSID Setting - Ricoh Aficio SP C320DN | Manuals - Page 91
with a device that does not require an SSID to be set, select [802.11 Ad-hoc Mode]. • The transmission mode of the Wireless LAN can also be set using Web Image Monitor. 6. If [802.11 Ad-hoc Mode] is selected for [Communication Mode], confirm the channel to use for transmission. 7. Press the [ ] or - Ricoh Aficio SP C320DN | Manuals - Page 92
about printing the configuration page, see "Test Printing". • p.43 "Test Printing" Setting the SSID When [Communication Mode] is set to [Infrastructure Mode] or [802.11 Ad-hoc Mode], you must specify the Service Set Identifier (SSID) of the wireless access point that the printer will connect to - Ricoh Aficio SP C320DN | Manuals - Page 93
SSID can also be set using a Web browser. For details, see Web Image Monitor Help. • For details about printing the configuration page, see "Test Printing". • p.43 "Test Printing" Confirming Wireless Network Connectivity After you have installed the Wireless LAN interface unit, use the following - Ricoh Aficio SP C320DN | Manuals - Page 94
the Wireless LAN unit is receiving power, the upper indicator will be lit green. 2. If the printer is connected to an operational network and is problems may arise if you do not configure wireless security settings. Information leakage Information such as IDs, passwords, credit card numbers, - Ricoh Aficio SP C320DN | Manuals - Page 95
a WEP Key If the wireless network uses WEP to encrypt transmitted data, the corresponding WEP key must be set to the printer to allow communications with other network devices. Ask your network administrator for the WEP key to use. 1. Press the [Menu] key. 5 CBK049 2. Press the [ ] or [ ] - Ricoh Aficio SP C320DN | Manuals - Page 96
to select [WEP], and then press the [OK] key. 9. Press the [Menu] key to return to the initial screen. 10. Print a configuration page to confirm the settings. • The WEP key can also be set using a Web browser. For details, see Web Image Monitor Help. • For details about printing the configuration - Ricoh Aficio SP C320DN | Manuals - Page 97
Security Method of Wireless LAN • For setting WPA, installing the optional Hard disk is required. 1. Press the [Menu] key. CBK049 2. Press the [ ] or [ ] key to select [Host Interface], and then press the [ - Ricoh Aficio SP C320DN | Manuals - Page 98
[ ] key to select encryption method, and then press the [OK] key. Consult your network administrator for information about making encryption settings. 5 Encryption settings are as follows: • [TKIP] Uses the same algorithm as RC4, but further reduces vulnerability using methods such as key mixing - Ricoh Aficio SP C320DN | Manuals - Page 99
an expanded version of WPA that fully supports IEEE 802.11i. Wait for two seconds, the display returns to the [WPA] menu. 10. If [WPA] or [WPA2] 17. Print a configuration page to confirm the settings. • For details about printing the configuration page, see "Test Printing". • p.43 "Test Printing" 97 - Ricoh Aficio SP C320DN | Manuals - Page 100
using Web Image Monitor's administrator mode. You can select four types of EAP authentication method: EAP-TLS, LEAP, EAP-TTLS and PEAP. Note that each EAP authentication method has different configuration settings and authentication procedures. Types and requirements of certificates are as - Ricoh Aficio SP C320DN | Manuals - Page 101
downloaded in step 11, and then copy over all the text. 12. In the [Enter Certificate Request] window, paste all the text copied into the CA signified 5 certificate. 13. Click [OK]. 14. "Updating machine, enable the SSL setting. This procedure is used for a self-signed certificate or a - Ricoh Aficio SP C320DN | Manuals - Page 102
Permit Sub-domain". LEAP • Click [Change] in "Password", and then enter the password set in the RADIUS server. EAP-TTLS • Click [Change] in "Password", and then enter the password set in the RADIUS server. • Click [Change] in "Phase 2 User Name", and then enter the user name set in the RADIUS server - Ricoh Aficio SP C320DN | Manuals - Page 103
to specify a password. • Click [Change] on "Phase 2 User Name", and then enter the user name set in the RADIUS problem with settings, you might not be able to communicate with the printer. To identify the problem, print a network summary. • If you cannot identify the problem, reset the printer - Ricoh Aficio SP C320DN | Manuals - Page 104
Sub-domain". LEAP • Click Change in "Password", and then enter the password set in the RADIUS server. EAP-TTLS • Click [Change] in "Password", and then enter the password set in the RADIUS server. • Click [Change] in "Phase 2 User Name", and then enter the user name set in the RADIUS server - Ricoh Aficio SP C320DN | Manuals - Page 105
[OK]. 8. "Updating..." appears. Wait for about one or two minutes, and then click [OK]. 9. In the menu area, click [Configuration]. 10. Under "Interface", click [Wireless LAN Settings]. 11. Select [Wireless LAN] in "LAN Type". 12. Select [Infrastructure Mode] in "Communication Mode". 13. Enter - Ricoh Aficio SP C320DN | Manuals - Page 106
5. Configuration 5 104 - Ricoh Aficio SP C320DN | Manuals - Page 107
to load paper into the paper trays. Supported Paper for Each Tray The tables in this section provide details of the sizes, types, feed directions, and maximum number of sheets of paper that can be loaded in each of the printer's trays. Symbols In this manual On the display A4 Short-edge feed - Ricoh Aficio SP C320DN | Manuals - Page 108
feed tray" Optional Paper Feed Tray 6 Paper types Plain Paper, Middle Thick, Thick Paper 1, Thin Paper, Letterhead, Preprinted Paper, Color Paper, Recycled Paper Paper sizes requiring manual settings Paper weight The following sizes are supported, but they must be selected using the control - Ricoh Aficio SP C320DN | Manuals - Page 109
Color Paper, Recycled Paper, Envelope The following sizes are supported, but they must be selected using the control panel. For details about paper size settings, see "Specifying standard size paper for bypass tray". Paper sizes requiring manual settings exceeds the paper guides on the bypass tray - Ricoh Aficio SP C320DN | Manuals - Page 110
(66 to 74 g/m2)] Any input tray can be used. Supported • Tray 1: 500 • Tray 2 (Paper feed unit): 500 • Bypass Tray: 100 Middle Thick Paper weight Paper type setting using the control panel Paper type setting using the printer driver Supported input tray Duplex printing 75 to 90 g/m2 (20 to 24 - Ricoh Aficio SP C320DN | Manuals - Page 111
tray. [Thick Paper 3]: Bypass tray. 6 Duplex printing Not supported Note Printing is slightly slower than when using plain paper. Thin Paper Paper weight Paper type setting using the control panel Paper type setting using the printer driver Supported input tray Duplex printing 60 to 65 g/m2 - Ricoh Aficio SP C320DN | Manuals - Page 112
[Label Paper] > the [OK] key [Labels] This paper type can be printed only from the tray 1 and bypass tray. Not supported Coated Paper (Glossy) Paper type setting using the control panel Paper type setting using the printer driver Supported input tray Duplex printing The [Menu] key > [Paper Input - Ricoh Aficio SP C320DN | Manuals - Page 113
type setting using the printer driver [Coated (Matted)] Supported input tray Duplex printing This paper type can be printed only from the tray 1 and bypass tray. 6 Supported Coated Paper (Matted: Thick) Paper type setting using the control panel Paper type setting using the printer driver - Ricoh Aficio SP C320DN | Manuals - Page 114
] Any input tray can be used. Supported Color Paper Paper type setting using the control panel Paper type setting using the printer driver Supported input tray The [Menu] key > [Paper Input] > [Paper Type: (tray name)] > [Color Paper] > the [OK] key [Color] Any input tray can be used. 112 - Ricoh Aficio SP C320DN | Manuals - Page 115
[OK] key Paper type setting using the printer driver [Cardstock] Supported input tray This paper type can be printed only from the bypass tray. Duplex printing Not supported Bond Paper Paper type setting using the control panel Paper type setting using the printer driver Supported input tray - Ricoh Aficio SP C320DN | Manuals - Page 116
6. Loading Paper Envelopes Paper type setting using the control panel Paper type setting using the printer driver Supported input tray Duplex printing 6 Note The [Menu] key > [Paper Input] > [Paper Type: Bypass Tray] > [Envelope] > the [OK] key [Envelope] This paper type can be printed only from - Ricoh Aficio SP C320DN | Manuals - Page 117
Paper Types CBK099 • To correctly specify the length of an envelope whose flap opens along its short edge, be sure to include the open flap when measuring. 6 ASH125S Storing Paper Take care when storing paper. Improperly stored paper might result in poor print quality, paper misfeeds, or printer - Ricoh Aficio SP C320DN | Manuals - Page 118
6. Loading Paper Non-Recommended Paper Types • Do not use the following types of paper: • Ink-jet printer paper • GelJet special paper • Bent, using paper printed on by other than a laser printer (e.g.monochrome and color copiers, ink-jet printers, etc.) • Surface-processed paper (excluding - Ricoh Aficio SP C320DN | Manuals - Page 119
page that is available for printing. Be sure to set the print margins correctly by the application. The following diagram shows the print area for this printer paper size, printer language and printer driver settings. • To print on paper that is over 900 mm (35.5 inches) in length, set the top margin - Ricoh Aficio SP C320DN | Manuals - Page 120
6. Loading Paper Envelope 2 3 3 4 1 3 CBK101 Print area 6 Feed direction Approx. 10 mm (0.4 inches) Approx. 15 mm (0.6 inches) • The print area may vary depending on the paper size, printer language and printer driver settings. 118 - Ricoh Aficio SP C320DN | Manuals - Page 121
the control panel. This printer does not automatically detect the size of paper loaded in a tray. Make sure the paper size and type is selected using the control panel. • If the bypass tray is open, close it before pulling out Tray 1. • Do not move the side paper guides forcefully. Doing so can - Ricoh Aficio SP C320DN | Manuals - Page 122
the tray on a flat surface. 2. Push the metal plate down until it clicks into place to lock. 6 CBK036 3. Pinch the clip on the side paper guide and slide it to match the standard size. CBK207 When loading custom size paper, position the paper - Ricoh Aficio SP C320DN | Manuals - Page 123
standard size. CBK208 When loading custom size paper, position the paper guide slightly wider than the actual paper size. 5. Fan the paper before the upper limit (upper line) marked inside the tray. CBK041 Slide the guides inward, until they are flush against the paper's sides. Make sure the paper - Ricoh Aficio SP C320DN | Manuals - Page 124
Hold the tray with both hands, slide it along the rails of the printer body, and then push it straight in. CBK045 To avoid paper jams for the optional paper feed tray. 1. Lift and pull the optional paper feed unit, and then hold the tray with both hands, and then pull it out. CBK226 Place the tray - Ricoh Aficio SP C320DN | Manuals - Page 125
2. Press down on the bottom plate until it clicks. Loading Paper in Trays CBK227 3. Pinch the clips on the side paper guide, and then adjust the guide to the paper size. 6 CBK228 4. Pinch the clip on the end paper guide and align the arrow with the paper size. CBK229 123 - Ricoh Aficio SP C320DN | Manuals - Page 126
in. Push the tray firmly to avoid a paper jam. CBK231 Loading legal size paper This section describes how to load Legal size paper into the printer. The same procedure applies to A4 paper or larger. • Do not move the side paper - Ricoh Aficio SP C320DN | Manuals - Page 127
Loading Paper in Trays • Do not move the end paper guide forcefully. Doing so can damage the tray. • When inserting the tray, make sure it is not slanted. Inserting it at a slant can damage the printer. 1. Remove the rear cover using a coin. CBK102 2. Pull Tray 1 carefully, then hold it with both - Ricoh Aficio SP C320DN | Manuals - Page 128
will hear a click). 1 2 1 CBK103 After extension, make sure the arrows on the extender and tray are aligned. 6 CBK104 5. Pinch the clip on the side paper guide, and then slide it to match the legal paper size. 126 CBK105 - Ricoh Aficio SP C320DN | Manuals - Page 129
Loading Paper in Trays 6. Pinch the front end paper guide and slide it inward to match the legal paper size. not stacked higher than the upper limit (upper line) marked inside the tray. Slide the guides inward until they are flush against the paper's sides. Make sure the paper is not stacked higher - Ricoh Aficio SP C320DN | Manuals - Page 130
inserted. • To reinsert the extender, you might have to push it with moderate force. • For details about paper types supported by the printer, see "Supported Paper Types". 6 • p.108 "Supported Paper Types" Setting a paper size by using the control panel Follow the procedure described below to - Ricoh Aficio SP C320DN | Manuals - Page 131
the paper size you want to set using the scroll keys, and then press the [OK] key. 5. Press the [Menu] key to return to the initial screen. • For details about paper types supported by the printer, see "Supported Paper Types". 6 • p.108 "Supported Paper Types" Specifying custom size paper for - Ricoh Aficio SP C320DN | Manuals - Page 132
6. Loading Paper 2. Press the [ ] or [ ] key to select [Paper Input], and then press the [OK] key. 3. Press the [ ] or [ ] key to select [Paper Size: (tray name)], and then press the [OK] key. In the illustration below, [Paper Size: Tray 1] is selected for Tray 1. 4. Select [Custom Size] using the - Ricoh Aficio SP C320DN | Manuals - Page 133
standard or optional paper feed tray This section describes how to specify a paper type. You can improve printer performance by selecting the optimum paper type for the tray. 1. Press the [Menu] key. 6 CBK049 2. Press the [ ] or [ ] key to select [Paper Input], and then press the [OK] key. 3. Press - Ricoh Aficio SP C320DN | Manuals - Page 134
type that is loaded, and then press the [OK] key. About two seconds later, the display returns to the Paper Input screen. 5. Press the [Menu] key to return to the initial screen. • If the printing result is badly smudged, change the setting on the printer's control panel. For details, see "Supported - Ricoh Aficio SP C320DN | Manuals - Page 135
toward you. Loading Paper in Trays CBK112 If you load legal or longer size paper, pull out the bypass tray extension. 6 CBK114 2. Slide the paper guide both sides outward, and then load paper print side down, until it stops. 1 2 1 CBK115 133 - Ricoh Aficio SP C320DN | Manuals - Page 136
sure the stack does not exceed the limit mark on the inner side of the paper guides. For details about the thicknesses of different paper types, see "Supported Paper Types". 6 • p.108 "Supported Paper Types" Specifying standard size paper for the bypass tray This section describes how to specify - Ricoh Aficio SP C320DN | Manuals - Page 137
for [Tray Setting Priority] under [Machine Modes] in [Print Settings], any settings made using the printer's control panel have priority over any settings made using the printer driver. • You cannot print on custom size paper with an application that does not support the custom size setting. • To - Ricoh Aficio SP C320DN | Manuals - Page 138
6. Loading Paper 1. Press the [Menu] key. CBK049 2. Press the [ ] or [ ] key to select [Paper Input], and then press the [OK] key. 6 3. Press the [ ] or [ ] key to select [Paper Size:Bypass Tray], and then press the [OK] key. 4. Select [Custom Size] using the scroll keys, and then press the [OK] - Ricoh Aficio SP C320DN | Manuals - Page 139
• The paper type selected using the printer driver overrides that selected using the control panel, so do not make settings using the control panel if you have already made settings using the printer driver. • When [Machine Setting(s)] is selected for [Tray Setting Priority] under [Machine Modes] in - Ricoh Aficio SP C320DN | Manuals - Page 140
the [ ] or [ ] key to select the paper type you want to use, and then press the [OK] key. 5. Press the [Menu] key to return to the initial screen. • If the printing result is badly smudged, change the setting on the printer's control panel. For details, see "Supported Paper for Each Tray". • p.105 - Ricoh Aficio SP C320DN | Manuals - Page 141
to be used are supported by this printer. • Check there is no air in the envelopes before loading. • Load only one size and type of envelope at a Tray 6 This section explains how to load envelopes onto the bypass tray and change paper size. 1. Hold the middle part of the bypass tray and pull it - Ricoh Aficio SP C320DN | Manuals - Page 142
your fingers, as shown in the illustration below. 6 CBK241 If envelopes are severely curled after printing, flatten them by bending them back against the curl. 3. Set the envelope in bypass tray with the printing side facing down. 1 2 1 CBK117 140 - Ricoh Aficio SP C320DN | Manuals - Page 143
4. Adjust the paper guide both sides to fit the envelope width. Loading Envelopes CBK118 Specifying envelope size for the bypass tray This section describes how to specify envelope size - Ricoh Aficio SP C320DN | Manuals - Page 144
higher than the limit mark on the side guides. • Do not push the stack of envelopes with too much force. • Confirm that the edges of envelopes fit under the side guides. • For details about paper types supported by the printer, see "Supported Paper Types". 6 • p.108 "Supported Paper Types" 142 - Ricoh Aficio SP C320DN | Manuals - Page 145
to the combination of paper feed direction and letterhead settings in the control panel and PCL printer driver. Paper trays 1 - 2 Bypass Tray Paper Orientation Letterhead Setting Letterhead Setting Letterhead Setting Letterhead Setting [On] [Off] [On] [Off] 1-sided print To make sure - Ricoh Aficio SP C320DN | Manuals - Page 146
a fixed orientation only when [Letterhead] is specified as the paper type in the printer driver's settings. Off The printer will print on paper in a fixed orientation, regardless of the specified paper type or the printer driver's settings. 6. Press the [Menu] key to return to the initial screen - Ricoh Aficio SP C320DN | Manuals - Page 147
when the printer is operating in a network, and bidirectional communication is enabled. • This function cannot be used with the printer driver's [Manage Preset List] function. • The printer's logs do not record names of user paper types. Registering Names to Paper Types • The printer driver might - Ricoh Aficio SP C320DN | Manuals - Page 148
command. 2. On the tab in the properties dialog box that appears, select a registered paper type under 6 [Paper Type:]. 3. Execute the print command. The preregistered settings are applied and print is performed. • For details about printer driver settings, see the printer driver Help. 146 - Ricoh Aficio SP C320DN | Manuals - Page 149
replace consumables, and clean the printer. Replacing the Print Cartridge • Do not incinerate toner (new or used) or toner containers. Doing so risks burns. Toner will ignite on contact with naked flame. • Keep the polythene materials (bags, gloves, etc.) supplied with this machine away from babies - Ricoh Aficio SP C320DN | Manuals - Page 150
(this number can vary depending on the environmental conditions). If prints appear dirtied, replace the print cartridge. • If cyan, magenta, or yellow toner runs out, you can print in black and white using black toner. Change the color mode setting to [Black and White] using the printer driver. • If - Ricoh Aficio SP C320DN | Manuals - Page 151
shake the removed print cartridge. Remaining toner may leak. • Place the old print cartridge on paper or some other material to avoid dirtying your workspace. • Color is labeled on each print cartridge. When removing print cartridges, be careful not to touch the Laser Scanning Unit on the underside - Ricoh Aficio SP C320DN | Manuals - Page 152
7. Maintaining the Printer CBK121 3. Take the new print cartridge out of the box, and then take it out of the plastic bag. 7 CBK123 4. Hold the print cartridge and shake it from side to side five or six times. CBK251 Even distribution of toner within the bottle improves print quality. 150 - Ricoh Aficio SP C320DN | Manuals - Page 153
5. Remove the cover from the print cartridge. Replacing the Print Cartridge CBK124 Do not touch the print cartridge's photo conductor unit. 7 CBK026 Do not touch a metal part. CBK250 151 - Ricoh Aficio SP C320DN | Manuals - Page 154
7. Maintaining the Printer 6. Check the toner color and location correspond, and carefully insert the print cartridge vertically. CBK033 7. Close the top cover with both hands carefully. Be careful not to trap your fingers. 7 CBK034 Wait while the toner loads. To avoid malfunction, do not turn off - Ricoh Aficio SP C320DN | Manuals - Page 155
Replacing the Print Cartridge • Comply with the print cartridge Recycling Program, whereby used print cartridges are collected for processing. For details, ask your sales or service representative. 7 153 - Ricoh Aficio SP C320DN | Manuals - Page 156
is installed. If the paper transfer unit is not installed, install it before turning the power on. • Cooperate with the waste toner bottle Recycling Program, whereby used waste toner bottles are collected for recycling. • Before removing the waste toner bottle from the printer, spread paper or some - Ricoh Aficio SP C320DN | Manuals - Page 157
Bottle When the following message appears on the display, the waste toner bottle should be replaced soon. Prepare a new Waste Toner Bottle. " Waste Toner almost full" Waste Toner almost full 1. Pull front cover open lever, and then open the front cover with both hands carefully. 2 7 1 CBK130 - Ricoh Aficio SP C320DN | Manuals - Page 158
7. Maintaining the Printer 3. Hold both ends of the paper transfer unit, and then lift it up. CBK132 4. Hold the center of the waste toner bottle, and then carefully pull it out horizontally. 7 CBK133 5. Pull the waste toner bottle halfway out, grab the bottle, and then pull it straight out. CBK134 - Ricoh Aficio SP C320DN | Manuals - Page 159
Replacing the Waste Toner Bottle CBK135 To prevent the waste toner bottle touching the intermediate transfer unit, do not lift the bottle while pulling it out. 7 CBK136 6. Close the bottle cap. CBK160 157 - Ricoh Aficio SP C320DN | Manuals - Page 160
bottle, and then carefully insert it halfway into the printer body. Leave the cap open. 7 CBK150 To prevent the waste toner bottle touching the intermediate transfer unit, do not lift the bottle while inserting it. CBK151 8. Push in the waste toner bottle until it clicks into place. Push the green - Ricoh Aficio SP C320DN | Manuals - Page 161
Replacing the Waste Toner Bottle CBK152 9. Place the paper transfer unit on the front cover by aligning the mark on the paper transfer unit with the mark on the front cover. 7 CBK153 1 2 CBK154 Then, push on the green PUSH marks until the paper transfer unit clicks into place. 159 - Ricoh Aficio SP C320DN | Manuals - Page 162
7. Maintaining the Printer CBK155 10. Close the front cover with both hands carefully. 7 CBK156 160 - Ricoh Aficio SP C320DN | Manuals - Page 163
"hot surface". Otherwise, an injury might occur. • Replace the intermediate transfer unit and transfer roller together. • When removing the waste toner bottle, make sure not to tilt it. • Before removing the waste toner bottle from the printer, spread paper or some other material around the area - Ricoh Aficio SP C320DN | Manuals - Page 164
7. Maintaining the Printer 1. Pull the right side lever to open the front cover. 2 1 CBK130 2. Slide the lever on the front cover outwards. 7 CBK131 3. Hold both ends of the paper transfer unit and lift it up. CBK132 162 - Ricoh Aficio SP C320DN | Manuals - Page 165
Hold the center of the waste toner bottle, and then carefully pull it out horizontally. CBK133 5. Pull the waste toner bottle halfway out, grab the bottle, and then pull it straight out. 7 CBK134 CBK135 To prevent the waste toner bottle touching the intermediate transfer unit, do not lift the bottle - Ricoh Aficio SP C320DN | Manuals - Page 166
7. Maintaining the Printer CBK136 6. Loosen the finger screws on both ends of the intermediate transfer unit. 1 2 1 2 7 CBK137 7. Hold the finger screws of sliders, and then pull the intermediate transfer unit until it stops. CBK138 164 - Ricoh Aficio SP C320DN | Manuals - Page 167
Replacing the Intermediate Transfer Unit 8. Hold the green parts at both ends of the intermediate transfer unit. CBK139 CBK140 7 Holding the levers on both side, carefully pull out the intermediate transfer unit. 2 1 CBK141 165 - Ricoh Aficio SP C320DN | Manuals - Page 168
7. Maintaining the Printer 9. Open the box containing the new intermediate transfer unit and remove the top cover. CBK143 10. Remove the covering sheet. Then, while taking care not to touch the belt area, lift the new intermediate transfer unit from its box using the grips on both sides. 7 CBK144 - Ricoh Aficio SP C320DN | Manuals - Page 169
Replacing the Intermediate Transfer Unit CBK146 Do not touch the transfer belt. CBK129 7 12. Hold the intermediate transfer unit by the green parts at both ends, and then push the unit straight into the printer body until it can go no further. CBK252 167 - Ricoh Aficio SP C320DN | Manuals - Page 170
7. Maintaining the Printer CBK147 13. Tighten the finger screws on both ends of the intermediate transfer unit. 2 1 2 1 7 CBK148 14. Remove the transfer belt cover. CBK149 168 - Ricoh Aficio SP C320DN | Manuals - Page 171
the Intermediate Transfer Unit 15. Hold the center of the waste toner bottle, and then carefully insert into the printer body. CBK150 To prevent the waste toner bottle touching the intermediate transfer unit, do not lift the bottle while inserting it. 7 CBK151 16. Push in the waste toner bottle - Ricoh Aficio SP C320DN | Manuals - Page 172
7. Maintaining the Printer 17. Place the paper transfer unit on the front cover by aligning the mark on the paper transfer unit with the mark on the front cover. CBK153 1 2 7 CBK154 Then, push on the green PUSH marks until the paper transfer unit clicks into place. CBK155 170 - Ricoh Aficio SP C320DN | Manuals - Page 173
18. Close the front cover with both hands carefully. Replacing the Intermediate Transfer Unit CBK156 7 171 - Ricoh Aficio SP C320DN | Manuals - Page 174
7. Maintaining the Printer Replacing the Maintenance Kit • When replacing the maintenance kit, turn the main power switch off and :Fusing Unit" Replacmnt Rqrd:Fusing Unit 7 When the following message appears on the display, the maintenance kit should be replaced soon. Prepare a new maintenance kit. - Ricoh Aficio SP C320DN | Manuals - Page 175
Replacing the Maintenance Kit 2. Hold the levers on both sides of the fusing unit and carefully pull it out. CBK168 Place the old fusing unit on a flat surface. 3. Prepare a new fusing unit. 7 CBK169 4. While supporting both ends of the new fusing unit with your forefingers and pressing down the - Ricoh Aficio SP C320DN | Manuals - Page 176
with the markings on the levers. CBK171 If the markings are misaligned, align them by lowering the levers and once again pushing the fusing unit fully in. 6. Slide the levers on the front cover outwards. 7 CBK131 7. Hold both ends of the paper transfer unit and lift it up. CBK132 Place the paper - Ricoh Aficio SP C320DN | Manuals - Page 177
Replacing the Maintenance Kit 8. Push in the depressions on both sides of the paper transfer unit. CBK172 9. Lift the transcription roller to take it out. 2 1 7 CBK173 CBK174 175 - Ricoh Aficio SP C320DN | Manuals - Page 178
7. Maintaining the Printer 10. Hold the new transcription roller, and match it with the paper transfer unit. CBK175 11. Lift the transcription roller to install it. 7 CBK178 CBK179 176 - Ricoh Aficio SP C320DN | Manuals - Page 179
Replacing the Maintenance Kit 12. Place the paper transfer unit on the front cover by aligning the mark on the paper transfer unit with the mark on the front cover. CBK153 1 2 7 CBK154 Then, push on the green PUSH marks until the paper transfer unit clicks into place. CBK155 177 - Ricoh Aficio SP C320DN | Manuals - Page 180
7. Maintaining the Printer 13. Close the front cover with both hands carefully. CBK156 7 178 - Ricoh Aficio SP C320DN | Manuals - Page 181
explicitly mentioned in this manual. Inside this machine are high voltage components that are an electric shock hazard and laser components that could cause blindness. Contact your sales or service representative if any of the machine's internal components require maintenance, adjustment, or repair - Ricoh Aficio SP C320DN | Manuals - Page 182
7. Maintaining the Printer Cleaning the Toner Density Sensor Clean the toner density sensor when the following message appears on the control panel. "Sensor cleaning required." • Be careful not to trap your fingers when opening or closing - Ricoh Aficio SP C320DN | Manuals - Page 183
density sensor lever once to the left. Cleaning the Toner Density Sensor CBK180 Slide the lever only once. 4. To reattach the cyan print cartridge removed in step 2. Push it all the way in carefully. 7 CBK246 5. Close the top cover with both hands carefully. Be careful not to trap your - Ricoh Aficio SP C320DN | Manuals - Page 184
as follows: • When moving the machine, hold the inset grips at both sides, and then lift the printer slowly. Lifting it carelessly or dropping it may cause an injury. • When performing maintenance on the machine, always disconnect the power cord from the wall outlet. • When disconnecting the power - Ricoh Aficio SP C320DN | Manuals - Page 185
Cleaning the Friction Pad and the Paper Feed Roller 3. Lift and pull Tray 1 carefully, and then pull it out with both hands. CBK035 Place the tray on a flat surface. When there is paper in the tray, remove paper. 4. Wipe the friction pad with a damp cloth. 7 CBK181 5. Wipe the rubber part of the - Ricoh Aficio SP C320DN | Manuals - Page 186
all the way into the printer. 7 CBK045 Do not slide the paper tray in with force. If you do, the front and side guides might move. 8. Insert after cleaning the friction pad, contact your sales or service representative. • If the optional paper feed unit is installed, clean its friction pad and paper - Ricoh Aficio SP C320DN | Manuals - Page 187
might fall and cause an injury. • Do not put your hands inside the printer when the input tray is removed. Some internal parts become hot and are a . 2. Pull out the plug from the socket. Remove all the cables from the printer. 3. Lift and pull Tray 1 carefully, and then pull it out with both hands - Ricoh Aficio SP C320DN | Manuals - Page 188
7. Maintaining the Printer 4. Wipe the inside of the paper tray with a cloth. CBK184 5. Push the metal plate down until it clicks into place to lock. 7 CBK036 6. Slide Tray 1 along the rails, and push it carefully all the way into the printer. CBK045 186 - Ricoh Aficio SP C320DN | Manuals - Page 189
Cleaning the Registration Roller and the Paper Tray 7. Pull Front Cover Open Lever, and then open the front cover with both hands carefully. 2 1 CBK130 The registration roller is set in the position shown by the illustration. 7 CBK185 Do not touch the transfer roller. CBK183 187 - Ricoh Aficio SP C320DN | Manuals - Page 190
7. Maintaining the Printer 8. Using a cloth, wipe the metal registration roller. CBK232 Clean the registration roller if printed paper becomes smeared after clearing a paper jam. 9. Close the front cover with both hands carefully. 7 CBK156 10. Insert the plug of the power cord into the wall socket - Ricoh Aficio SP C320DN | Manuals - Page 191
. After moving the printer, printing on thick paper, or printing repeatedly for some time, color degradation may occur. By performing automatic color adjustment, you can restore optimum print quality. 1. Press the [Menu] key. CBK049 2. Press the [ ] or [ ] key to select [Maintenance], and then press - Ricoh Aficio SP C320DN | Manuals - Page 192
8. Adjusting the Printer 5. Select [Auto Adjust], and then Press the [OK] key. 6. Press [OK]. Automatic color adjustment begins. Automatic color adjustment takes about 30 seconds. A confirmation message appears when the adjustment is complete. Press [Exit]. 7. Press the [Menu] key to return to the - Ricoh Aficio SP C320DN | Manuals - Page 193
a single operation, repeat the correction several times, as 8 needed. • Corrections to color gradation will be applied to all user jobs. • Use the same type of paper when printing a run of gradation corrections. If a different type of paper is used, corrections may not be apparent. Setting the - Ricoh Aficio SP C320DN | Manuals - Page 194
8. Adjusting the Printer 1. Press the [Menu] key. CBK049 2. Press the [ ] or [ ] key to select [Maintenance], and then press the [OK] key. 3. Press the [ ] or [ ] key to select [Quality Maintenance], and then press the [OK] key. 8 4. Press the [ ] or [ ] key to select [Color Calibration], and then - Ricoh Aficio SP C320DN | Manuals - Page 195
the colors printed on gradation correction sheet 1 with the colors you select the color you want to adjust, and then press the [OK] key. 10. Adjust the correction value for the selected color, and values of the colors you want to reproduce on prints so they match the colors on gradation correction - Ricoh Aficio SP C320DN | Manuals - Page 196
1. K (black) correction values Used to adjust the color printed when only black toner is used. The currently set correction value is printed in red. 2. M (magenta) correction values Used to adjust the color printed when only magenta toner is used. The currently set correction value is printed in red - Ricoh Aficio SP C320DN | Manuals - Page 197
is printed. This value corresponds to the value set on the control panel. Resetting the Gradation Correction Value to the Initial Value Reset the correction value default. 1. Press the [Menu] key. CBK049 2. Press the [ ] or [ ] key to select [Maintenance], and then press the [OK] key. 8 3. Press the - Ricoh Aficio SP C320DN | Manuals - Page 198
8. Adjusting the Printer 5. Press the [ ] or [ ] key to select [Reset Setting], and then press the [OK] key. A confirmation message appears. 6. Press [Yes]. When resetting is completed, press [Exit]. 7. Press [Menu] key to return to the initial screen. 8 196 - Ricoh Aficio SP C320DN | Manuals - Page 199
to the feed direction. Normally you do not need to update the printing position. However, updating is useful in some cases when the optional paper feed unit is installed. 1. Press the [Menu] key. CBK049 2. Press the [ ] or [ ] key to select [Maintenance], and then press the [OK] key. 8 3. Press the - Ricoh Aficio SP C320DN | Manuals - Page 200
8. Adjusting the Printer 5. Press the [ ] or [ ] key to select [Print Test Sheet], and then press the [OK] key. . 9. Press the [ ] or [ ] key to select [Adjustment], and then press the [OK] key. 10. Press the [ ] or [ ] key to select the parameter you want to adjust, and then press the [OK] key. 198 - Ricoh Aficio SP C320DN | Manuals - Page 201
11. Enter the value (mm), and then press the [OK] key. Adjusting Printing Position Increase the value to shift the print area in the direction indicated by the " " symbol in the diagram below. Decrease the value to shift the print area in the direction indicated by the " " symbol. 2 1 8 CBK242 : - Ricoh Aficio SP C320DN | Manuals - Page 202
8. Adjusting the Printer 8 200 - Ricoh Aficio SP C320DN | Manuals - Page 203
9. Troubleshooting This chapter provides solutions to common problems and it also explains how to correct unwanted print results. Error and . It means the printer is initializing, replenishing toner, or executing maintenance operations. Wait a while. Printing... The printer is printing. Wait - Ricoh Aficio SP C320DN | Manuals - Page 204
the Waste Toner Bottle". @Remote Cert. update failed Updating the @Remote certificate failed. Contact your sales or service representative. Cannot connect=>Comm.Serv./ Check proxy user/password. The proxy user name or password is incorrect. Check the proxy server settings, and change the user name - Ricoh Aficio SP C320DN | Manuals - Page 205
(tray name) The duplex mode for the indicated tray is off; you can only use one-sided printing. Press [Change] to change the tray's settings, press [JobReset] to reset the job, or press [Form Feed] to force printing. ECO Night Sensor did not turn Power Switch off. Turn switch off manually or to use - Ricoh Aficio SP C320DN | Manuals - Page 206
Manual [JobReset] to reset the job. [System], set [Bypass Print error. For details, see p.57 "Installing the Interface Units". Printer Font Error. There are problems with the printer's font file. Contact your sales or service representative. Problem with Hard Disk Please call service. The printer - Ricoh Aficio SP C320DN | Manuals - Page 207
Intermediate Transfer Unit". Replacmnt Rqrd:Fusing Unit You need to replace the fusing unit. For details, see p.172 "Replacing the Maintenance Kit". Replcmnt Requrd: Print Cart The toner has run out, or the photo conductor unit has reached the end of its service life. Replace the print cartridge - Ricoh Aficio SP C320DN | Manuals - Page 208
sales or service representative. For details, see p.172 "Replacing the Maintenance Kit" for fusing unit installation. Set the Intermediate Transfer Unit correctly. The intermediate transfer unit may not be installed correctly. Turn the printer off and re-install the intermediate transfer unit. If - Ricoh Aficio SP C320DN | Manuals - Page 209
Error and Status Messages Appear on the Control Panel USB has a problem./ Please call service. The printer has detected a USB board failure. Turn the power off, and then on again. If the problem persists, contact your sales or service representative. Values set for IPv6/Gateway addresses are invalid - Ricoh Aficio SP C320DN | Manuals - Page 210
out of the energy-saving mode or was reset. Printer requires user attention. Paper may have jammed or print cartridge may need replenishing. 9 • Users cannot mute the printer's tone alerts. When the printer beeps to alert users of a paper jam or toner request, if the printer's covers are opened and - Ricoh Aficio SP C320DN | Manuals - Page 211
For details, see p.119 "Loading Paper in Trays". Can you print a configuration page? If you cannot print a configuration page, it probably indicates a printer malfunction. Contact your sales or service representative. For details, see p.43 "Test Printing". Is the interface cable connected securely - Ricoh Aficio SP C320DN | Manuals - Page 212
9. Troubleshooting • Infrastructure Mode Check the signal status in the [Wireless LAN] set to USB00(n)*. *(n) varies depending on the number of printers connected. Windows Windows 2000 1. Click the [Start] button, point to [Settings], and then click [Printers]. 2. Click the icon of the printer. - Ricoh Aficio SP C320DN | Manuals - Page 213
[Hardware], Select [USB]. Using the printer browser 1. Start [Printer Setup Utility] or [Printer Center] utility. Under Mac OS X 10.5 or 10.6, start System Preferences and click [Print & Fax]. 2. Click [Add] or [+] button. The printer browser starts. Confirm the printer is displayed on the browser - Ricoh Aficio SP C320DN | Manuals - Page 214
Problems When You Cannot Print Properly Toner smears appear on the print side of the page. • The paper setting may not be correct. For example, you are using thick paper but the setting for thick paper might not be set. • Check the paper settings. • Check the printer driver's paper settings - Ricoh Aficio SP C320DN | Manuals - Page 215
Select [CMY + K] for [Gray Reproduction (Text/Line Art):] in the printer driver's dialog box. For details, see the printer driver Help. Colors are faded or missing from the bottom part of an image. • Turn the printer off and re-install the print cartridge. For details, see p.147 "Replacing the Print - Ricoh Aficio SP C320DN | Manuals - Page 216
side paper guides to match the paper size. See p.119 "Loading Paper in Trays". White lines appear. CBK260 • The intermediate transfer belt is dirty. Follow the procedure below to clean the belt: Open the top cover while the power is on. 9 Remove all print cartridges from the printer. Close the - Ricoh Aficio SP C320DN | Manuals - Page 217
the paper settings of this printer. For details, see p.108 "Supported Paper Types". • Check the paper settings of the printer driver. For details, see the printer driver Help. • The fusing unit is deteriorated or damaged. Replace the unit. For details, see p.172 "Replacing the Maintenance Kit". When - Ricoh Aficio SP C320DN | Manuals - Page 218
are using thick paper, the setting for thick paper may not be set. Check the printer driver's paper settings. See the printer driver Help. Multiple pages are fed at once. • There may be a gap between the front end paper guide and the paper, or between the paper guides on both sides and the paper - Ricoh Aficio SP C320DN | Manuals - Page 219
unit is removed. If this happens, reset the value of [RAM Disk] to 2MB or higher. For details about [RAM Disk], see "System Menu", Software Guide. • When printing a PDF with a password set, set the password of the PDF file using the [Change PDF 9 Password using the printer driver. Set the file - Ricoh Aficio SP C320DN | Manuals - Page 220
on again. If this does not solve the problem, contact your sales or service representative. Color changes extremely when adjusted with the printer driver. • Do not make extreme settings for the color balance on the "Print Quality" tab in the printer driver's 9 dialog box. Note that the sample - Ricoh Aficio SP C320DN | Manuals - Page 221
the PCL 5c or PCL6 printer driver appears blurred, select [On] for [PCL Char.Thickness Adjust] in [Machine Modes] under [Print Settings]. When Printer is Not Functioning Properly Paper is not fed from the selected tray. • When you are using a Windows operating system, the printer driver settings - Ricoh Aficio SP C320DN | Manuals - Page 222
For details, see the printer driver Help. If the problem cannot be solved, contact your sales or service representative. With Windows 2000/XP/Vista/7, Windows Server 2003/2003 R2/2008/2008 R2, when doing aggregate prints or bound prints. • Check that the paper size and direction set in the [Menu - Ricoh Aficio SP C320DN | Manuals - Page 223
Problems Some complex images do not print out on large custom size paper, such as paper with a length of 1260 mm. • If the image prints out when a lower resolution is set, the printer paper error. • If a paper tray is opened and closed while the printer is in Energy Saver mode, the printer will - Ricoh Aficio SP C320DN | Manuals - Page 224
[Off] to [On], but e-mail is not arriving. • After changing the setting, turn the printer's power off and then back on again. Error notification e-mail was received, but no error-solved e-mail is received. • Check e-mail is set for sending using Web Image Monitor's [Auto E-mail Notification] at - Ricoh Aficio SP C320DN | Manuals - Page 225
time information from the SNTP server. Refer to Web Image Monitor's Help to the settings. • If the printer is still not operating satisfactorily, contact your sales or service representative. Consult with the store where the printer was purchased for information about the location of sales or - Ricoh Aficio SP C320DN | Manuals - Page 226
9. Troubleshooting 9 224 - Ricoh Aficio SP C320DN | Manuals - Page 227
paper may cause paper to tear and leave scraps of paper in the printer. 10 This might cause a misfeed and damage the printer. • When paper is misfed a number of times, the following are possible causes. • The control panel settings do not match the size or orientation of the loaded paper. • The - Ricoh Aficio SP C320DN | Manuals - Page 228
10. Removing Misfed Paper • Paper jams can cause pages to be lost. Check your print job for missing pages and reprint any pages that did not print out. • Remove the paper above-mentioned causes, contact your sales or service representative. • p.182 "Cleaning the Friction Pad and the Paper Feed Roller - Ricoh Aficio SP C320DN | Manuals - Page 229
(A) Remove paper from Trays. Opn & cls Frt. Cov." error message appears when a paper misfeed occurs in the standard paper feed CBK130 2. Carefully pull the jammed paper upward and out. 10 CBK194 If paper has jammed inside the paper transfer unit, holding both sides of the paper, pull the paper - Ricoh Aficio SP C320DN | Manuals - Page 230
10. Removing Misfed Paper CBK195 3. Close the front cover with both hands carefully. CBK156 • Do remove it. After removing the paper, carefully push Tray 2 all the way back inside the printer. • When closing the front cover, push the upper side of the cover firmly. After closing the cover, check that - Ricoh Aficio SP C320DN | Manuals - Page 231
Paper Misfeed Message (A) Misfeed Bypass Tray 1. Remove paper loaded in the bypass tray, and then close the bypass tray with both hands. CBK197 2. Pull Front Cover Open Lever, and then open the front cover with both hands carefully. 2 1 CBK130 3. Pull out the jammed paper carefully. 10 CBK198 229 - Ricoh Aficio SP C320DN | Manuals - Page 232
10. Removing Misfed Paper 4. Close the front cover with both hands carefully. CBK156 • Be sure the Tray 1 is inserted before you open the front cover. • When closing the front cover, push the upper side of the cover firmly. After closing the cover, check that the error is cleared. 10 230 - Ricoh Aficio SP C320DN | Manuals - Page 233
The " (B) Open Front Cover and remove the paper." error message appears when a paper misfeed occurs in the internal paper of this printer becomes very hot. Before removing paper around the fusing unit, wait until the temperature of the covers inside the fusing unit and paper transfer unit cool down. - Ricoh Aficio SP C320DN | Manuals - Page 234
paper is visible in the output tray, lower the blue fusing unit levers, and then pull the jammed paper out of the tray. If you cannot find the jammed paper, open the guide by lowering the guide's blue levers. Check inside the guide for the jammed paper. CBK193 10 CBK244 Be sure to fully close the - Ricoh Aficio SP C320DN | Manuals - Page 235
3. Close the front cover with both hands carefully. Paper Misfeed Message (B) CBK156 • When closing the front cover, push the upper side of the cover firmly. After closing the cover, check that the error has cleared. 10 233 - Ricoh Aficio SP C320DN | Manuals - Page 236
10. Removing Misfed Paper Paper Misfeed Message (Y) " (Y) Remove misfeed in Trays. Opn & cls Frt. Cov." appears when a paper jam has occurred in Tray 2. Open the front cover and remove the paper following the same procedure as for Tray 1. • p.227 "Paper Misfeed Message (A)" 10 234 - Ricoh Aficio SP C320DN | Manuals - Page 237
the fusing unit and the paper transfer unit have cooled down. 1. Pull Front Cover Open Lever, and then open the front cover with both hands carefully. 2 1 CBK130 2. Carefully remove misfed paper under the paper transfer unit. 10 CBK196 If you cannot find the misfed paper, look inside the printer - Ricoh Aficio SP C320DN | Manuals - Page 238
10. Removing Misfed Paper 3. Close the front cover with both hands carefully. CBK156 • When closing the front cover, push the upper side of the cover firmly. After closing the cover, check that the error has cleared. 10 236 - Ricoh Aficio SP C320DN | Manuals - Page 239
nor the waste toner bottle to prevent toner spill inside the printer. 11 • Be sure to disconnect all cables from the printer before transporting it. • The printer is a piece of precision machinery. Take care to avoid damage during transportation. • If optional paper feed units are attached, remove - Ricoh Aficio SP C320DN | Manuals - Page 240
of the printer, and then move it horizontally to the place where you want to install it. CBK027 4. If you removed options, reattach them. For details, see the relevant sections in this manual. • Be sure to move the printer horizontally. To prevent toner from scattering, move the printer slowly. 11 - Ricoh Aficio SP C320DN | Manuals - Page 241
yield) Average number of pages printable per cartridge *1 2,500 pages 6,500 pages 2,500 pages 6,000 pages 2,500 pages 6,000 pages 2,500 pages 6,000 pages *1 The printable number of pages is based on pages that are compliant with ISO/IEC 19798 and the image density set as the factory default. ISO - Ricoh Aficio SP C320DN | Manuals - Page 242
. • If the waste toner bottles are not changed when necessary, printing will become impossible. We recommend keeping a stock of bottles or purchasing them soon. Intermediate Transfer Unit 11 Name Transfer Unit SP C310 Average printable number of pages *1 90,000 pages *1 A4/letter 5% test - Ricoh Aficio SP C320DN | Manuals - Page 243
• If the intermediate transfer unit are not changed when necessary, printing will become impossible. We recommend keeping a stock of bottles or purchasing them soon. Maintenance Kit Name Average printable number of pages *1 Maintenance Kit SP C320 (includes a fusing unit and transcription roller - Ricoh Aficio SP C320DN | Manuals - Page 244
: Monochrome: • maximum 25 pages per minute (A4 ) • maximum 26 pages per minute (81/2 " × 11 " (Letter) ) Color: • maximum 25 pages per minute (A4 ) 11 • maximum 26 pages per minute (81/2 " × 11 " (Letter) ) Printing speed may vary depending on the setting up environment. Resolution: 600 - Ricoh Aficio SP C320DN | Manuals - Page 245
, 11 A or less Power Consumption: Printing Panel Off mode Auto Off mode (sleep mode) 1300 W or less 45 W or less 5.5 W or less Warm-up Time: Less than 20 seconds (23 °C, 71.6 °F) *1 11 *1 When no error is occurred. Dimensions (W × D × H): Printer only (tray not extended): 400 × 480 × 387 mm - Ricoh Aficio SP C320DN | Manuals - Page 246
(A) B&W : Less than 61 dB (A) Color: Less than 62 dB (A) Stand-by Printing • Sound Pressure Level *2 • Main unit only Less than 39 dB (A) Less than memory unit) 11 Interfaces: Standard: • Ethernet (10BASE-T/100BASE-TX) • USB 2.0 To use USB 2.0, a USB computer port and cable that support USB - Ricoh Aficio SP C320DN | Manuals - Page 247
/PCL6, PS3/PDF/ PictBridge (optional) Fonts: PCL 5c/PCL 6: 45 fonts, 13 International fonts PostScript 3, PDF: 80 fonts Network: Topology: The physical or logical layout of the nodes (devices) in a network. (10BASE-T/100BASETX/1000BASE-T) Protocol: TCP/IP, IPX/SPX, AppleTalk Options Paper Feed Unit - Ricoh Aficio SP C320DN | Manuals - Page 248
Synchronous Dynamic RAM) Number of Pins: 200 pins Gigabit Ethernet Board Type A Interface Connector: Ethernet (10BASE-T, 100BASE-TX, 1000BASE-T) USB 2.0 To use USB 2.0, a USB computer port and cable that support USB 2.0 are required. 11 Data Transmission Speed: Ethernet: 10 Mbps, 100 Mbps - Ricoh Aficio SP C320DN | Manuals - Page 249
are available : 2412 - 2462 Mhz (1-11 Channels) Transmission Mode: • Ad hoc • infrastructure mode IEEE 802.11a/g Interface Unit Type L (mainly North America) Transmission Specification: Based on IEEE 802.11a/b/g (Wireless LAN) Data Transfer Speed: Auto select from the following speed: 1 Mbps - Ricoh Aficio SP C320DN | Manuals - Page 250
11. Appendix Required Cable: Standard IEEE 1284-compliant Micro Centronics 36-pin cable 11 248 - Ricoh Aficio SP C320DN | Manuals - Page 251
or other countries. Microsoft®, Windows®, Windows Server®, and Windows Vista® are registered trademarks of Microsoft Corporation in the United States and/or other countries. Monotype is a registered trademark of Monotype Imaging, Inc. PCL® is a registered trademark of Hewlett-Packard Company - Ricoh Aficio SP C320DN | Manuals - Page 252
® 2003 R2 Enterprise Edition • The product names of Windows Server 2008 are as follows: Microsoft® Windows Server® 2008 Standard Microsoft® Windows Server® 2008 Enterprise Microsoft® Windows Server® 2008 Standard without Hyper-VTM Microsoft® Windows Server® 2008 Enterprise without Hyper-VTM • The - Ricoh Aficio SP C320DN | Manuals - Page 253
15 Front cover open lever 17 Fusing unit 19 G Gigabit Ethernet board 57 Gradation correction sheet 194 Gradation correction value 191, 195 Guide to the printer 15, 17, 19, 21 H Hard disk 54 HDD encryption unit 65 How to read this manual 6 HTML manuals 12 I IEEE 1284 interface board 62 - Ricoh Aficio SP C320DN | Manuals - Page 254
size paper 124 Letterhead 110 Light sensor 21 List of options 11 Loading envelopes 139 Loading paper 119 M Maintenance kit 172, 241 Manuals 12 Manuals for this printer 10 Memory cover 17 Menu key 22 Middle thick 108 Misfeed bypass tray 229 Misfeed tray 1 227 Model-specific information - Ricoh Aficio SP C320DN | Manuals - Page 255
Transcription roller 19 Transfer roller 161 Tray 1 15, 119 Tray 2 122 Troubleshooting 201 Turning off the power 38 Turning on the power 36 Turning the power On and Off 36 U USB cable connection 73 USB port A 17 USB port B 17 User paper type 145, 146 V Viewing the HTML manuals 12 VM card - Ricoh Aficio SP C320DN | Manuals - Page 256
MEMO 254 - Ricoh Aficio SP C320DN | Manuals - Page 257
MEMO 255 - Ricoh Aficio SP C320DN | Manuals - Page 258
MEMO 256 EN GB EN US M0758627 - Ricoh Aficio SP C320DN | Manuals - Page 259
© 2010 - Ricoh Aficio SP C320DN | Manuals - Page 260
Operating Instructions Hardware Guide EN US M075-8627
-
 1
1 -
 2
2 -
 3
3 -
 4
4 -
 5
5 -
 6
6 -
 7
7 -
8
-
9
-
10
-
11
-
12
-
13
-
14
-
15
-
16
-
17
-
18
-
19
-
20
-
21
-
22
-
23
-
24
-
25
-
26
-
27
-
28
-
29
-
30
-
31
-
32
-
33
-
34
-
35
-
36
-
37
-
38
-
39
-
40
-
41
-
42
-
43
-
44
-
45
-
46
-
47
-
48
-
49
-
50
-
51
-
52
-
53
-
54
-
55
-
56
-
57
-
58
-
59
-
60
-
61
-
62
-
63
-
64
-
65
-
66
-
67
-
68
-
69
-
70
-
71
-
72
-
73
-
74
-
75
-
76
-
77
-
78
-
79
-
80
-
81
-
82
-
83
-
84
-
85
-
86
-
87
-
88
-
89
-
90
-
91
-
92
-
93
-
94
-
95
-
96
-
97
-
98
-
99
-
100
-
101
-
102
-
103
-
104
-
105
-
106
-
107
-
108
-
109
-
110
-
111
-
112
-
113
-
114
-
115
-
116
-
117
-
118
-
119
-
120
-
121
-
122
-
123
-
124
-
125
-
126
-
127
-
128
-
129
-
130
-
131
-
132
-
133
-
134
-
135
-
136
-
137
-
138
-
139
-
140
-
141
-
142
-
143
-
144
-
145
-
146
-
147
-
148
-
149
-
150
-
151
-
152
-
153
-
154
-
155
-
156
-
157
-
158
-
159
-
160
-
161
-
162
-
163
-
164
-
165
-
166
-
167
-
168
-
169
-
170
-
171
-
172
-
173
-
174
-
175
-
176
-
177
-
178
-
179
-
180
-
181
-
182
-
183
-
184
-
185
-
186
-
187
-
188
-
189
-
190
-
191
-
192
-
193
-
194
-
195
-
196
-
197
-
198
-
199
-
200
-
201
-
202
-
203
-
204
-
205
-
206
-
207
-
208
-
209
-
210
-
211
-
212
-
213
-
214
-
215
-
216
-
217
-
218
-
219
-
220
-
221
-
222
-
223
-
224
-
225
-
226
-
227
-
228
-
229
-
230
-
231
-
232
-
233
-
234
-
235
-
236
-
237
-
238
-
239
-
240
-
241
-
242
-
243
-
244
-
245
-
246
-
247
-
248
-
249
-
250
-
251
-
252
-
253
-
254
-
255
-
256
-
257
-
258
-
259
-
260
 |
 |
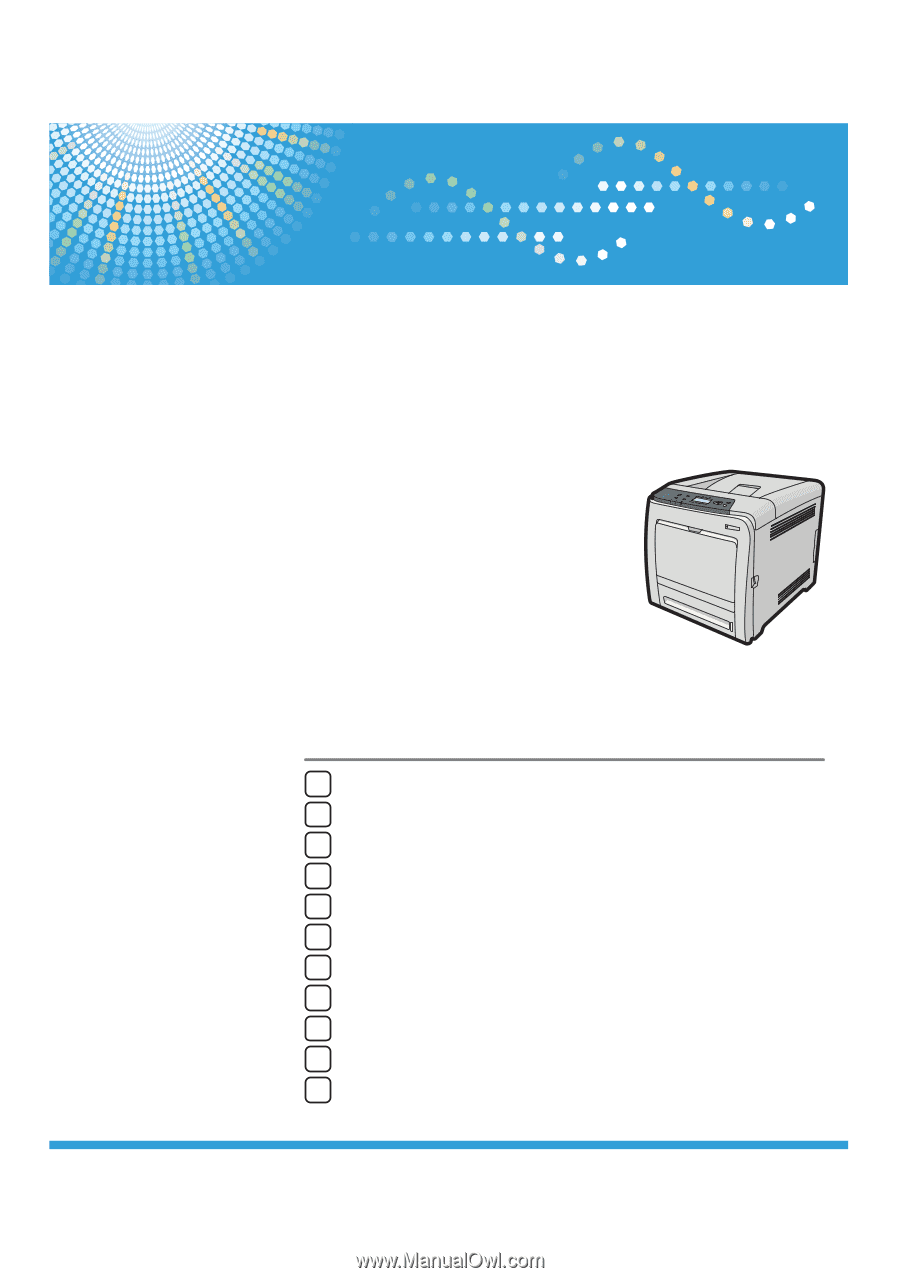
Read this manual carefully before you use this machine and keep it handy for future reference. For safe and correct use, be sure to read "Safety
Information" before using the machine.
1
Guide to the Printer
2
Setting Up the Printer
3
Installing Options
4
Connecting the Printer
5
Configuration
6
Loading Paper
7
Maintaining the Printer
8
Adjusting the Printer
9
Troubleshooting
10
Removing Misfed Paper
11
Appendix
Hardware Guide
Operating Instructions