Ricoh C210SF User Guide
Ricoh C210SF - Aficio SP Color Laser Manual
 |
UPC - 026649025310
View all Ricoh C210SF manuals
Add to My Manuals
Save this manual to your list of manuals |
Ricoh C210SF manual content summary:
- Ricoh C210SF | User Guide - Page 1
User's Guide Read this manual carefully before you use this machine and keep it handy for future reference. For safe and correct use, be sure to read the Important Information in this manual before using the machine. - Ricoh C210SF | User Guide - Page 2
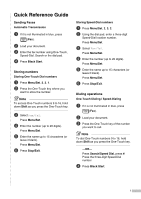
Guide Sending Faxes Automatic Transmission 1 If it is not illuminated in blue, press (Fax). 2 Load your document. 3 Enter the fax number using One-Touch, Speed-Dial, Search or the dial pad. 4 Press Black Start. Storing numbers Storing One-Touch Dial numbers 1 Press Menu/Set, 2, 3, 1. 2 Press the One - Ricoh C210SF | User Guide - Page 3
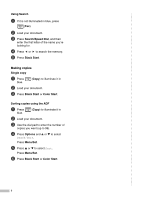
Start. ▲ ▲ Making copies Single copy 1 Press blue. (Copy) to illuminate it in 2 Load your document. 3 Press Black Start or Color Start. Sorting copies using the ADF 1 Press blue. (Copy) to illuminate it in 2 Load your document. 3 Use the dial pad to enter the number of - Ricoh C210SF | User Guide - Page 4
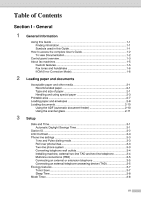
the complete User's Guide 1-2 To view Documentation 1-2 Control panel overview 1-3 About fax machines 1-5 Custom features 1-5 Fax tones and handshake 1-6 ECM (Error Correction Mode 1-6 2 Loading paper and documents Acceptable paper and other media 2-1 Recommended paper 2-1 Type and size - Ricoh C210SF | User Guide - Page 5
Paper settings...3-9 Paper Type ...3-9 Paper Size ...3-9 Volume Settings 3-10 Ring Volume 3-10 Beeper Volume 3-10 Speaker Volume 3-10 4 Security features Setting Lock ...4-1 Setting up the password 4-1 Changing the Setting Lock password 4-2 Turning Setting Lock on 4-2 Turning Setting Lock off - Ricoh C210SF | User Guide - Page 6
only 6-7 7 Dialing and phone options How to dial...7-1 Manual dialing 7-1 One-Touch Dialing 7-1 Speed-Dialing 7-1 Search ...7-2 Fax Redial One-Touch and Speed-Dial numbers 7-4 Setting up Groups for Broadcasting 7-5 Access codes and credit card numbers 7-6 Tone or Pulse 7-6 Phone line services - Ricoh C210SF | User Guide - Page 7
poster (page layout 11-5 Sorting copies using the ADF 11-7 Adjusting Brightness, Contrast and Color 11-7 Out of Memory message 11-9 Legal limitations 11-9 Section IV - Software and Network Features Section V - Appendixes A Important information Standard telephone and FCC Notices These notices - Ricoh C210SF | User Guide - Page 8
the outside of the machine C-21 Cleaning the scanner glass C-22 Cleaning to prevent paper jams C-22 Cleaning the laser glass C-24 Replacing the consumable items C-26 Toner cartridges C-28 Waste toner pack C-31 OPC belt cartridge C-33 Machine Information C-35 Checking the Serial Numbers - Ricoh C210SF | User Guide - Page 9
D-1 Lower tray unit (Paper Feed Unit Type 1000 D-1 Memory Unit Type C (64/128/256 MB D-3 Installing additional memory D-3 E Specifications Product description E-1 General ...E-1 Print media...E-2 Fax...E-3 Copier ...E-4 Scanner ...E-5 Printer ...E-6 Interfaces ...E-6 Computer requirements - Ricoh C210SF | User Guide - Page 10
Section I 1. General Information 2. Loading paper and documents 3. Setup 4. Security features General SECTION I GENERAL - Ricoh C210SF | User Guide - Page 11
the back of this Guide. Symbols used in this Guide Throughout this Guide you will see special you to a related topic. Courier type face identifies the messages on the LCD parts that are hot. Indicates points to pay attention to when using the machine, and explanations of likely causes of paper - Ricoh C210SF | User Guide - Page 12
not appear, use 1 Windows® Explorer to run the setup.exe program from the root directory of the CD-ROM. 4 Click Documentation. 5 Click the documentation you want to read. • Quick Setup Guide: Setup and Software Installation Instructions • User's Guide (3 manuals): User's Guide for stand-alone - Ricoh C210SF | User Guide - Page 13
Keys These 8 keys give you instant access to 16 previously stored numbers. 2 Shift To access One-Touch numbers 9 to 16, hold down Shift as you press the One-Touch key. 3 Copy keys (Temporary settings): Enlarge/Reduce Lets you reduce or enlarge copies depending upon the ratio you select. Options - Ricoh C210SF | User Guide - Page 14
color. 8 Stop/Exit Stops an operation or exits from the menu. 9 Secure Print Lets you print secured print data saved in the machine's memory if you enter the four-digit password. (For details about using this feature, see Chapter 1 in the Software User's Guide and then press Black Start. Also, press - Ricoh C210SF | User Guide - Page 15
? A very good way to avoid problems like the one mentioned, is to get a second phone number on your present phone line. Many people with Voice Mail choose an alternative service, which is called "Distinctive Ring", and they are very satisfied with it. (See Distinctive Ring on page 7-6.) Another - Ricoh C210SF | User Guide - Page 16
fax machine sends fax calling tones (CNG tones). These are quiet, intermittent beeps every 4-seconds. You'll hear them after you dial and press Black Start and they will continue for about 60 seconds after dialing. During that time, the sending machine must begin the "handshake" or connection with - Ricoh C210SF | User Guide - Page 17
tray unit. It may cause paper jams. Type and size of paper The machine loads paper from the installed standard paper tray or optional lower tray. Standard paper tray Since the standard paper tray is a universal type, you can use any of the paper types and sizes (one paper type and size at a time - Ricoh C210SF | User Guide - Page 18
specifications The following paper specifications are suitable for this machine. Basis weight (lb (g/m2)) Thickness (µm) Roughness (sec.) Stiffness (cm3/100) Grain direction Volume resistivity (ohm) Surface resistivity (ohm-cm) Filler Ash content (wt%) Brightness (%) Opacity (%) 16-24 (75-90) 80 - Ricoh C210SF | User Guide - Page 19
before purchasing to ensure desirable performance. Some important guidelines when selecting paper are: ■ Supplier should be informed that the paper or envelopes will be used in a color laser machine. ■ Preprinted paper must use inks that can withstand the temperature of the machine's fusing process - Ricoh C210SF | User Guide - Page 20
the manufacturer should be secure. ■ Do not put different types of paper in the paper tray at the same time because it may cause paper jams or misfeeds. ■ For proper printing, you must choose the same paper size from your software application as the paper in the tray. ■ We recommend that you do - Ricoh C210SF | User Guide - Page 21
previously printed by a laser machine ■ that are pre-printed on the inside ■ that cannot be arranged neatly when stacked ■ that are made of paper that weighs more than the paper weight specifications for the machine ■ with edges that are not straight or consistently square ■ with windows, holes, cut - Ricoh C210SF | User Guide - Page 22
a laser machine. Labels should have an adhesive that is acrylic-based since such material is more stable at the high temperatures in the fusing unit. Adhesives should not come in contact with any part of the machine, because the label stock may stick to the OPC belt or rollers and cause jams and - Ricoh C210SF | User Guide - Page 23
sizes 1 0.17 in. (4.2 mm) 2 0.17 in. (4.2 mm) 3 0.17 in. (4.2 mm) 4 0.17 in. (4.2 mm) Landscape 1 2 4 3 For all available paper sizes 1 0.17 in. (4.2 mm) 2 0.17 in. (4.2 mm) 3 0.17 in. (4.2 mm) 4 0.17 in. (4.2 mm) Note We recommend that you do not print within 0.6 in. (15 mm) - Ricoh C210SF | User Guide - Page 24
the software. If your application software does not support it, you can set the paper size in the printer driver or by using the control panel buttons. ■ Before using paper that has holes in it, such as organizer sheets, you must 'fan' the stack to avoid paper jams and misfeeds. To load paper or - Ricoh C210SF | User Guide - Page 25
and unfold the output paper tray support flap before you use the machine. Output paper tray support flap Note When you put paper in the paper tray, please remember the following: ■ Check that the paper is flat in the tray and below the maximum paper mark, and that the paper guides are touching the - Ricoh C210SF | User Guide - Page 26
on the scanner glass. If you do this, the ADF may jam. ■ DO NOT use paper that is curled, wrinkled, folded, ripped, stapled, paper-clipped, the feed roller. 2 Adjust the paper guides to fit the width of 2 your documents. 3 Unfold the ADF document output support flap. IMPORTANT DO NOT pull on - Ricoh C210SF | User Guide - Page 27
to fax, copy or scan pages of a book or one page at a time. Documents can be up to 8.5 in. (215.9 mm) wide and 11 in. (297 mm) long. Note To use the scanner glass, the ADF must be empty. 1 Lift the document cover. 2 Using the document guidelines on the left, center the - Ricoh C210SF | User Guide - Page 28
3-8.) Automatic Daylight Savings Time You can set the machine to change automatically for Daylight Savings Time. It will reset itself forward one hour in the Spring 3 and backward one hour in the Fall. Make sure you have set the correct date and time in the Date/Time setting. 1 Press Menu - Ricoh C210SF | User Guide - Page 29
Chapter 3 Station ID You should store your name or company name and fax number so they print on all fax pages you send. 1 Press Menu/Set, 0, 3. Initial Setup 3.Station ID 2 Enter your fax number (up to 20 digits). Press Menu/Set. 3 Enter your telephone number (up to 20 digits). Press Menu/Set. (If - Ricoh C210SF | User Guide - Page 30
mode Your machine comes set for Tone dialing service. If you have Pulse dialing service (rotary), you need to change the dialing on separate jacks (RJ11) or combined into one jack (RJ14). Your machine must be both may contain four wires (black, red, green, yellow). To test the type of jack, plug in - Ricoh C210SF | User Guide - Page 31
two-line TAD and the two-line telephone next to your machine. 2 Plug one end of the telephone line cord for your machine into the L2 jack of the answering device (TAD) and a two-line telephone, your machine must be isolated on one line at both the wall jack and at the TAD. The most common connection - Ricoh C210SF | User Guide - Page 32
your PBX. 2 If all incoming calls will be answered by a switchboard operator, it is recommended that the Receive Mode be set to Manual. All incoming calls should initially be regarded as telephone calls. Connecting an external or extension telephone You can connect a separate telephone to your - Ricoh C210SF | User Guide - Page 33
for the fax "handshake". Make sure you carefully follow the instructions in this guide for recording your outgoing message. We do not recommend using the If You Subscribe to your Telephone Company's Distinctive Ring Service: You may connect an external TAD to a separate wall jack only if - Ricoh C210SF | User Guide - Page 34
Timing is important in recording this message. You can conserve toner using this feature. When you set Toner Save to On, print appears lighter. The default setting is Off. 3 1 Press Menu/Set, 1, pause, but if your machine has trouble receiving, then you must re-record the OGM to include it. 3 - 7 - Ricoh C210SF | User Guide - Page 35
to print or copy in sleep mode, there will be a short delay while the fuser warms up to its working temperature. 1 Press Menu/Set, 1, 6, 2. Ecology . Note ■ If you want to turn off sleep mode, press Start (either Black or Color) and Options simultaneously in Step 2. ■ If the machine is in Sleep Mode - Ricoh C210SF | User Guide - Page 36
of the machine. When you use transparencies or labels, remove each sheet immediately to prevent smudging or paper jams. Paper Size In the standard paper tray, you can use seven sizes of paper for printing copies: Letter, A4, B5, JISB5, Executive, Com10 and DL and two sizes for printing faxes - Ricoh C210SF | User Guide - Page 37
it again. Beeper Volume You can change the beeper volume. The default setting is Med. When the beeper is on, the machine will Menu/Set. 3 Press Stop/Exit. ▲ ▲ ▲ ▲ Speaker Volume You can adjust the machine's one-way speaker volume. 1 Press Menu/Set, 1, 4, 3. Volume 3.Speaker 2 Press ▲ or ▼ - Ricoh C210SF | User Guide - Page 38
Setting Lock is On, the following operations are NOT available without a password: ■ Date & Time ■ Station ID ■ Set Quick-Dial (One-Touch Dial, Speed-Dial and Setup Groups) ■ Mode Timer ■ Paper Type ■ Small Paper ■ Volume ■ Auto Daylight ■ Ecology ■ LCD Contrast ■ Memory Security Setting up the - Ricoh C210SF | User Guide - Page 39
Lock on 1 Press Menu/Set, 1, 8, 2. Security 2.Setting Lock 2 Press ▲ or ▼ to select On. Press Menu/Set. 3 Enter the registered four-digit password. Press Menu/Set. 4 Press Stop/Exit. Turning Setting Lock off 1 Press Menu/Set, 1, 8, 2. Security 2.Setting Lock 2 Enter the registered four-digit - Ricoh C210SF | User Guide - Page 40
. ■ You must turn off PC Fax Receive before you can turn on Memory Security. (See Turning off Remote Fax Options on page 8-4.) Setting up the password Note ■ If you have already set the password, you will not need to set it, again. ■ If you forget the Memory Security - Ricoh C210SF | User Guide - Page 41
Memory Security on 1 Press Menu/Set, 1, 8, 1. Security 1.Mem Security 2 Press ▲ or ▼ to select Set Security. Press Menu/Set. 3 Enter the registered four-digit password. Press Menu/Set. The machine goes offline and the LCD shows Secure Mode. Note If there is a power failure the data will stay in - Ricoh C210SF | User Guide - Page 42
Section II Fax & Telephone 5. Sending a fax 6. Receiving a fax 7. Dialing and phone options 8. Remote Fax Options 9. Printing reports 10. Polling SECTION II FAX & TELEPHONE - Ricoh C210SF | User Guide - Page 43
. If it is not, press (Fax) to enter Fax mode. The default setting is Fax mode. Sending a fax from the ADF This is the page on the scanner glass. 3 Dial the fax number. Press Black Start. ■ If you press Black Start, the machine starts scanning the first page. 4 To send more than one page, press - Ricoh C210SF | User Guide - Page 44
5 Place the next page on the scanner glass. Set Next Page Then Press Set Press Menu/Set. The machine starts scanning the you get an Out of Memory message while scanning a subsequent page, you can press Black Start to send the pages scanned so far, or press Stop/Exit to cancel the operation. 5 - 2 - Ricoh C210SF | User Guide - Page 45
Chapter 5 Sending a fax manually Manual transmission Manual transmission lets you hear the dialing, ringing and fax up. 2 If it is not illuminated in blue, press (Fax). 3 Load your document. Press Black Start. 4 Replace the external phone's handset. Out of Memory message If you get an Out of - Ricoh C210SF | User Guide - Page 46
). 2 Load your document. 3 Enter a number using One-Touch, Speed-Dial, a Group number, Search or manual dialing using the dial pad. Press Menu/Set after each press Stop/Exit to stop the job or if more than one page has been scanned, press Black Start to send the portion that is in the memory. To - Ricoh C210SF | User Guide - Page 47
fax only). In Fax mode , press Resolution and ▲ or ▼ to select the setting you want, and then press Menu/Set. -OR- You can change the default setting. 1 If it is not illuminated in blue, press (Fax). 2 Press Menu/Set, 2, 2, 2. Setup Send 2.Fax Resolution 5 - 5 - Ricoh C210SF | User Guide - Page 48
▼ to select the resolution you want. Press Menu/Set. Note You can choose four different resolution settings for black & white faxes. Standard Fine S.Fine Photo Suitable for most typed documents. Good for small print and transmits a little slower than Standard resolution. Good for small print or - Ricoh C210SF | User Guide - Page 49
Next Fax:On (or Next Fax:Off). Press Menu/Set. Note In Real Time Transmission, the automatic redial feature does not work when using the scanner glass. Overseas Mode If you are having difficulty sending a fax overseas due to possible interference on the phone line, we recommend that you turn on - Ricoh C210SF | User Guide - Page 50
and scheduled time. All delayed faxes that are scheduled to be sent at the same time to the same fax number will be sent as one fax to save transmission time. 1 If it is not illuminated in blue, press (Fax). 2 Press Menu/Set, 2, 2, 4. 5 Setup Send 4.Batch TX 3 Press ▲ or ▼ to select - Ricoh C210SF | User Guide - Page 51
includes the name or number stored in the One-Touch or Speed-Dial memory. If you are dialing manually, the name is not shown on the help entering characters. (See Composing your own comments on page 5-10.) 5.(User Defined) 6.(User Defined) Most of the Setup Send settings are temporary to allow you to - Ricoh C210SF | User Guide - Page 52
/Set, 2, 2, 7. Setup Send 7.Coverpg Setup 4 Press ▲ or ▼ to select Next Fax:On (or Next Fax:Off). Press Menu/Set. Sending a fax 5 Press ▲ or ▼ to select one of the standard or your own comments. Press Menu/Set. 6 Enter two digits to show the number of pages you are sending. Press Menu/Set - Ricoh C210SF | User Guide - Page 53
it is not illuminated in blue, press (Fax). 2 Press Menu/Set, 2, 2, 7. Setup Send 7.Coverpg Setup 3 Press ▲ or ▼ to select Print Sample. Press Menu/Set. 4 Press Black Start. Your machine prints a copy of your cover page. 5 - 11 - Ricoh C210SF | User Guide - Page 54
EXT jack of your machine. The External TAD setting works only with an external answering machine. Ring Delay does not work in this setting. Manual (manual receive) (with an external or extension telephone only) You control the phone line and must answer every call yourself unless you are using the - Ricoh C210SF | User Guide - Page 55
Receive Mode 2 Press ▲ or ▼ to select Fax Only, Fax/Tel, External TAD or Manual. Press Menu/Set. 3 Press Stop/Exit. Current Receive Mode 12/10 11:53 Fax as the machine or subscribe to the telephone company's Distinctive Ring service, keep the Ring Delay setting of 4. (See Operation from extension - Ricoh C210SF | User Guide - Page 56
not have the optional tray #2, this setting is not available. The default setting of Auto allows your machine to choose the paper from the optional Tray #2 if Tray #1 is out of paper or if incoming faxes will fit best on the paper in Tray #2. 1 Press Menu/Set, 1, 0. General Setup 0.Tray Use:Fax - Ricoh C210SF | User Guide - Page 57
an incoming fax to fit on one page of Letter or A4 size paper. The machine calculates the reduction ratio by using the page size of the fax and size of the paper in your tray. 1 If it you hear the other machine's CNG tones (beeps), press Black Start. 3 Replace the external phone's handset. 6 - 4 - Ricoh C210SF | User Guide - Page 58
(such as # # # and 9 9 9). ■ Remote Codes might not work with some telephone systems. Easy Receive When you use this feature you do not have to press Black Start or the Fax Receive Code 51 when you answer a fax call. Selecting On allows the machine to receive fax calls automatically, even if you - Ricoh C210SF | User Guide - Page 59
1 Press Menu/Set, 2, 5, 3. Remote Fax Opt 3.Print Fax 2 Press Black Start. Setting the Print Density You can adjust print density, making your printed pages page 6-3.) If you answer a call and no one is on the line, you should assume that you're receiving a manual fax. ■ Press 51 and wait for the - Ricoh C210SF | User Guide - Page 60
an extension phone, you'll need to lift the handset and then press the Telephone Answer Code (#51) between the pseudo/double rings. If no one is on the line, or if someone wants to send you a fax, send the call back to the machine by pressing the Fax Receive Code - Ricoh C210SF | User Guide - Page 61
dial in any of the following ways. Manual dialing Press all of the digits of the fax number. Speed-Dialing Press Search/Speed Dial, #, and then the three-digit Speed-Dial number. (See Storing Speed-Dial numbers on page 7-4.) One-Touch Dialing Press the One-Touch key of the location you want to - Ricoh C210SF | User Guide - Page 62
and the menu keys to search. (See Storing One-Touch Dial numbers on page 7-3 and Storing Speed-Dial numbers on page 7-4.) To search numerically Fax Redial If you are sending a fax manually and the line is busy, press Redial/Pause, and then press Black Start to try again. If you want to make - Ricoh C210SF | User Guide - Page 63
You can set up your machine to do following types of easy dialing: One-Touch, Speed-Dial and Groups for Broadcasting faxes. many times as needed to increase the length of the pause. Storing One-Touch Dial numbers Your machine has 8 One-Touch keys where you can store 16 fax or phone numbers for - Ricoh C210SF | User Guide - Page 64
Search/Speed Dial, #, the three-digit number, and Black Start). The machine can store 200 Speed-Dial numbers. you want to change, and 7 then type over it. • If you want to erase directions beginning at Step 5 in Storing One-Touch Dial numbers and Storing Speed-Dial numbers. (See Storing One - Ricoh C210SF | User Guide - Page 65
One-Touch key and Black Start or Search/Speed Dial, #, the three-digit location and Black Start. First, you'll need to store each fax number as a One . Press Menu/Set. (For example, type NEW CLIENTS). 7 Press Stop/Exit. Note You can print a list of all One-Touch and Speed-Dial numbers. Group numbers - Ricoh C210SF | User Guide - Page 66
example, perhaps you have stored '555' on One-Touch key 1 and '7000' on One-Touch key 2. If you press One-Touch key 1, One-Touch key 2, and Black Start, you will dial '555-7000'. To temporarily change a number, you can substitute part of the number with manual dialing using the dial pad. For example - Ricoh C210SF | User Guide - Page 67
problems. If each one has a separate phone number, neither will interfere with the other's operations. If you decide to get the Distinctive Ring service from the telephone company, you will need to follow the directions patterns below are supported by your machine. Register the one your telephone - Ricoh C210SF | User Guide - Page 68
/Exit. Note If you turn off Distinctive Ring, the machine will stay in Manual receive mode. You will need to set the Receive Mode again. (See To feature lets you use the Caller ID subscriber service offered by many local telephone companies. This service displays the telephone number, or name if it - Ricoh C210SF | User Guide - Page 69
in, information about the first call is erased. You can scroll through Caller ID information to review those calls made to your machine. 1 Press Menu/Set, 2, 0, 3. Miscellaneous 3.Caller ID on the display. 3 Press Black Start or Color Start. 4 After printing has finished, press Stop/Exit. 7 - 9 - Ricoh C210SF | User Guide - Page 70
8 Remote Fax Options Note ■ You can only use one remote fax option at a time: Fax Forwarding-OR-Paging-OR- is a safety feature in case there is a power failure before the fax is forwarded or a problem at the receiving machine. The machine can store faxes up to 60 hours if there is a power failure. 5 Press - Ricoh C210SF | User Guide - Page 71
Chapter 8 Programming your pager number When Paging is selected, your machine dials the pager number you've programmed, and then dials your Personal Identification Number (PIN). This activates your pager so you will know that you have a fax message in the memory. 1 Press Menu/Set, 2, 5, 1. Remote - Ricoh C210SF | User Guide - Page 72
faxes to your PC you must have the PC-FAX Receiving software running on your PC. (For details, see PC-FAX receiving in the Software User's Guide on the CD-ROM.) If you select Backup Print:On -Fax Receive is on. 8 ■ PC Fax Receive is not supported when the machine is connected on a network. 8 - 3 - Ricoh C210SF | User Guide - Page 73
Chapter 8 Changing Remote Fax Options If received faxes are left in your machine's memory when you change to another remote fax option, the LCD will ask you the following message: Erase All Fax? 1.Yes 2.No -OR- Print All Fax? 1.Yes 2.No ■ If you press 1, faxes in the memory will be erased or - Ricoh C210SF | User Guide - Page 74
Stop/Exit. Note You can change your code at any time by entering a new one. If you want to make your code inactive, press Stop/Exit in Step 2 when you've finished. 6 Hang up. Note If your machine is set to Manual mode and you want to use the remote retrieval features, you can access your machine - Ricoh C210SF | User Guide - Page 75
1 OFF You can select Off after you have retrieved or erased all your messages. 2 Fax Forwarding 3 Paging 4 Fax Forwarding number 6 Fax Storage If you hear one long beep, the change has been accepted. If you hear three short beeps, you cannot change it because something has not been set up (for - Ricoh C210SF | User Guide - Page 76
messages. Changing the Fax Forwarding number You can change the default setting of your fax forwarding number from another telephone or answers, immediately enter your Remote Access Code (3 digits followed by ). If you hear one long beep, you have messages. 3 When you hear two short beeps, use - Ricoh C210SF | User Guide - Page 77
or 24 hours, 2 or 7 days). If you set the interval to Off, you can print the report by following the steps on Additional reports. The default setting is Every 50 Faxes. 1 Press Menu/Set, 2, 4, 2. Report Setting 2.Journal Period 2 Press ▲ or ▼ to choose an interval. Press Menu/Set. (If you choose - Ricoh C210SF | User Guide - Page 78
3.Quick-Dial Lists names and numbers stored in the One-Touch and Speed-Dial memory, in numerical order. 4. outgoing faxes. (TX means Transmit.) (RX means Receive.) 5.User Settings Lists your settings. 6.Network Config Lists your Network Black Start or Color Start. Printing reports 9 9 - 2 - Ricoh C210SF | User Guide - Page 79
2 Press Menu/Set, 2, 1, 7. Setup Receive 7.Polling RX 3 Enter the fax machines you want to poll using One-Touch, Speed-Dial, a Group or the dial pad. You must press Menu/Set between each fax number. 4 Press Black Start. Your machine will poll each number or Group number in turn to receive a fax. To - Ricoh C210SF | User Guide - Page 80
/Set, 2, 2, 6. Setup Send 6.Polled TX 4 Press ▲ or ▼ to select On (or Off). Press Menu/Set. 5 The LCD shows: Other Settings 1.Yes 2.No 6 Press 2 and press Black Start. Note The document will be stored and can be retrieved from any other fax machine until you delete the fax from memory by using - Ricoh C210SF | User Guide - Page 81
Section III 11. Making copies Copy SECTION III COPY - Ricoh C210SF | User Guide - Page 82
in. (4 mm) from the top or bottom of the paper. 0.12" (3 mm) 0.16" (4 mm) Unprintable area Making a single copy 1 Press blue. (Copy) to illuminate it in 2 Load your document. (See Loading documents on page 2-10.) 3 Press Black Start or Color Start. Note To stop copying, press Stop/Exit. 11 - Ricoh C210SF | User Guide - Page 83
the Menu/Set, 1, 3. Making copies 6 Press Black Start or Color Start. ■ If both trays are using paper that is the same size, Auto will allow your machine to take paper from Tray #2 if Tray #1 is out of paper. To change the default setting follow the instructions below: Auto allows your machine to - Ricoh C210SF | User Guide - Page 84
Set. 5 Press ▲ or ▼ to select the copy quality you want (Auto, Text or Photo). Press Menu/Set. 6 Press Black Start or Color Start. To change the default setting follow the instructions below: 1 Press Menu/Set, 3, 1. Copy 1.Quality 2 Press ▲ or ▼ to select Auto, Text or Photo. Press Menu/Set. 3 Press - Ricoh C210SF | User Guide - Page 85
an enlargement or reduction ratio from 25% to 400%. Press Menu/Set. (For example, press 5 3 to enter 53%.) Making copies 5 Press Black Start or Color Start. -OR- Press the Options key for more settings. Note ■ Page Layout Options 2 in 1 (P), 2 in 1 (L), 4 in 1 (P), 4 in 1 (L) or Poster(3 x 3) are - Ricoh C210SF | User Guide - Page 86
or four pages onto one page, allowing you to save paper. It is also to print a poster, use the scanner glass. Note ■ Please make sure paper size is set to Letter, Legal x 3) or Off(1 in 1). Press Menu/Set. 6 Press Black Start or Color Start to scan the document. If you are making a poster or - Ricoh C210SF | User Guide - Page 87
ADF, insert document face up in the direction shown below. 2 in 1 (P) 2 in 1 (L) Making copies Poster(3 x 3) You can make a poster size copy of a photograph. 4 in 1 (P) 4 in 1 (L) When using the scanner glass, place document face down in the direction shown below. 2 in 1 (P) 2 in 1 (L) 11 4 in - Ricoh C210SF | User Guide - Page 88
/Set. 5 Press ▲ to make a lighter copy. -OR- Press ▼ to make a darker copy. Press Menu/Set. 6 Press Black Start or Color Start. To change the default setting follow the instructions below: 1 Press Menu/Set, 3, 2. Copy 2.Brightness 2 Press ▲ to make a lighter copy. -OR- Press ▼ to make a darker - Ricoh C210SF | User Guide - Page 89
/Set. 5 Press ▲ to increase the contrast. -OR- Press ▼ to decrease the contrast. Press Menu/Set. 6 Press Black Start or Color Start. To change the default setting follow the instructions below: 1 Press Menu/Set, 3, 3. Copy 3.Contrast 2 Press ▲ to increase the contrast. -OR- Press ▼ to decrease - Ricoh C210SF | User Guide - Page 90
guide you through the next step. If you get an Out of Memory message while scanning a subsequent page, you will have the option to press Black Start or Color Service or draft papers ■ Passports ■ United States/Canadian Postage Stamps (canceled or uncanceled) ■ Food Stamps ■ Immigration Papers - Ricoh C210SF | User Guide - Page 91
the Software User's Guide on the CD-ROM.) ■ ControlCenter2 (For Windows®, see Chapter 3 in the Software User's Guide on the CD-ROM.) ■ Remote Setup (For Windows®, see Chapter 5 in the Software User's Guide on the CD-ROM.) ■ PC-FAX software (For Windows®, see Chapter 6 in the Software User's Guide on - Ricoh C210SF | User Guide - Page 92
Section V Appendixes A. Important information B. Menu and Features C. Troubleshooting and routine maintenance D. Optional accessories E. Specifications F. Glossary SECTION V APPENDIXES - Ricoh C210SF | User Guide - Page 93
with Part 68 installation instructions trouble is experienced with this equipment, for repair or warranty information, please contact Customer Service. If the equipment is causing harm to the telephone network, the telephone company may request that you disconnect the equipment until the problem - Ricoh C210SF | User Guide - Page 94
service lines provided by the telephone company or connected to party lines. ■ We cannot accept any financial or other responsibilities that may be the result of your use of this information, including direct : SP C210SF comply with Part 15 user is encouraged to try to correct the interference by one - Ricoh C210SF | User Guide - Page 95
operation the supplied three-pin Laser safety This equipment is certified as a Class 1 laser product under the U.S. Department of Health and Human Services laser radiation. Since radiation emitted inside the equipment is completely confined within protective housings and external covers, the laser - Ricoh C210SF | User Guide - Page 96
those specified in this manual may result in hazardous invisible radiation exposure. Internal laser radiation Max. Radiation Power 5 mW Wave Length 780 - 800 nm Laser Class Class 3B Important information Important safety instructions 1 Read all of these instructions. 2 Save them for later - Ricoh C210SF | User Guide - Page 97
parts resulting in the risk of fire or electric shock. Never spill liquid of any kind on the product. Do not attempt to service this operate normally when the operating instructions are followed. Adjust only those controls that are covered by the operating instructions. Improper adjustment of other - Ricoh C210SF | User Guide - Page 98
or generate magnetic fields. ■ Do not expose the machine to direct sunlight, excessive heat, open flames, salty or corrosive gasses, moisture same circuit as large appliances or other equipment that might disrupt the power supply. ■ Avoid interference sources, such as speakers or the base units of - Ricoh C210SF | User Guide - Page 99
Chapter A To use the machine safely Please keep these instructions for later reference and read them before attempting any maintenance. ICMAPUOTRIOTNANT There are high voltage electrodes inside careful not to put your hands on the edge of the machine under the document cover or scanner unit. A - 7 - Ricoh C210SF | User Guide - Page 100
the AC power outlet. Call your dealer or Customer Service. ■ Do not put consumable items such as the toner cartridges and the waste toner pack into a fire. Some consumable items can be flammable under certain conditions. ■ Do not look directly at the laser beam light. It might cause damage to your - Ricoh C210SF | User Guide - Page 101
surge protection device on the AC power line and on the telephone line, or unplug the cords during a lightning storm. WARNING IMPORTANT SAFETY INSTRUCTIONS When using your telephone equipment, basic safety precautions should always be followed to reduce the risk of fire, electric shock and injury to - Ricoh C210SF | User Guide - Page 102
Inc. Each company whose software title is mentioned in this manual has a Software License Agreement specific to its proprietary programs. All other brand and product names mentioned in this User's Guide, the Software User's Guide, and the Network User's Guide are registered trademarks of their - Ricoh C210SF | User Guide - Page 103
easy to use with LCD on-screen programming using the menu keys. User-friendly programming helps you take full advantage of all the menu selections -by-step on-screen instructions to help you program your machine. All you need to do is follow the instructions as they guide you through the menu - Ricoh C210SF | User Guide - Page 104
0.Initial Setup You can scroll more quickly through each menu level or to your next menu selection by pressing the ▲ or ▼ arrow key for the direction you want. Select an option by pressing Menu/Set when that option appears on the LCD. The LCD will then show the next menu level - Ricoh C210SF | User Guide - Page 105
the time to return to 3-8 Fax mode. 2. Paper Type 1. Tray#1 Thin Sets the type of paper in 3-9 (This menu only appears when you have the optional tray #2) Plain Thick Thicker Recycled Paper the paper tray. 2. Tray#2 Thin Sets the type of paper in 3-9 (This menu only appears when you have - Ricoh C210SF | User Guide - Page 106
On Off Changes for Daylight 3-1 Savings Time automatically. Increases the page yield 3-7 of the toner cartridge. 2. Sleep Time (0-99) 30 Min Conserves power. 3-8 7. LCD - Contrast Adjust the contrast of the 3-3 LCD. 8. Security 1. Mem Security Prohibits most operations 4-3 except - Ricoh C210SF | User Guide - Page 107
/double-ring time in Fax/Tel mode. Receives fax messages 6-5 without pressing Black Start. You can answer all calls at 6-5 an extension or external phone 2. Fax Resolution 3. Delayed Fax Standard Fine S.Fine Photo - Sets the default resolution 5-5 for outgoing faxes. Sets the time of day in 24 - Ricoh C210SF | User Guide - Page 108
Off If you are having difficulty 5-7 sending faxes overseas, set this to On. 3. Set 1. One-Touch - Quick-Dial Dial Stores One-Touch Dial 7-3 numbers, so you can dial by pressing one key (and Black Start). 2. Speed-Dial - Stores Speed-Dial 7-4 numbers, so you can dial by pressing only - Ricoh C210SF | User Guide - Page 109
Chapter B Select & Set Select & Set to accept to exit Main Menu 2. Fax (Continued) Submenu 4. Report Setting 5. Remote Fax Opt (Backup print for Fax Forward/PC Fax Receive) 6. Remaining Jobs Menu Selections Options Descriptions Page 1. Transmission On On+Image Off Off+Image Initial setup - Ricoh C210SF | User Guide - Page 110
transmission problems. 2. Distinctive Off Set (On) Uses the Telephone 7-8 Company's Distinctive Ring subscriber service to for your type of document. 2. Brightness - Adjusts the brightness for 11-7 copies 3. Contrast - Adjusts the contrast for copies. 11-8 4. Color Adjust 1. - Ricoh C210SF | User Guide - Page 111
to accept to exit Descriptions Prints a test page. Returns the print settings to the original factory default settings. Adjusts the color density or returns the color calibration to the factory setting. You can print these lists and reports. Page See Software User's Guide on the CD-ROM 9-2 B - 9 - Ricoh C210SF | User Guide - Page 112
[000-255]. [000-255]. [000-255]. [000-255] You can choose the BOOT method that best suits your needs. Enter the IP address. See Network User's Guide on the CD-ROM 3. Subnet Mask [000-255]. [000-255]. [000-255]. [000-255] Enter the Subnet mask. 4. Gateway [000-255]. [000-255]. [000-255 - Ricoh C210SF | User Guide - Page 113
]. [000-255] Enter the mail address. Enter the SMTP server address. See Network User's Guide on the CD-ROM 3. POP3 Server [000-255]. [000-255]. [000-255]. characters) Enter the mail box name. 5. Mailbox Pwd Password: ****** Enter the password to login to the POP3 server. 1. Auto On Polling - Ricoh C210SF | User Guide - Page 114
's Guide on the CD-ROM Sends notification messages. Relays a document to another fax machine. Registers the Domain name. Prints the Relay Broadcast Report. Selects Ethernet link mode. Sets the time zone for your country. Selects the file type. Restores all Network settings to factory default - Ricoh C210SF | User Guide - Page 115
during its life. 1. OPC Belt Life OPC Belt Life You can check the Remaining:XXX% percentage of unused 2. Fuser Life (remaining) life for these Fuser Life parts. Remaining:XXX% C-35 French LCD language for your Setup country. Guide Note The factory settings are shown in Bold. B - 13 - Ricoh C210SF | User Guide - Page 116
Menu/Set, the LCD shows Set temporarily. Press Black Start or Color Start when you have finished choosing settings. Press Options XXX)* B * XXX is the paper size detected by the tray or the small paper size you set in Menu/Set, 1, 3. Note ■ If both trays are using paper that is the same size, - Ricoh C210SF | User Guide - Page 117
the appropriate number key repeatedly, you can access the character you want. Press Key 2 3 4 5 6 7 8 9 one time A D G J M P T W two times B E H K N Q U X three times C F Re-enter the correct character. You can also back up and type over incorrect letters. Repeating letters If you need to enter - Ricoh C210SF | User Guide - Page 118
Troubleshooting IMPORTANT For technical help, you must call the country where you bought the machine. Calls must be made from within that country. Error messages As with any sophisticated office product, errors may occur. If this happens, your machine identifies the problem the toner cartridges - Ricoh C210SF | User Guide - Page 119
. (See Replacing the waste toner pack on page C-32.) No OPC Belt The OPC belt cartridge is not installed. Install the OPC belt cartridge. (See Replacing the OPC belt cartridge (Photo Conductor Unit Type 140) on page C-33.) No Paper Fed The machine is out of paper or paper is not properly loaded - Ricoh C210SF | User Guide - Page 120
the Software User's Guide on the CD-ROM.) -OR- Clear the faxes from the memory. (See Out of Memory message on page 5-3.) -OR- Add more memory. (See Installing additional memory on page D-3.) (See Paper jams on page C-7.) Call Customer Service to replace the 120K kit. Replace the OPC belt cartridge - Ricoh C210SF | User Guide - Page 121
Chapter C ERROR MESSAGES ERROR MESSAGE CAUSE Unable to Init. The machine has a mechanical (Initialize) problem. Unable to Print Unable to Scan Waste Toner Full The waste toner pack is full. ACTION Turn off the machine's power switch and then turn it on again. If the error message continues - Ricoh C210SF | User Guide - Page 122
Troubleshooting and Enter the fax number to which the faxes will be forwarded. 2 Press Black Start. Transferring faxes to your PC You can transfer the faxes from your PC. (For details about PC Fax Receive, see PC-FAX software in the Software User's Guide on the CD-ROM.) 3 Make sure you have set PC - Ricoh C210SF | User Guide - Page 123
ADF unit 1 Take out any paper from the ADF that is not jammed. 2 Open the ADF cover. 3 Pull the jammed document out to the left. Document is jammed under the document cover 1 Take out any paper from the ADF that is not jammed. 2 Lift the document cover. 3 Pull the jammed document out to the right - Ricoh C210SF | User Guide - Page 124
machine will stop. One of the following LCD messages will appear to tell you where to find the jammed paper. C B A1 A2 Troubleshooting and routine maintenance CAUTION The fusing unit and the parts around it are hot! Never touch the shaded areas shown below. Paper Jam A1 Paper jam in the standard - Ricoh C210SF | User Guide - Page 125
the following paper: ■ Bent/curled paper ■ Moist paper ■ Paper that does not meet specifications Paper Jam A1 / Paper Jam A2 Paper Jam A1 Paper Jam A2 If there is a paper jam in the paper tray, follow these steps: 1 Pull out the paper tray. 2 Take out the jammed paper. 3 Put the paper tray back - Ricoh C210SF | User Guide - Page 126
roller, release the fusing unit pressure release levers on both sides. 2 If the paper jammed while exiting the paper tray, remove the jammed paper by holding it with both hands and pulling it slowly toward you. 5 Remove the jammed paper at the back of the machine by holding it with both hands and - Ricoh C210SF | User Guide - Page 127
Chapter C Paper Jam C Paper Jam C 2 Remove the jammed paper by pulling it out slowly. If paper has passed behind the back cover and there is a paper jam where the paper comes out, follow the steps below: 1 Open the back cover and release the fusing unit pressure release levers. 3 Reset the fusing - Ricoh C210SF | User Guide - Page 128
the problem is probably not your machine. Check the chart below and follow the troubleshooting cord connections. Check power cord connection. Send a manual fax by pressing Hook or by lifting the handset . Wait to hear fax receiving tones before pressing Black Start. Make sure the machine is in the - Ricoh C210SF | User Guide - Page 129
Vertical black lines when sending. If the copy you made shows the same problem, your scanner is dirty. (See Cleaning the scanner glass on you answered on an external or extension phone, press your Fax Receive Code (default setting is ( 51). When your machine answers, hang up. Custom features on a - Ricoh C210SF | User Guide - Page 130
toner cartridge on page C-29 and Replacing the OPC belt cartridge (Photo Conductor Unit Type 140) on page C-33.) -OR- • The interface cable is securely connected between the machine and computer. (See the Quick Setup Guide). -OR- • The correct printer driver in your application software to make sure - Ricoh C210SF | User Guide - Page 131
perform '2 in 1' or '4 in 1' Check that the paper size setting in the application and in the printer driver are the printing. same. Machine does not print from Adobe Illustrator Try to reduce the print resolution. (See Advanced tab in the Software User's Guide on the CD-ROM.) -OR- Add more - Ricoh C210SF | User Guide - Page 132
paper and other media on page 2-1 and Basic tab in the Software User's Guide on the CD-ROM.) Printouts are too light. If this problem occurs when making copies or printing received faxes, turn off Toner then click OK. For Windows® XP SP1 users, contact your service representative. Your computer - Ricoh C210SF | User Guide - Page 133
■ Check that the recommended paper was used. (See Recommended paper on page 2-1.) ■ Change the paper to freshly unpacked paper, and then check that the problem is solved. ■ Check that the back cover is closed properly. ■ Shake the toner cartridges gently. ■ Clean the laser glass. (See Cleaning the - Ricoh C210SF | User Guide - Page 134
■ Clean the registration roller, the paper pick-up roller, the transfer roller guide and the exit roller. (See Cleaning to prevent paper jams on page C-22.) ■ If the problem continues, identify the color and replace that toner cartridge. (See Replacing a toner cartridge on page C-29.) White spots - Ricoh C210SF | User Guide - Page 135
paper on page 2-1.) Replace the OPC belt cartridge. (See Replacing the OPC belt cartridge (Photo Conductor Unit Type 140) on page C-33.) ■ Change to the recommended type of transparency, and then check that the problem is solved. ■ Check that the media type mode is selected properly. Color - Ricoh C210SF | User Guide - Page 136
. ■ Identify the color causing the problem and replace the toner cartridge. (See Replacing a toner cartridge on page C-29.) ■ Replace the OPC belt cartridge. (See Replacing the OPC belt cartridge (Photo Conductor Unit Type 140) on page C-33.) ■ Change to a recommended type of paper, and then check - Ricoh C210SF | User Guide - Page 137
. Unless interference is a recurring problem on your phone line, you may parts of the machine every 20,000 printed pages or every 12 months: ■ Paper guides of the paper tray ■ Registration roller ■ Paper pick-up roller ■ Transfer roller unit ■ Transfer roller guide ■ Exit roller ■ Laser unit ■ Laser - Ricoh C210SF | User Guide - Page 138
of the machine as follows: 1 Pull the paper tray completely out of the machine. 3 Remove any paper that is stuck inside the paper tray. 4 Wipe the inside and the outside of the paper tray with a soft cloth to remove dust. 5 Re-load the paper and put the paper tray firmly back in the machine - Ricoh C210SF | User Guide - Page 139
-free cloth. Document Cover White Plastic Cleaning to prevent paper jams When you clean the inside of the machine, pay attention to the following: CAUTION ■ The fusing unit and the parts around it are hot! Never touch the shaded areas shown below. Scanner glass In the ADF unit, clean the white - Ricoh C210SF | User Guide - Page 140
the registration roller and paper pick-up roller. This could damage them and cause poor print quality. 2 Clean the registration roller and the paper pick-up roller with a dry soft, lint-free cloth to prevent paper jams. 3 Clean the transfer roller unit and the transfer roller guide with a dry soft - Ricoh C210SF | User Guide - Page 141
the laser glass 1 Turn off the machine's power switch. Unplug the telephone line cord first, and then unplug the power cord from the AC power outlet. 2 Open the scanner unit. 4 To release the lock, push the green belt cartridge lock levers that are on both sides inwards. 5 Remove the OPC belt - Ricoh C210SF | User Guide - Page 142
Close the laser glass cover. C Put all the toner cartridges and the OPC belt cartridge back in the machine. Do C not try to push or lock the new toner cartridge in. It must rest loosely in the guide rails. D Close the front cover and the inside cover, and then close the scanner unit. E Plug - Ricoh C210SF | User Guide - Page 143
pages (Cyan, Magenta, Yellow)2 message on page C-28. ■ Type 140LY 5,000 pages (Black)2 3,000 pages (Cyan, Magenta, Yellow)2 Note The toner cartridges that come supplied with this machine are starter toners. Starter toners, are toner cartridges with approx. half the page yield of the standard - Ricoh C210SF | User Guide - Page 144
Toner Bottle Type 140 Replace OPC Belt Replace 120K Kit Replace PF Kit2 OPC belt cartridge 60,000 images See C-33. (Continuously printed) Photo Conductor Unit Type 140 Transfer belt cleaner 120,000 pages2 Transfer roller Paper pick-up roller Separator pad Transfer belt Call Customer Service - Ricoh C210SF | User Guide - Page 145
. ■ If you use paper that is not a direct equivalent for the recommended paper, the life of consumable items and machine parts may be reduced. ■ The projected life for each of the items listed is based on an average of 5% coverage of the printable area using any color toner cartridge. Frequency of - Ricoh C210SF | User Guide - Page 146
supplies. ■ Printing with a third-party toner or third-party toner cartridges may reduce not only the print quality but also the quality and life of the machine itself. It may also cause serious damage to the performance and life of a OPC belt cartridge. Warranty coverage does not apply to problems - Ricoh C210SF | User Guide - Page 147
it in the machine. If toner cartridges are left unpacked for a long time, the toner life will be shortened. ■ Put the toner cartridge into the machine immediately after you have removed the protective cover. To prevent degradation to the print quality, do not touch the shaded parts shown. C - 30 - Ricoh C210SF | User Guide - Page 148
color cartridge is individually keyed to prevent improper installation. Match each cartridge color label to the same color label on the machine. Troubleshooting and routine maintenance Waste toner items other than our genuine supplies or if you use refilled toner cartridges, the machine could be - Ricoh C210SF | User Guide - Page 149
the lower right hand side of the machine. Be careful not to spill the toner. 3 Take the cap off the new waste toner pack, and put the cap on the used waste toner pack. Note ■ When you discard the used waste toner pack, place it in the plastic bag included with the replacement waste - Ricoh C210SF | User Guide - Page 150
more than two minutes to avoid damaging the belt. ■ Damage caused by improper handling of the OPC belt cartridge may void your warranty. Replacing the OPC belt cartridge (Photo Conductor Unit Type 140) 1 Turn off the machine's power switch. 2 Open the scanner unit. 3 Open the inside cover so that it - Ricoh C210SF | User Guide - Page 151
7 Remove the protective sheet from the new OPC belt cartridge. Do not touch the green part of the OPC belt cartridge. 8 Put the new OPC belt cartridge into the machine guides with the flat side facing you. 0 Close the inside cover, and then close the scanner unit. A Turn the machine's power switch - Ricoh C210SF | User Guide - Page 152
Troubleshooting and routine maintenance Machine Information Checking the parts on the LCD. 1 Press Menu/Set, 7, 3. 2 Press ▲ or ▼ to select 1.OPC Belt Life, 2.Fuser Life, 3.120K Kit Life or 4.PF KIT2 Life. Press Menu/Set. OPC Belt Life Remaining:XXX% 3 Press Stop/Exit. Note The life check of a part - Ricoh C210SF | User Guide - Page 153
Paper Feed Unit Type 1000) See Lower tray unit (Paper Feed Unit Type 1000) on page D-1. SO-DIMM memory See Memory Unit Type C (64/128/256 MB) on page D-3. Lower tray unit (Paper Feed Unit Type table, and then remove the protective parts. 4 Remove the paper tray from the lower tray unit. IMPORTANT - Ricoh C210SF | User Guide - Page 154
5 Remove the protective parts and then put the paper tray back in the lower tray unit. 6 Check the two alignment pins on the lower tray unit. Use two people to lift the machine and - Ricoh C210SF | User Guide - Page 155
After you have installed the lower paper tray, you can put paper in it the same way you put paper in the upper paper tray. Prohibit Do not put transparencies, labels or envelopes in the paper tray of the optional lower tray unit. This might cause paper jams. Memory Unit Type C (64/128/256 MB) The - Ricoh C210SF | User Guide - Page 156
3 Unscrew the screw holding the side cover, and then slide the side cover to remove it. Optional accessories 6 Hold the SO-DIMM with your fingers on the side edges and your thumb on the back edge. Align the notch on the SO-DIMM with the protrusions with the SO-DIMM slot. (Check that the locks on - Ricoh C210SF | User Guide - Page 157
9 Put the side cover back on by sliding it into the guide rails, and then secure it with the screw. 0 Reconnect the the SO-DIMM properly, you can print the User Settings listing that shows the current memory size. To print the User Settings listing, see How to print a report on page 9-2. D - - Ricoh C210SF | User Guide - Page 158
) Paper Tray Printer Type Print Method LCD (Liquid Crystal Display) Power Source Power Consumption Dimensions 64 MB (expandable to 576 MB) Up to 35 pages Temperature: 68°F - 86°F (20°C - 30°C) Humidity: 50% - 70% Paper: 20 lb (80 g/m2) Letter 250 Sheets (20 lb (80 g/m2)) Laser Electrophotography - Ricoh C210SF | User Guide - Page 159
With OPC belt/Toner cartridges: 76.7 lb (34.8 kg) Operating: LWAd = 6.7 bels or less Standby: LWAd = 5.4 bels or less Operating: 50°F - 90.5°F (10 - 32.5°C) Storage: 32°F - 104°F (0 - 40°C) Operating: 20 to 80% (without condensation) Storage: 10 to 90% (without condensation) Print media Paper - Ricoh C210SF | User Guide - Page 160
Modem Speed Document Size Scanning Width Printing Width Gray Scale Polling Types Contrast Control Resolution One-Touch Dial Speed-Dial Broadcasting Automatic Redial Auto Answer Communication Source Memory Transmission Out of Paper Reception ITU-T Group 3 MH/MR/MMR Automatic Fallback: 33600 bps - Ricoh C210SF | User Guide - Page 161
to 14 in. (147.3 to 356 mm) Scanner Glass Width: Max. 8.5 in. (215.9 mm) Scanner Glass Height: Max. 11.7 in. (297 mm) Color Up to 8 pages/minute (Letter/A4 paper)1 Black Up to 31 pages/minute (Letter/A4 paper)1 Approx. 20 seconds (Black) Approx. 30 seconds (Color) Stacks or Sorts up to 99 pages 25 - Ricoh C210SF | User Guide - Page 162
Specifications Scanner Color/Black TWAIN Compliant WIA Compliant Color Depth Resolution Document Size Scanning Width Gray Scale Color/Black Yes (Windows® 98/98SE/Me/2000 Professional/XP/Windows NT® Workstation Version 4.0) Yes (Windows® XP)1 48 bit color processing (Input) 24 bit color processing - Ricoh C210SF | User Guide - Page 163
XP/Windows NT® Workstation Version 4.0 driver supporting native compression mode and bi-directional capability 600 x 600 dpi (Max. 2400 dpi class) Normal printing mode Economy printing mode (Toner Save mode) Up to 31 pages/minute (Letter/A4 size) (Black)1 Up to 8 pages/minute (Letter/A4 size) (Color - Ricoh C210SF | User Guide - Page 164
USB, Parallel, Ethernet 128 MB 256 MB 150 MB 220 MB 1 Network Scanning not supported in Windows NT® Workstation 4.0. 2 PC Fax send only for network users. 3 PC Fax supports black & white faxing only. All registered trademarks referenced herein are the property of their respective companies - Ricoh C210SF | User Guide - Page 165
a page contains only one color of either Cyan, Magenta, Yellow or Black =>1 image, two colors => 2 images, three colors => 3 images, four colors => 4 images. There are many factors that determine the actual consumable items' life, such as temperature, humidity, type of paper, toner you use and the - Ricoh C210SF | User Guide - Page 166
Network (LAN) LAN Support for Protocols You can connect your machine to a network for the Internet FAX, Network Printing, Network Scanning and PC Fax Send. Also included is the BRAdmin Professional Network Management software. Windows® 98/98SE/Me/2000/XP/ Windows NT® Workstation Version - Ricoh C210SF | User Guide - Page 167
The ability to send the same fax message to more than one location. Caller ID A service purchased from the telephone company that lets you see the number at a specified time later that day. Distinctive Ring A subscriber service purchased from the telephone company that gives you another phone number - Ricoh C210SF | User Guide - Page 168
so you can hear the receiving fax machine answer before you press Black Start to begin sending. Menu mode Programming mode for changing your machine's settings. OCR (optical character recognition) The bundled ScanSoft® OmniPage® software application convert an image of text to text that you can edit - Ricoh C210SF | User Guide - Page 169
the One-Touch key together. Out of Paper Reception Receives faxes into the machine's memory when the machine is out of paper. One-Touch, Speed-Dial and Group numbers. Speed-Dial A pre-programmed number for easy dialing. You must press the Search/Speed Dial key, #, and the three-digit code, and Black - Ricoh C210SF | User Guide - Page 170
You can select certain options for each fax transmission and copy without changing the default settings. Tone A form of dialing on the telephone line used for Touch Tone that shows its date, time and number. User Settings A printed report that shows the current settings of the machine. Glossary F F - Ricoh C210SF | User Guide - Page 171
Cleaning outside of machine C-21 scanner glass C-22 CNG tones 1-6 Control panel overview 1-3, 1-4 Copy brightness 11-7 color 11-7 color adjust 11-8 contrast 11-7 Enlarge/Reduce key 11 7-6 automatic fax redial 7-2 Groups 5-4 manual 7-1 One-Touch 7-1 Speed-Dial 7-1 Distinctive Ring - Ricoh C210SF | User Guide - Page 172
5-2, 7-2 from scanner glass 5-1 Out of Jams document C-6 paper C-7 L Labels 2-6 LCD (liquid crystal display B-1, B-2 Lower tray (option D-1 loading paper D-3 M Machine information C-35 Maintenance, routine C-20 replacing OPC belt cartridge C-33 toner cartridges C-28, C-29 waste toner - Ricoh C210SF | User Guide - Page 173
- 3 Print difficulties C-11 drivers E-6 fax from memory 6-6 paper jams C-7 quality 2-1, 3-9, C-16 One-Touch dial changing 7-4 setting up 7-3 using 7-1 Search 7-2 Speed-Dial changing 7-4 setting up 7-4 using 7-1 R Receive Mode 6-1 External TAD 6-1 Fax Only 6-1 Fax/Tel 6-1 Manual - Ricoh C210SF | User Guide - Page 174
C-1 document jam C-6 if you are having difficulty incoming calls C-12 Network C-15 paper handling C-14 phone line C-20 printing C-11 printing difficulties C-13 paper jam C-7 Two-line phone system 3-3 V Volume, setting 3-10 beeper 3-10 ring 3-10 speaker 3-10 W Waste toner pack C-31 - Ricoh C210SF | User Guide - Page 175
EQUIPMENT ATTACHMENT LIMITATIONS (Canada only) NOTICE This product meets the applicable Industry Canada technical specifications. NOTICE The Ringer Equivalence Number is an indication of the maximum number of devices allowed to be connected to a telephone interface. The termination on an interface - Ricoh C210SF | User Guide - Page 176
User's Guide EN USA G157-3105
-
 1
1 -
 2
2 -
 3
3 -
 4
4 -
 5
5 -
 6
6 -
 7
7 -
8
-
9
-
10
-
11
-
12
-
13
-
14
-
15
-
16
-
17
-
18
-
19
-
20
-
21
-
22
-
23
-
24
-
25
-
26
-
27
-
28
-
29
-
30
-
31
-
32
-
33
-
34
-
35
-
36
-
37
-
38
-
39
-
40
-
41
-
42
-
43
-
44
-
45
-
46
-
47
-
48
-
49
-
50
-
51
-
52
-
53
-
54
-
55
-
56
-
57
-
58
-
59
-
60
-
61
-
62
-
63
-
64
-
65
-
66
-
67
-
68
-
69
-
70
-
71
-
72
-
73
-
74
-
75
-
76
-
77
-
78
-
79
-
80
-
81
-
82
-
83
-
84
-
85
-
86
-
87
-
88
-
89
-
90
-
91
-
92
-
93
-
94
-
95
-
96
-
97
-
98
-
99
-
100
-
101
-
102
-
103
-
104
-
105
-
106
-
107
-
108
-
109
-
110
-
111
-
112
-
113
-
114
-
115
-
116
-
117
-
118
-
119
-
120
-
121
-
122
-
123
-
124
-
125
-
126
-
127
-
128
-
129
-
130
-
131
-
132
-
133
-
134
-
135
-
136
-
137
-
138
-
139
-
140
-
141
-
142
-
143
-
144
-
145
-
146
-
147
-
148
-
149
-
150
-
151
-
152
-
153
-
154
-
155
-
156
-
157
-
158
-
159
-
160
-
161
-
162
-
163
-
164
-
165
-
166
-
167
-
168
-
169
-
170
-
171
-
172
-
173
-
174
-
175
-
176
 |
 |
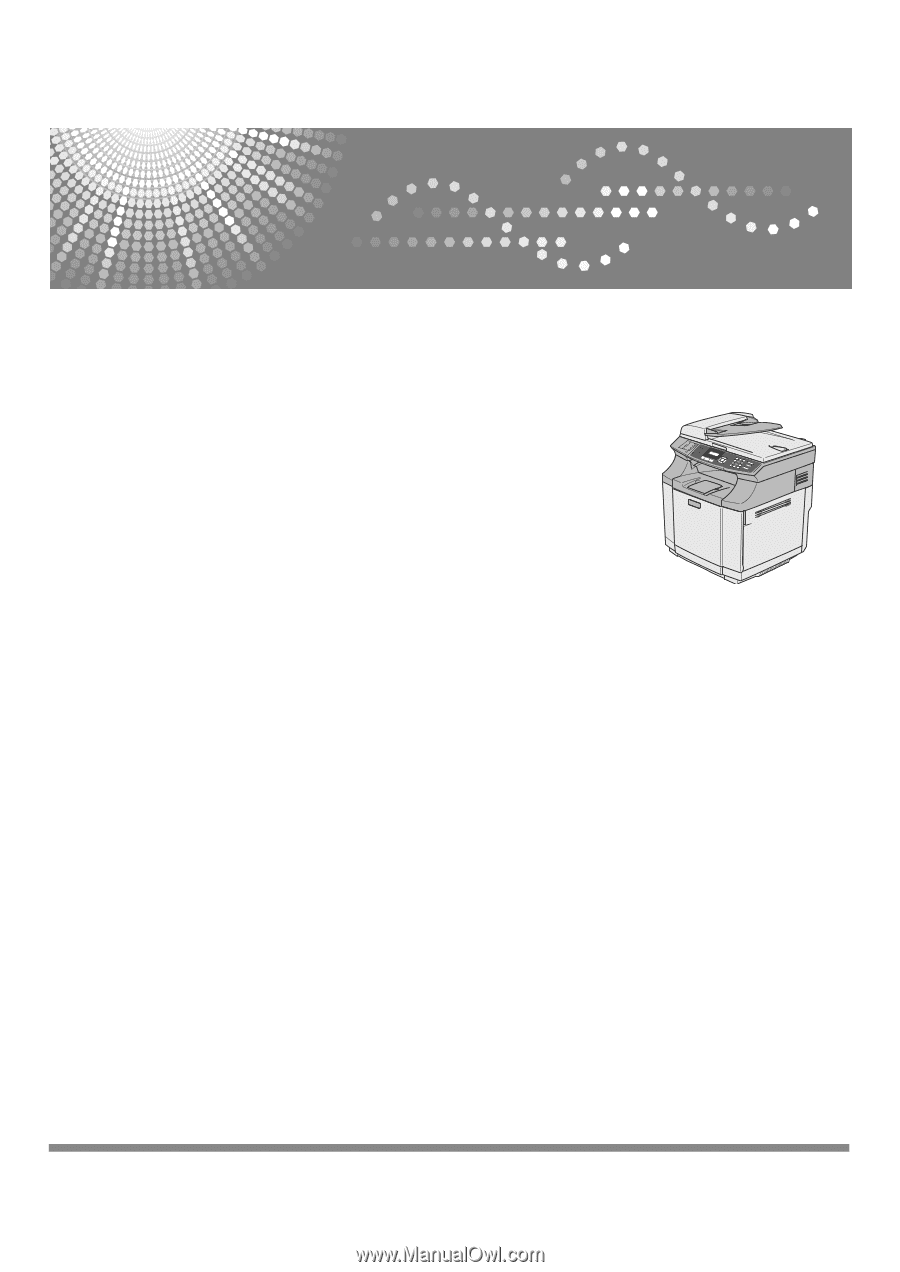
User’s Guide
Read this manual carefully before you use this machine and keep it handy for future reference. For safe and correct
use, be sure to read the Important Information in this manual before using the machine.