Ridgid WD1851 Owners Manual - Page 8
Drum/Caddy Assembly continued
 |
View all Ridgid WD1851 manuals
Add to My Manuals
Save this manual to your list of manuals |
Page 8 highlights
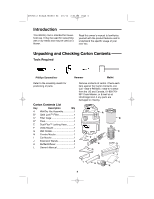
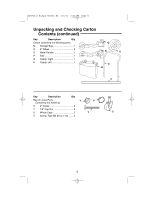
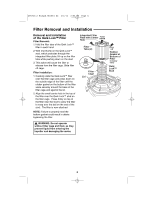
SP6733-2 Ridgid WD1851 ES 2/3/12 2:04 PM Page 8 Drum/Caddy Assembly (continued) 4. Slide open end of axle through caddy left making sure the leg slot lines up with the cradle hole. Slide all the way through the caddy right. Light taps with a mallet may be required to fully insert axle. 5. Install second wheel onto axle with smooth portion of wheel facing outward. 6. Install the second cap nut. Tap gently until cap nut is firmly seated 7. Using a rubber mallet or hammer, gently tap the wheel cap onto the right wheel until the wheel cap is firmly seated onto the wheel. This is required on both left and right sides. 8. Insert the caster stem into the socket of the caster foot as shown. (Front caster only). 9. Push on the caster until the ball on the caster stem is inserted all the way into the socket. You will be able to hear the ball snap into the socket and the caster will swivel easily when positioning is correct. Wheel Cap Socket Caster Stem Caster Ball Mallet Installing Handle Press and hold release buttons while installing handle into handle receptacles in drum (See illustration). NOTE: An audible snap of release buttons indicates successful engagement of handle. Removing Handle Press and hold release buttons as shown. While firmly pushing in release buttons, pull handle upwards to remove (see illustration). 8
-
 1
1 -
2
-
 3
3 -
 4
4 -
 5
5 -
 6
6 -
 7
7 -
 8
8 -
 9
9 -
 10
10 -
 11
11 -
 12
12 -
 13
13 -
14
-
15
-
16
-
17
-
18
-
19
-
20
-
21
-
22
-
23
-
24
-
25
-
26
-
27
-
28
-
29
-
30
-
31
-
32
-
33
-
34
-
35
-
36
-
37
-
38
-
39
-
40
-
41
-
42
-
43
-
44
-
45
-
46
-
47
-
48
-
49
-
50
-
51
-
52
-
53
-
54
-
55
-
56
-
57
-
58
-
59
-
60
 |
 |
