Rocketfish RF-HTMF19 User Manual - Page 16
and into the holes in the wall plate, then tighten the lag
 |
View all Rocketfish RF-HTMF19 manuals
Add to My Manuals
Save this manual to your list of manuals |
Page 16 highlights
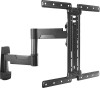
5 Align the TV arm assembly (08) with the pilot holes, insert the lag screws (09) through washers (10) and into the holes in the wall plate, then tighten the lag screws only until they are firm against the wall plate. CAUTION: Avoid potential injuries or property damage! DO NOT over-tighten the lag screws (09). 16
-
 1
1 -
2
-
3
-
4
-
5
-
6
-
7
-
8
-
9
-
10
-
 11
11 -
 12
12 -
 13
13 -
 14
14 -
 15
15 -
 16
16 -
 17
17 -
 18
18 -
 19
19 -
 20
20 -
 21
21 -
22
-
23
-
24
-
25
-
26
-
27
-
28
-
29
-
30
-
31
-
32
-
33
-
34
-
35
-
36
-
37
-
38
-
39
-
40
-
41
-
42
-
43
-
44
-
45
-
46
-
47
-
48
-
49
-
50
-
51
-
52
-
53
-
54
-
55
 |
 |

16
5
Align the TV arm assembly (
08
) with the pilot holes, insert the lag screws (
09
)
through washers (
10
) and into the holes in the wall plate, then tighten the lag
screws only until they are firm against the wall plate.
CAUTION
: Avoid potential injuries or property damage! DO NOT over-tighten the lag screws
(
09
).