Samsung BD7200 User Manual (ENGLISH) - Page 37
Audio setup
 |
UPC - 036725616998
View all Samsung BD7200 manuals
Add to My Manuals
Save this manual to your list of manuals |
Page 37 highlights
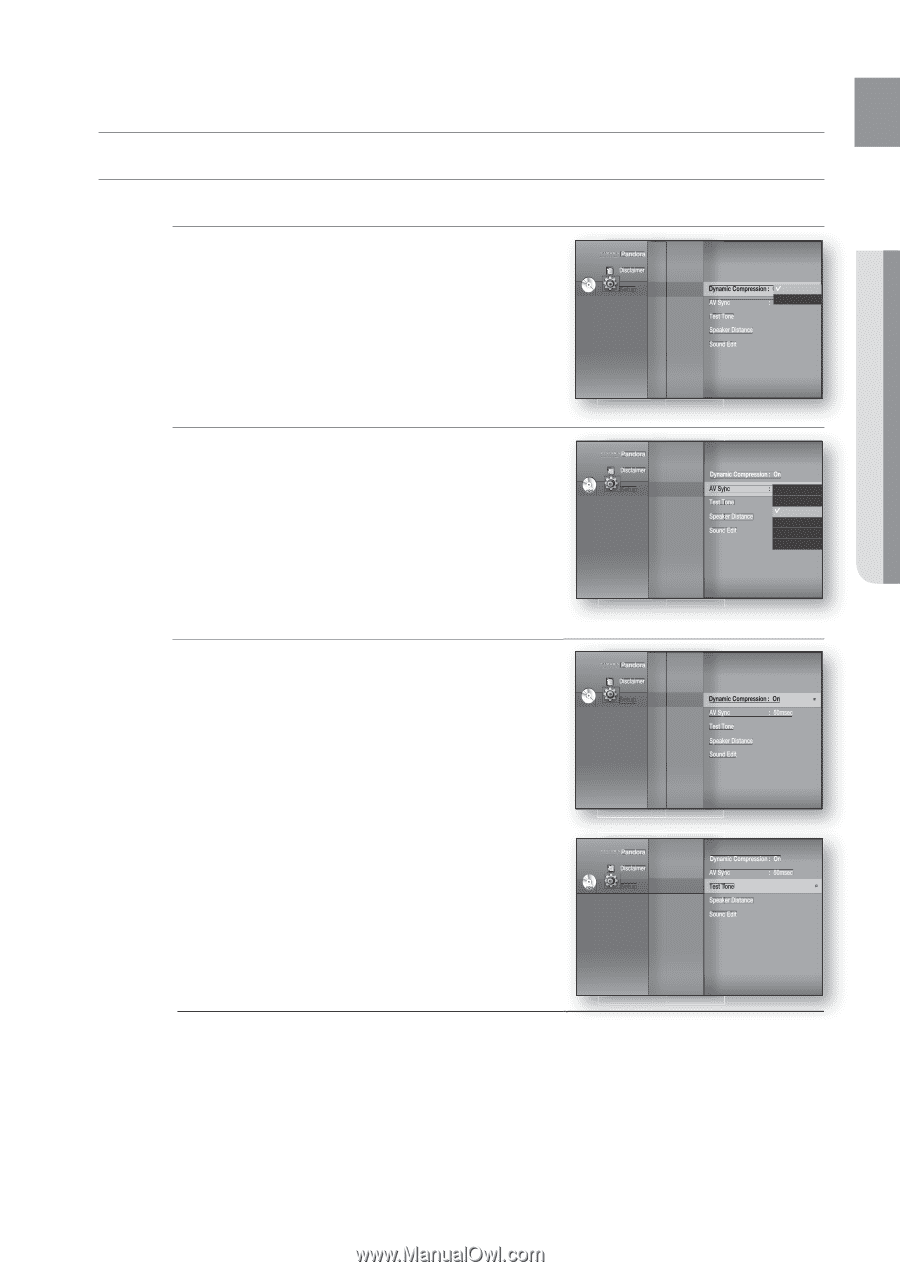
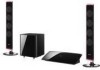
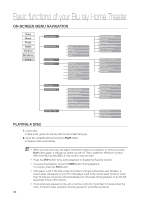
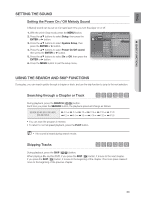
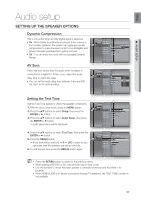
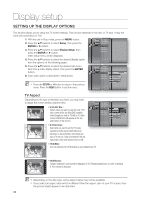
eng ● audio Setup Audio setup Setting up the SpeaKeR optionS dynamic Compression This is only active when a Dolby Digital signal is detected. Pandora • on : When Movie soundtracks are played at low volume or System Setup Disclaimer Language Setup from smaller speakers, the system can apply appropriate dVd Setup Audio Setup ◄ Dynamic Compression : On On ► compression to make low-level content more intelligible and prevent dramatic passages from getting too loud. Display Setup HDMI Setup Network Setup aV Sync test tone Speaker distance : 50mOsefcf • off : You can enjoy the movie with the standard Dynamic Parental Setup Sound edit Range. aV Sync Video may look slower than the audio when the player is connected to a digital TV. If this occurs, adjust the audio delay time to match the video. • You can set the audio delay time between 0 ms and 300 ms. Set it to the optimal status. Pandora Disclaimer System Setup Language Setup Dynamic Compression : On dVd Setup Audio Setup ◄ aV Sync : 50m0smescec Display Setup HDMI Setup Network Setup Parental Setup test tone Speaker distance Sound edit 25msec 50msec 75msec 100msec 125msec Setting the test tone Use the Test Tone feature to check the speaker connections. 1. With the unit in Stop mode, press the Menu button. 2. Press the ▲▼ buttons to select Setup, then press the enteR or ► button. 3. Press the ▲▼ buttons to select audio Setup, then press the enteR or ► button. • Audio setup menu will be displayed. Pandora Disclaimer System Setup Language Setup dVd Setup Audio Setup ◄ Dynamic Compression : On ► Display Setup HDMI Setup Network Setup Parental Setup aV Sync test tone Speaker distance Sound edit : 50msec 4. Press the ▲▼ buttons to select test tone, then press the enteR or ► button. Pandora Disclaimer System Setup Language Setup Dynamic Compression : On aV Sync : 50msec 5. Press the Red(a) button dVd Setup Audio Setup ◄ test tone ► • A test tone will be sent to l R lFe in order so you can make sure the speakers are set up correctly. 6. To end the test tone, press the Red (a) button again. Display Setup HDMI Setup Network Setup Parental Setup Speaker distance Sound edit M Press the RETURN button to return to the previous menu. When playing a BD/DVD or CD, this will work only in Stop mode. Use this function to check that each speaker is correctly connected and that there is no problem. When HDMI AUDIO is on (audio is produced through TV speakers), the TEST TONE function is not available. 37
-
 1
1 -
2
-
3
-
4
-
5
-
6
-
7
-
8
-
9
-
10
-
11
-
12
-
13
-
14
-
15
-
16
-
17
-
18
-
19
-
20
-
21
-
22
-
23
-
24
-
25
-
26
-
27
-
28
-
29
-
30
-
31
-
 32
32 -
 33
33 -
 34
34 -
 35
35 -
 36
36 -
 37
37 -
 38
38 -
 39
39 -
 40
40 -
 41
41 -
 42
42 -
43
-
44
-
45
-
46
-
47
-
48
-
49
-
50
-
51
-
52
-
53
-
54
-
55
-
56
-
57
-
58
-
59
-
60
-
61
-
62
-
63
-
64
-
65
-
66
-
67
-
68
-
69
-
70
-
71
-
72
-
73
-
74
-
75
-
76
-
77
-
78
-
79
-
80
-
81
-
82
-
83
-
84
-
85
-
86
-
87
-
88
-
89
-
90
-
91
-
92
-
93
-
94
-
95
-
96
-
97
-
98
-
99
-
100
 |
 |